

The Leading Provider of Education for Photography and Creative Professionals Worldwide. Denis G. J.R. Photoblog - Articles & Tutorials. Sommaire - post-traitement.com. Post-traitement.com - le site pour apprendre le post-traitement numérique. ImaG'One : liste des tutoriels. Trucs et astuces pour maîtriser Photoshop : Maîtriser Photoshop. Premiers pas sur photoshop. 3 Fantastic Uses of the Photoshop High Pass Filter. Pelleron Art. Vintage Effect: Bring Mood To Your Photos. Since it appeares that you really like the article Backlight Portraits: Edit Them Easily which I wrote last week I´ve decide to write another article about portrait editing.
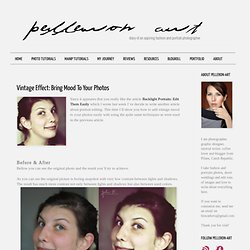
This time I´ll show you how to add vintage mood to your photos easily with using the quite same techniques as were used in the previous article. Before & After Bellow you can see the original photo and the result you´ll try to achieve. As you can see the original picture is boring snapshot with very low contrast between lights and shadows. The result has much more contrast not only between lights and shadows but also between used colors.
The effect was achieved thanks to luminosity selection (same as in above mentioned article) and Curves adjustment layer. Technical Info Lets add more contrast... To do that add new adjustment layer Gradient Map on the top of all layers. Then change the Blending Mode of this layer on Luminosity. Click on the Background layer and load the luminosity selection once again. In Vintage Style: Give Attitude to Your Photos. I thought it would be great to create an article tailored exactly for you, my amazing readers!
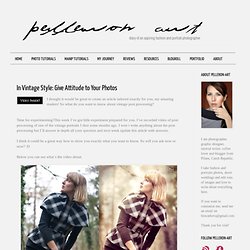
So what do you want to know about vintage post processing? Time for experimenting! This week I´ve got little experiment prepared for you. Bring Summer in 6 Quick Steps (At Least in Your Photos) I really miss summer time during the last days.
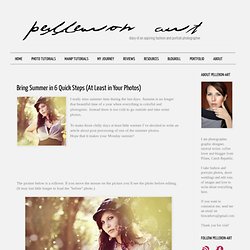
Autumn is no longer that beautiful time of a year when everything is colorful and photogenic. Instead there is too cold to go outside and take some photos. To make those chilly days at least little warmer I´ve decided to write an article about post processing of one of the summer photos. Hope that it makes your Monday sunnier! The picture below is a rollover. Resource Photo If you decide to follow this tutorial you can download the photo below. Another reason why I love having bokeh in my photos is that it creates beautiful, supernatural atmosphere - you capture something which can´t be seen with eyes but only through viewfinder.
Post Processing During editing you´ll basicly use only four tools: Levels,Gradient Map,Selective Color,Color Balance.Besides from it you´ll also use High Pass Filter for softening and sharpening and apply texture with more bokeh. How to Create Summery Vintage Portraits. I´m back from my ten days long trip in China.

In one word it was absolutelly awesome. Wait .. it´s two words :D Anyway I´ll post more about it once I download all the photos (I have 1300 of them plus some videos). I came back yesterday late night so it was no time to write my regular Monday article. But I hope that Thuesday is as good as Monday :) Backlight Portraits: Edit Them Easily. Do you too like the portrait photos where the sun is behind the photographic subject and created nice glow arround the hair?
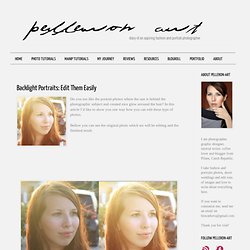
In this article I´d like to show you one way how you can edit these type of photos. Bellow you can see the original photo which we will be editing and the finished result. Original Picture Bellow you can download the source photo to can follow the tutorial. Step 1 - Sharpening I usually sharpen every photo a little bit. It gives the photo more professional look. Right click on the background layer and select Duplicate Layer. Change the Blending Mode of this layer on Overlay. Step 2 - Softening Now it´s time to soft the skin a little.
Go to Filter > Other > High Pass and set the Radius so you can see the borders as it´s shown on the picture above as a wrong way. Add layer mask to this layer. Make sure that the vector mask is active - just click on it. Grab the Brush Tool (B), pick white color and paint over the parts of the face which you want to soften. Apprendre Photoshop CS5 & CS5.5. Apprendre Photoshop CS4. Photoshop Tutorials. Apprendre à utiliser Photoshop pour les nuls - tutoriel pour débutants. Photoshop est un logiciel de traitement d'image professionnel qui permet de faire de la retouche photo, du dessin (digital painting), du graphisme ou encore du webdesign.
Il est utilisé dans de nombreux domaines : les agences de publicité, les photographes, les graphistes, le cinéma ou encore les particuliers. Photoshop est édité par Adobe et fait partie d'un ensemble de logiciels : la Creative Suite. Même s'il peut paraître difficile à utiliser aux yeux d'un débutant, il n'en est rien. Dans ce cours, nous allons voir comment utiliser Photshop en faisant le tour des fonctionnalités importantes, pour comprendre la logique de cet outil très puissant. Si Photoshop n'est pas déjà installé sur votre PC ou Mac, il va falloir l'ajouter. Cours Adobe Photoshop - Evadoc. Chez Sweety Tutoriaux Photoshop Tutos Tutoriels. → Tutoriaux Photoshop School.