
Making an Interactive Picture with jQuery. In this tutorial I will be showing you how to piece together an interactive picture – aka an image that contains tooltips and popup boxes.
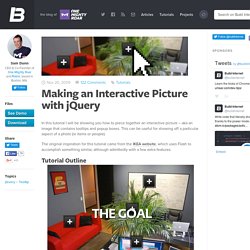
This can be useful for showing off a particular aspect of a photo (ie items or people). The original inspiration for this tutorial came from the IKEA website, which uses Flash to accomplish something similar, although admittedly with a few extra features. Tutorial Outline This tutorial will show you how to set up the basic structure for your own interactive picture.Create/Position “more info” buttonsAdd captions to buttonsLink buttons to descriptions in popup info boxes This tutorial will be most effective if used as a guide to customize the downloadable files. Set Up Your Picture Before we can place any buttons, we first have to get the image ready (I’ve chosen a picture of our office) .
You will want to customize your dimensions and background image to match your selected image. Positioning Info Buttons The Info Box The HTML for this goes as follows: Create a free website and a free blog. Stopping & Starting HTML Marquees. This page contains code that allows you to stop and start HTML marquees with your mouse.

Therefore, your website users can stop/start your HTML marquees with their mouse too. These codes use JavaScript, and therefore, will not work on your MySpace page. You can still use marquee codes on your MySpace page though, you just won't be able to stop/start them with JavaScript. Clicking the Marquee This example allows the user to stop the marquee when they click on the mouse (i.e. onmousedown). Hovering over the Marquee This example allows the user to stop the marquee when they hover over the marquee with their cursor (i.e. onmouseover). Start/Stop Buttons: You can add "start" and "stop" buttons that enable the user to start and stop the marquee as required.
Stopping Multiple Marquees: You can add "start" and "stop" buttons for as many marquees as you like. Slowing Down Your Marquee You can also make the marquee slow down instead of just stopping/starting. MySpace Users More Marquee Tricks. Tribune: Website Calendars for Media. You’ve probably heard of widgets, also known as gadgets or docklets.
“Spuds” are specialized Trumba® Connect widgets. We chose the term “spud” somewhat facetiously as a play on the concept of “mashups.” A mashup is a web page that brings together content from more than one source. The IT world borrowed the term “mashup” from a hip-hop music practice of mixing two or more songs together to create a new song. A spud is actually a small piece of JavaScript™ code that retrieves event information stored on the Trumba servers. Spuds embedded into your web pages act like windows. Create and Paste a Spud: A Walk Through the Process To help clarify the power and flexibility of spuds, let’s walk through the process of creating and embedding a spud using the Trumba Tribune calendar as an example.
Step 1 In the Trumba Connect editing environment, we create the Trumba Tribune calendar. Step 2 Step 3 Step 4. Code Year. Sharendipity - Create Rich Internet Applications without writing a single line of code. Create a Free Website with our Website Builder - Jimdo.