background preloader

CSS

Facebook Twitter

30 Useful CSS Snippets for Developers - Ahref Magazine. Swap Your Page’s Background Image on Navigation Hover. I love the challenge of building something with CSS that uses one item to trigger another. It can get pretty tricky to wrap your mind around all of the pieces involved and come up with a way to flow your HTML in a way that is easily controlled in your CSS. Today we’re going to embark on just such a challenge. We’ll build a basic home page that swaps out background images based on the link that you’re hovering over in the navigation. Along the way, you’ll learn all about the idea of remote hovers and how to wield them in your projects.

Sleight of Hand Did you know that it’s possible, using only CSS, to manipulate one element when a user hovers over a completely different item? To see how this works, let’s use a really basic example. Pretty simple right? Let’s start with the basics. This isn’t at all what we were looking to achieve though. Unfortunately, this doesn’t work either! The first image is an adjacent sibling of the link, so it gets a border on hover. Changing the Way You Think. What the Heck Is CSS Specificity? CSS specificity is a topic that many new front end coders avoid for as long as possible. It sounds complicated, there are all of these rules, you might even have to do some math! How lame is that? Ultimately, you can only avoid it for so long. Specificity is an essential concept that you need to grasp to be an effective developer. Today I’ll walk you through the concepts of specificity in a simple and easy to understand manner. The Core Concept of Specificity Specificity is a funny word, right from the outset it communicates the idea that this is going to be complicated.

To break the practical application of specificity down into something that anyone can wrap their mind around, let’s use a familiar metaphor. Who Would Win in a Fight? When you were a kid, the world was a much cooler place. ScrewAttack writes huge pieces dedicated to pitting heroes against each other. There’s this innate curiosity in children to constantly compare things and ask which is better. And the Last Shall Be First. Create an Animated Share Menu With CSS. Sharing is an integral part of the web experience and designers are always looking for new and interesting ways to highlight or show off the sharing portion of their pages. Today, we’re going to build a simple sharing menu that integrates an icon font as well as some animations. The final product is inspired by Disqus, but has a unique twist of its own. Let’s jump in and see how it works. Check out the Final Demo: Click here Disqus Share Menu The idea for today’s tutorial comes from the Disqus comment menu that you see at the bottom of this and every other Design Shack article.

Step 1. For this menu, we’ll need at least three social sharing icons. After some searching, I found Socialico from FontFabric, which is free, has tons of icons and is licensed for embedding on websites. Now, to make sure that we have maximum compatibility for embedding this font into our page, let’s head over to FontSquirrel. So far so good! Step 1. Now it’s time to mark up this sucker. That’s it! Step 2. Step 3. Perform a Split Reveal With CSS. CSS can pull of a lot of really great image tricks: size manipulation, desaturation, even blur. One limitation that we run into though is that you can’t really slice an image into multiple parts.

For instance, if you wanted to cut a photo in half and animate the separation, you couldn’t really do it with pure CSS. Could you? Today we’re going to code up a work around that allows us to achieve this very trick without an ounce of JavaScript or extra files. Sneak Peak: Launch Demo Hat Tip to Kyle Foster Recently, developer Kyle Foster created a nice little jQuery plugin with an effect that I really like (shown here).

As you can see, it’s a great little piece of UI. Step 1: Format Your Image CSS allows us to apply multiple background images to a single element. The trick to pulling this off is to split your image in half in Photoshop before you embed it. The workflow to do this goes like this (feel free to tweak the dimensions): Step 2. This div has two classes: reveal and plug. Step 3. All About Cubic Bezier Curves & Transitions. In the last post, we looked at the basics of CSS transitions, including how to use easing to control how your animation flows. In this post, I want to look deeper at a very powerful easing feature; cubic bezier curves.

In short, they let you define exactly what path your animation will take, and thanks to some awesome community tools, they are extremely easy to use (No maths required at all). This gives you total flexibility with your transitions. One of the best tools is the free Cubic-Bezier.com by Lea Verou. It lets you make new curves and see them in action just by dragging the handles.

We’ll use it for all of the demos in this post, and it’s well worth a bookmark! The syntax is simple too. The linear part is actually a shortcut though. For now, you could rewrite that line to use the cubic-bezier function and get the exact same animation: That one line can now be used in any transition, and to tweak the animation, all you need to do is change those 4 bracketed values. The Ease Graph. Code a Spinning Circular Menu With CSS. Don’t be a square, break outside your boring box and try on a circle for size. 
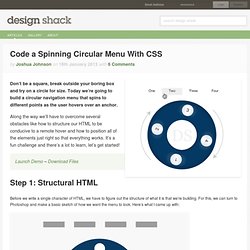
Today we’re going to build a circular navigation menu that spins to different points as the user hovers over an anchor. Along the way we’ll have to overcome several obstacles like how to structure our HTML to be conducive to a remote hover and how to position all of the elements just right so that everything works. It’s a fun challenge and there’s a lot to learn, let’s get started! Launch Demo – Download Files Step 1: Structural HTML Before we write a single character of HTML, we have to figure out the structure of what it is that we’re building.

Basically, each of the rectangles at the top are tied to one of the four little circles inside of the big circle. Every time I try to pull off a remote hover, it takes me a few tries to get the structure just right. Let’s say that we put this structure into place with the idea that we wanted a hover over the anchor to change the color of the paragraph. Application. Performance & Organization - An Advanced Guide to HTML & CSS. Having the ability to write HTML and CSS with a solid understanding is a great expertise to have. As a website’s code base and traffic grows, a new skill set comes into play, one that is extremely important to both development time and user experience. Knowing the fundamentals of website performance and organization can go a long way. The organization and architecture of a code base can greatly affect not only the speed of development, but also the speed at which pages render.

Both of which can be sizeable concerns not only for developers but also users. Taking the time to design the right structure for a code base, and identify how all of the different components will work together, can speed up production and make for a better experience all around. Additionally, taking a few small steps to improve the performance of a website can pay off in dividends.

Strategy & Structure Style Architecture Object Oriented CSS Separate structure from skin Separate content from container <! Favor Classes <! CSS Style Guides. As we wrap up our recent poll on ordering CSS properties, it brings up the larger issue of CSS style guides. Ordering properties is just one choice you have to make that makes up a complete styling strategy.

Naming is a part of it. Sectioning is a part of it. Commenting, indentation, overall file structure... it all makes up a complete CSS style guide. Let's round up some existing ones. But first... I love pattern libraries. The List I'll list some excerpts from each that I like below. GitHub GitHub CSS Style Guide → As a rule of thumb, don't nest further than 3 levels deep. Unit-less line-height is preferred because it does not inherit a percentage value of its parent element, but instead is based on a multiplier of the font-size. Google Google HTML/CSS Style Guide → Use ID and class names that are as short as possible but as long as necessary. E.g. E.g. .demo-image not .demoimage or .demo_image Idiomatic CSS Nicolas Gallagher's Idiomatic CSS → Configure your editor to "show invisibles". ThinkUp. How to Customize Browser Scrollbars Using CSS. We`re all using web browsers to navigate on internet.

Most of you(to be more specific, 65% according to my analytics) are using Chrome and Safari to navigate through this website. These 2 browsers have something in common: they are both built on the WebKit platform, or in other words, they are WebKit browsers. Although Google and Apple assigned them already some quite nice UI elements, some people thought that there is room for more. Did you know that you can customize the way a scrollbar looks? Customizing scrollbars is easy, being based on a pure CSS solution, but there`s a glitch: custom scrollbars works only for WebKit browsers.

Let`s write some code: As you noticed already, each element has the custom prefix ::-webkit-. Should You Use Inline-Blocks As A Substitute For Floats? When it comes to developing a site layout with css, floats do most of the heavy lifting. 
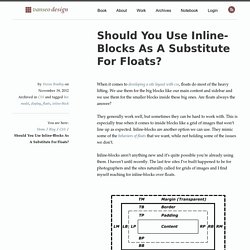
We use them for the big blocks like our main content and sidebar and we use them for the smaller blocks inside these big ones. Are floats always the answer? They generally work well, but sometimes they can be hard to work with. This is especially true when it comes to inside blocks like a grid of images that won’t line up as expected.

Inline-blocks aren’t anything new and it’s quite possible you’re already using them. What is an inline-block? Inline-block is one of the values we can assign to the display property of an element. Block elements — form boxes according to the css box-model. If you think about it, that’s not too far off from how a floated elements behaves. The Difference Between Floats and Inline-Blocks While floats and inline-blocks share some characteristics, there are some clear differences between the two.

Solving the Whitespace issue When To Use Inline-Blocks and When To Use Floats? Bootleg.css Twitter Bootstrap. Raw denim you probably haven't heard of them jean shorts Austin. 
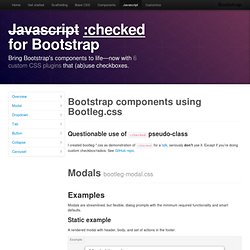
Nesciunt tofu stumptown aliqua, retro synth master cleanse. Mustache cliche tempor, williamsburg carles vegan helvetica. Reprehenderit butcher retro keffiyeh dreamcatcher synth. Cosby sweater eu banh mi, qui irure terry richardson ex squid. Aliquip placeat salvia cillum iphone. Seitan aliquip quis cardigan american apparel, butcher voluptate nisi qui.

Food truck fixie locavore, accusamus mcsweeney's marfa nulla single-origin coffee squid. Etsy mixtape wayfarers, ethical wes anderson tofu before they sold out mcsweeney's organic lomo retro fanny pack lo-fi farm-to-table readymade. Trust fund seitan letterpress, keytar raw denim keffiyeh etsy art party before they sold out master cleanse gluten-free squid scenester freegan cosby sweater. Build an Adaptive CSS Modal Window. This tutorial is yet another fun CSS project that helps you build something that you may have thought was only possible with JavaScript. We’re going to create a modal window that can be shown and hidden with a click that’s powered by a CSS checkbox. To sweeten the deal, we’re also going to use a media query to ensure that the modal screen adapts well to smaller screen sizes.

Let’s jump in and see how it all works! Live Demo: Click here to launch. Getting Started To begin, we’ll need some generic content that is always visible on the page. So far so good, now let’s move onto the button that will toggle our modal window off and on. Toggle HTML In this article, commenters voted to see more tutorials on how to override checkboxes to create pure CSS click events, so that’s exactly what we’re going to do here! How this works is fairly simple. As you can see, the “label for” section matches the ID of the input. Modal HTML Now it’s time to finish up our HTML by adding in the actual modal window code. Perfect Full Page Background Image. Learn Development at Frontend Masters This post was originally published on August 21, 2009 and is now updated as it has been entirely revised. Both original methods are removed and now replaced by four new methods.

The goal here is a background image on a website that covers the entire browser window at all times. Let’s put some specifics on it: Fills entire page with image, no white spaceScales image as neededRetains image proportions (aspect ratio)Image is centered on pageDoes not cause scrollbarsAs cross-browser compatible as possibleIsn’t some fancy shenanigans like Flash Image above credited to this site. Awesome, Easy, Progressive CSS3 Way We can do this purely through CSS thanks to the background-size property now in CSS3. Works in: Safari 3+Chrome Whatever+IE 9+Opera 10+ (Opera 9.5 supported background-size but not the keywords)Firefox 3.6+ (Firefox 4 supports non-vendor prefixed version) View Demo CSS-Only Technique #1 Big thanks, as usual, to Doug Neiner for this alternate version.