
A simple way to sew facings with invisible zippers. Once you’ve got the hang of sewing invisible zippers, you may wonder what the best way is of attaching a facing or a lining to it.
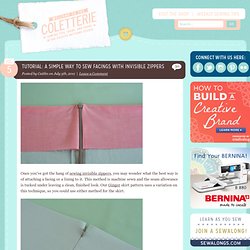
This method is machine sewn and the seam allowance is tucked under leaving a clean, finished look. Our Ginger skirt pattern uses a variation on this technique, so you could use either method for the skirt. Tools Neededzippergarmentfacingscissors. Megan nielsen design diary - Easy & neat centered zipper. Though I do prefer an invisible zipper, sometimes it just isn’t practical.

So I usually end up centering an all purpose zip. This is when you sew the seam before installing the zip, and then top stitch on the right side of the fabric, on either side of the seamline, avoiding the zipper teeth. The problem is you quite often end up with a bubble around the zipper pull as it hits the zipper foot. I’ve seen a lot of suggestions for getting around this by opening the zipper and sewing each side seperately, then zipping it up and finishing blah blah blah. But honestly I find that to be really fidley. I prefer to do it this way: Side note: Now at this stage you really should baste the zipper to the garment, but I was feeling a little lazy when I was making this dress and so I just pinned it as you can see above. Sewing Tutorial: Internal Zipper Pocket For Bag. I made a bag recently…. before I let you see the bag [update: it is here], I wish to show you how I sewed the pockets inside, both zipper pocket and 2-tier slip pocket with 6 compartments (coming soon, updated).
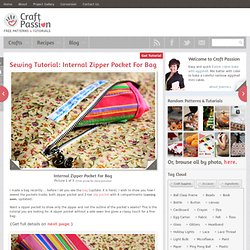
Want a zipper pocket to show only the zipper and not the outline of the pocket’s seams? This is the tutorial you are looking for. A zipper pocket without a side sewn line gives a classy touch for a fine bag. {Get full details on next page.} Pages: 1 2 Get all updates via email: Highlights from Our Partners. Sewing Zippers in Bags Tutorial 1. (aka Zippered inner bag pocket) **UPDATE** If you'd like this tutorial (or any of my others) in PDF format click here.

Note: to view the PDF tutorial, you will need the latest Adobe Viewer program. Get the latest version of the viewer absolutely free by clicking on the button below: Here is a tutrorial for zippered pockets inside bags. They look smart, they prevent your valuables from going 'walkies', they make essentials such as lippy and your mirror easy to get at, and a girl can never have too many pockets in her bag! This one is for you Katie :) A zippered pocket in one of the lining pieces of my bag-to-be. Here's how I put it together Shopping list (as if you were buying from a shop, if not using stash fabrics 0.5 yard of fabric for pocket0.5 yard of Vilene Firm Iron-on1x 7" Zip Click on any of the pictures to make them bigger. 1. Iron the same sized interfacing onto the wrong side of pocket pieces. Sew some stitches around the end of the zip to secure the zip halves (as shown in the pic)
Installing an Invisible Zipper. Zippers can be daunting even for experienced sewers.

The reason? Zippers are often installed the wrong way. Lots of seam ripping and swearing ensues, especially when it’s a simple mistake. There’s no need to be scared of zippers anymore! We’re here to help. With this tutorial we cover how to install an invisible zipper. Items Needed: invisible zipperthreadscissorspinsinvisible zipper footzipper footgarment Before we start, take a look at the back of your invisible zipper. 1.
Zipper tape is usually smaller than 5/8″ MarySew » How To: Sew an Inner Zipper Pocket. I have tried several ways to sew in internal zipper pockets.

I need one in every bag and I want at least one to be in every bag I make for my shop. They are so nifty, especially when you carry as much crap in your purse as I do and your cell phone rings. Anyways, it used to take me hours to make these. Just to get the damn small zipper in frustrated me to no end. Eventually I figured out a way that works perfectly for me and is quite a time saver. . You need: a zipper (obviously ^^).fabric you want to use as your bags lining.fusible interfacing (Vlieseline).sewing machine, thread, scissors, the usual sewing utensils.
The first step is optional. Measure your zipper and mark where to sew it in. Cut where you just marked your fabric. Fold over and press So, now I could serge the raw edges with a zig zag (or even take it to the serger) but, urgs, such tiny openings are a pain in the ass to serge. Add another strip of fusible interfacing to the other side.
It should look like this now.