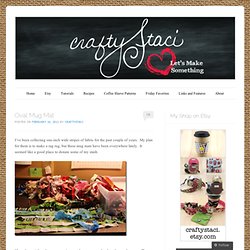

Oval Mug Mat « I’ve been collecting one-inch wide stripes of fabric for the past couple of years.

My plan for them is to make a rag rug, but these mug mats have been everywhere lately. It seemed like a good place to donate some of my stash. If you haven’t heard, a mug mat is more than a coaster, but less than a placemat. The theory is, it can hold your cup of tea or coffee with room left for a little pastry or cookie to go with it. It calls out to the girly-girl in me. To make one, you’ll need this pattern and 1” wide strips of cotton fabric, each approximately 20” long. You don’t have to use 1” wide strips. Sew the strips together side by side with a 1/4” seam. Cut out the front and back (and sleeve pieces, if you choose), angling the pattern if you’d like the stripes diagonal. Stitch around the pieces, close to the edge, so the strips don’t come apart.
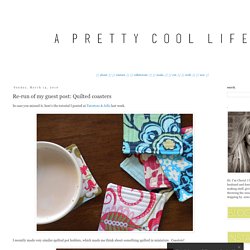
To finish the edge, you’ll need about 30 inches of bias tape. Stitch all the way around the edge in the fold line. Flip over. Like this: Related. Reversible Mug Rug Tutorial. Re-run of my guest post: Quilted coasters. In case you missed it, here's the tutorial I posted at Tatertots & Jello last week.

I recently made very similar quilted pot holders, which made me think about something quilted in miniature. Coasters! These are something you can whip up in less than an hour, make a thoughtful (but super easy!) Gift, and only require the most basic of sewing skills (Straight lines only, I promise!). To make a set of 6 coasters, you'll need 12 squares of fabric, 4.5 inches each.
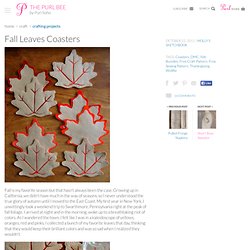
You'll also need 6 squares of 4.5 inch batting. , which I love for small craft projects. Pin, right sides together, the top fabric to the bottoms with batting. Sew around each side, leaving a pretty wide gap for turning. After sewing the squares, clip each corner, being careful not to snip the line of stitches. Turn the squares right side out. Poke out the corners. Iron the squares. After everything's ironed, topstitch along the edges of the coaster. Continue doing this towards the center. Fall Leaves Coasters. Fall is my favorite season but that hasn't always been the case.

Growing up in California, we didn't have much in the way of seasons, so I never understood the true glory of autumn until I moved to the East Coast. My first year in New York, I unwittingly took a weekend trip to Swarthmore, Pennsylvania right at the peak of fall foliage. I arrived at night and in the morning, woke up to a breathtaking riot of colors. As I wandered the town, I felt like I was in a kaleidoscope of yellows, oranges, red and pinks.
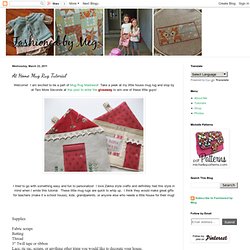
I collected a bunch of my favorite leaves that day, thinking that they would keep their brilliant colors and was so sad when I realized they wouldn't. Because the beautiful foliage is, in fact, so fleeting, I wanted to make some pretty leaves that would last all year long. Materials To make 8 total coasters (four of each version): Patterns Version One Cutting Cut an outer leaf piece from the tan felt and a colored felt. For a clearer picture of these markings please see below: Sewing. At Home Mug Rug Tutorial. I tried to go with something easy and fun to personalize!

I love Zakka style crafts and definitely had this style in mind when I wrote this tutorial. These little mug rugs are quick to whip up. I think they would make great gifts for teachers (make it a school house), kids, grandparents, or anyone else who needs a little house for their mug! Supplies Lace, ric rac, scraps, or anything other trims you would like to decorate your house. All seam allowances are 1/4". 1. 2. These are your two pattern pieces you now should have. 3. At this point if you would like to add some trim at the roof line this is when I add it.