

Www.perfectphotoblog.com. DIY solutions for jewelry photography. By Alex Koloskov posted on March 9th, 2012 | In the book I will show how to shoot necklaces using a DIY shooting cone.
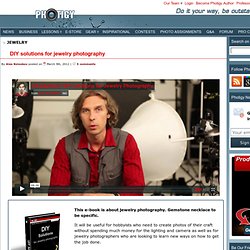
However, the same technique can be used for other type of jewelry and gemstone photography. As usual in all my tutorials, I concentrate on how to use the lighting. If you understand how each light affects the image and what role light modifier play, you could use the same approach to shoot another, different from what I’ve showed you in the book subjects, and get a great professional looking images. The e-book consist from actual PDF e-book and embed and attached videos. Human’s code exposed: Photographing DNA encoded jewelry. While working on putting together test result for an upcoming Leica X1 vs Fuji X100 article I found this one year old photoshoot which was never released before.
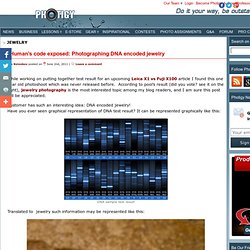
According to pool’s result (did you vote? See it on the right), jewelry photography is the most interested topic among my blog readers, and I am sure this post will be appreciated. Customer has such an interesting idea: DNA encoded jewelry! Have you ever seen graphical representation of DNA test result? Macro. Silver ring with Swarovski crystals.
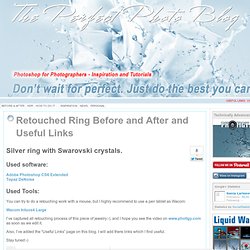
Used software: Adobe Photoshop CS6 ExtendedTopaz DeNoise Used Tools: You can try to do a retouching work with a mouse, but I highly recommend to use a pen tablet as Wacom: Wacom Intuos4 Large I’ve captured all retouching process of this piece of jewelry:-), and I hope you see the video on www.photigy.com as soon as we edit it. Also, I’ve added the “Useful Links” page on this blog. Stay tuned:-) Painting in Photoshop (Part 1) - Adobe Photoshop Tutorial - Photoshop Tutorials, Tutorials. Optimize your MODO Physical Sun and Sky Renderings.
Design Wedding Rings Using Adobe Illustrator. In this tutorial we create two wedding rings using 3D modeling in Illustrator.

We learn a few operation techniques with gradient mesh. If you need to create an upcoming wedding invitation, this can serve as an excellent centerpiece for that kind of design. 3D Modeling. Photoshop Website Template Stock Photo Ring Hydrogen Tank · Website Template Graphics. Lighting for jewelry photography: the development process. Just want to give a little insight for one of the projects we have running as some sort of background process during the week before a vacation.
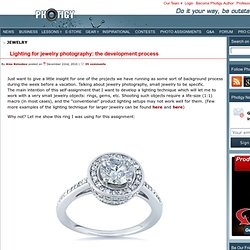
Talking about jewelry photography, small jewelry to be specific. The main intention of this self-assignment that I want to develop a lighting technique which will let me to work with a very small jewelry objects: rings, gems, etc. Shooting such objects require a life-size (1:1) macro (in most cases), and the “conventional” product lighting setups may not work well for them. (Few more examples of the lighting technique for larger jewelry can be found here and here) Why not? What makes it difficult to shoot is attached diamond: such crystal requires completely different lighting approach then what I can use for the rest of the ring. From one side, the ring surface looks good under gradient filled reflectors and diffusers, which makes it look shiny and soft.On other side, the diamond looks dull and flat under such lighting. Metal Chrome Effect - Photoshop CS4 Tutorial. Simay Gold's Catalog Working. Jewellery technique for photoshop.
Photos with white background using Photoshop CS5 - Part 1 of 3. The Fast Way to Remove Dark Circles Under Eyes in Photoshop. How to split an image into Polaroid photos. Premier Diamond and Jewelry Community. Adobe Photoshop Metallic Paint. Photoshop Tutorials - photoshop makeup tutorial metallic or glitter eyeshadow. Photoshop Tutorials - rough metal photoshop text effect. How to Make a Ring in Photoshop CS2. Photoshop tutorials. Editing Jewelry - Photoshop Tutorial. Editing Jewelry in Photoshop. Graphic Media Knowledge. Try Our Jewelry Photo Editing Service for Free. We'll perform editing of up to 3 photos of jewelry and watches absolutely FREE for our new customers.

No credit card required. Please submit your sample photography only for the purpose of our service quality evaluation. Photoshop Styles Tutorial - Adobe Photoshop chrome effect style tutorial. This is an example of a Photoshop chrome effect used to design a metallic looking web interface.

It was created by following the step-by-step guide of this tutorial. Photoshop Tutorial by Graphisutra. Hello dear visitor and Welcome to The Metal Text Effects Tutorial.

In this tutorial we'll examine the procedure of engaging the desired text with a rusty-scraped metal look. We'll guide you threw and get you in touch with all of the techniques of how to manipulate and how to apply all of the required patterns, the tone variation and all of the rest. Photoshop Tutorials. Step 1 First, create a new image about 600x600 pixels (or whatever size is appropriate for the image you plan to create).
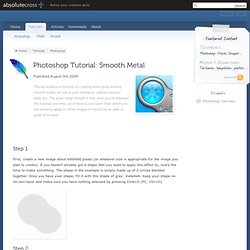
If you haven’t already got a shape that you want to apply this effect to, now’s the time to make something. The shape in the example is simply made up of 2 circles blended together. Smooth Metal Orb. Jan 13, 2006 I'm trying to smooth the edges of an image I have. Would like to try two things. First is,- simply smooth the edges (this is an image with people in it, and not a shape,-so I don't get the wanted effect when I do "Gaussian blur" as the whole image is being blured). Another thing I would like to achieve is i.e. having a 600*800 image(white background) with a smaller image in the middle. Then somehow manage to blure the edges of the image and by using a gradient colour to make the blured edges cover the empty area around the pic as well... Making Selections With The Pen Tool In Photoshop. Written by Steve Patterson. When it comes to making selections in Photoshop, there's really two types of people - those who know how to use the Pen Tool, and those who struggle.
Most people put off learning how to use the Pen Tool for as long as possible, while others never get around to learning it, believing it's just too confusing, too complicated, and just plain unnatural. Ultimately, their work in Photoshop suffers for it, since they're stuck relying on the Lasso Tool for just about everything they can't select with the Rectangular or Elliptical Marquee Tools.
Smooth. Step 1 Open a photo you would like to edit. Or, you may use the photo used in this tutorial (from iStockPhoto). Make sure that the image is in RGB color mode. To switch to RGB color mode, click on RGB Color under the Image> Mode menu. Step 2 Duplicate the current layer (Layer> Duplicate Layer or Ctrl+J). How to Remove Newton's Rings in Photoshop. Metal Texture. Quick Overview. How to Draw a Photorealistic iPhone 4 in Photoshop.
Photoshop Tutorials. HELP: Change Silver to Become Gold (Colorization) How To Combine Two Paths Into One. If you’re using the Pen tool (P), and you’ve created multiple paths within your document, these paths are totally separate, and are moved independently of one another. However, if you want these paths to move as one unit—combine them. Just switch to the Path Selection tool (Shift-A until it comes up), then go up to the Options Bar and click on the Combine button. Now when you move one path, all the combined paths move right along with it. Corey is a education and curriculum developer for KelbyOne. He is a graduate of the Ringling School of Art & Design in Sarasota, Fl, with a degree in Illustration. 01 of 03 - Removing the background through Potoshop CS5. 02 of 03 - Cleaning up the back of the shank of the ring with Content-Aware Tool on Photoshop CS5.