Create a Smoky Fading Image in Photoshop. Adding Sparkle to Fashion Photography – Psd Premium Tutorial. In this tutorial, I'll show you how to transform a fashion photograph into a unique, multi-layered Photoshop illustration.
You'll be using 3D renders, custom space and cloud brushes, as well as throwing in some cool 3D vectors as Smart Objects for good measure. Before we begin, I would like to thank Katanaz for allowing me to use the model image. She also has more great images over at her deviant stock account. 3D Objects I‘ve supplied some abstract 3D renders in the "source" folder, but it's fairly simple to create your own shapes – and you don't need to be a 3D expert to get great results.
Also, if you're using the Extended versions of Photoshop, you could even import your models as 3D layers. Step 1 Start by opening the model image, we're now going to isolate the figure by creating a density mask. Now increase the contrast of the channel by pressing Command + L to access the Levels and set the Input Level midpoint to 0.43 and the whitepoint to 224.
Create a Beautiful Frosted Fashion Advertisement. We are going to use this stock photo by DeviantArt-user Katanaz-Stock.

When you are done with the tutorial, be sure to check out her work and maybe drop a line or two as a good gesture! Step 1 Open the photo in Adobe Photoshop. First we are going to extract the girl from the background. This can be done in billions of ways, but we are going to use Calculations. Duplicate the background layer (always work on a copy of the original photo). Apply Image Calculations, by using the menu Image > Calculations. While playing around with the settings, we found that these worked pretty well for this particular photograph. Step 2 Select the recently created Channel “Alpha 1″, select all on this Alpha-channel and paste it on a new layer. Your layers-palette should now look something like this…
Video tutorial: Complete the vintage toy camera aesthetic. To complete the analogue toy camera look from last month, we’ll use three superb free textures from SkeletalMess.
We’ll work with a bubbly light effect, some interesting graduated light streaks and a grungy border. We’ll mix the bubbly light texture in with our image using a Light blending mode, to add a double-exposed film effect. Then for the light streaks we’ll use Screen blending to selectively lighten and fade parts of our image, creating an old Polaroid effect. Finally, we’ll mix the grungy border in using the Blend If sliders. Design a Natural Abstract Photo Manipulation in Photoshop.
Design a Natural Abstract Photo Manipulation in Photoshop In this tutorial, I will show you the steps I took to Design a Natural Abstract Photo Manipulation in Photoshop.

This is an intermediate tutorial so some steps can be tricky, but why not have a try :) Along the way, we will apply some basic Photo Manipulation techniques such as layer blending and masking, we will also practice some selection techniques with Pen Tool and some photo retouch skills. Here is a preview of the final effect I have for this tutorial: (click to enlarge) PSD File Download To complete this tutorial, you will need the following stocks: Model Parrot 1 Parrot 2 Tree. Design a Vibrant Blackberry Inspired Ad in Photoshop. This post was originally published in 2009 The tips and techniques explained may be outdated.

The Blackberry Loves U2 TV promo features some awesome, bright and vibrant lighting effects. Let’s take a look at recreating the style to produce a Blackberry inspired design of our own. Much like the old Apple/Coldplay advertisement, the new Blackberry Loves U2 promo features some stunning visual effects. Check out the video, showing the range of light particles and colours flaring from the background. Looks pretty cool huh?!
Open up Photoshop and create a new document. Find a stock photo of a smoke texture, desaturate (CMD+U) to remove any colour. Next, find a stock photo of a singer. Paste and position the singer into the document. Select a large, soft brush, then dab a few spots of bright colours on three individual layers. Change each layer to Overlay. With all three colour spots changed to Overlay, it adds various hints of colour to the image. Continue adding a couple more spots of colour. Master lighting effects - Classic Photoshop Tutorial. How to Create a Colorful Abstract Photo Manipulation in Photoshop CS5. How to Create a Colorful Abstract Photo Manipulation in Photoshop CS5 March 19th, 2012 by admin Posted in Adobe Photoshop, Designing, Photo Editing In this tutorial, I will show you the steps I took to Create a Colorful Abstract Photo Manipulation in Adobe Photoshop CS5.
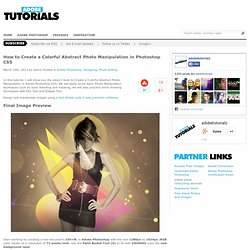
We will apply some basic Photo Manipulation techniques such as layer blending and masking, we will also practice some drawing techniques with Pen Tool and Elilipse Tool. Design and manipulate images using a fast Adobe suite 5 web premium software. Final Image Preview Start working by creating a new document (Ctrl+N) in Adobe Photoshop with the size 1280px by 1024px (RGB color mode) at a resolution of 72 pixels/inch. Create a new layer and take again the Paint Bucket Tool (G) to fill the new layer with grey color. Apply on the grey layer the next filter: Filter > Noise > Add Noise.