
Draw a Realistic Planet with Waterstream Texture. Step 1 Create a new document sized 800px * 800px, fill the background with Black Colour.
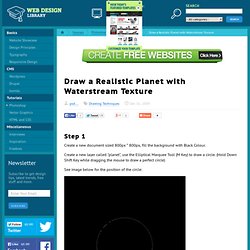
Create a new layer called "planet", use the Elliptical Marquee Tool (M Key) to draw a circle. (Hold Down Shift Key while dragging the mouse to draw a perfect circle) See image below for the position of the circle: Step 2 Still on the "planet" layer, DO NOT deselect the selection, Use the Gradient Tool (G Key) andset the foreground colour to "#ffffff" and the background colour to "#282828″. Fill the selection as shown below: For more lighting contrast, use the Curve Image Adjustment Tool with the setting similar to this: (the setting maybe slightly different for each person, but the general idea is to increase the light from the top right corner) Here is the effect you will want to achieve after the Curve Adjustment: Step 3 Now we will apply some waterstream texture for our planet . Mastering Photoshop: Unknown Tricks and Time-Savers - Smashing Magazine. We all have shortcuts that are essential to our daily workflow.

A majority of them are staples such as Copy (Command + C) and Paste (Command + V), but occasionally we stumble upon a shortcut we wish we’d learned years ago. Suddenly, this simple shortcut has streamlined our process and shaved quite a bit of time off our day. Collected here are some lesser known but extremely useful shortcuts. Many of these are not documented in the “Keyboard Shortcuts” menu, and some of them don’t even have equivalent menu options. Please note that all of the shortcuts listed below assume that you are using Photoshop CS4 on OS X.
Layers Link Selection Link Sifting through nests of layer sets to find the layer you need quickly becomes tiresome. Changing auto-select behavior. Abstract Watercolor Wallpaper in Photoshop. 22 Professional Photoshop Image Enhancing Tutorials. Adobe Photoshop is the premier tool for digital artists when it comes to professionally enhancing images. 26 Professional Photoshop Retouching Tutorials. Adobe Photoshop is the go-to tool for digital artists when it comes to professionally retouching images.
Enhancing and retouching photos in Photoshop is an effective way to "work with what you’ve got". There are many tips, tricks, and techniques for improving things like skin tone and imperfections, and enhancing the photo subject’s features. This article shares a huge variety of photo retouching tutorials for Photoshop users with brief descriptions of each. 1. Super Fast and Easy Facial Retouching. Create an Editable On Screen Text Effect using Smart Objects « PsAwesome★ Awesome Photoshop Tutorials. In this Awesome★ Photoshop tutorial, i’m going to show you how to create an editable screen shot text effect.

You can easily edit the text, you don’t need to repeat all steps from scratch, just double click the text layer and change it. This tutorial also has some good applications of Smart Objects. Have fun. Here is the Final Image Before we start lets see the final image we’ll create through out this tutorial. You can download the layered PSD document here. 28 Powerful Photoshop Lighting Effects.
There is something about beautiful lights that can mesmerize an audience.
Take a fireworks show for example. It’s been around for thousands of years, yet still has the power to put looks of amazement on faces of all ages. That’s why lighting effects make such powerful design elements. They are a great way to grab the attention of your audience and leave a lasting impression. Below is a collection of the best Photoshop tutorials for creating powerful lighting effects. Amazing Photoshop Light Effect In 10 Steps A smokey light effect complete with glowing particles. Fire Lines Tutorial. Using the Photoshop Ruler Tool. Tutorials by D.A.
Wagner 6inShare To shoot unnoticed, I frequently hold my camera casually, at waist level, and shoot using my intuition and guesswork. Knowing where to aim, but not seeing through my viewfinder or LCD, gives me uneven results and I have to make some corrections for the photo to look good. 1.Feel free to save the image above and follow along – let’s level out this scene first by going to the measure tool. 2.Click and drag your ruler across a good vertical (or horizontal) straight line near the middle of the photo. Creating an HDR-like Image From a Single RAW File in Lightroom. A Post By: Post Production Pye Introduction If you have been anywhere near the photography world in the past couple years, I am sure you have heard of HDR by now as there have been countless tutorials floating around on how to create HDR images using 3 bracketed exposures in programs like Photomatix and Photoshop.
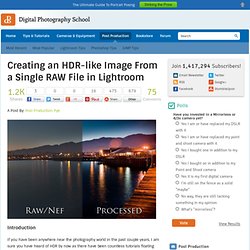
However what if you don’t have your tripod or if you are shooting a scene with moving subjects, yet you still want to create an HDR type shot? Well, good news, it is possible. This tutorial will teach you how correct and produce a single RAW image into an HDR-like masterpiece using only Lightroom! Image is provided courtesy of Lin and Jirsa Photography. Shooting the Image Before we get into the actual post production steps, let me quickly give you a background of the image and how it was shot. What you see below is the RAW file directly from a Canon 5D Mark II.
Image Metadata (Canon 5D Mark II, EF 17-40mm F/4L USM @ 40mm, 10 seconds, F/11, ISO 100) Processing the Image.