
The surpriseaholic: craft thursday: masquerade masks. Every New Years for the past 4 years I’ve tried to do something slightly different than normal.

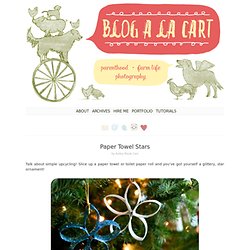
This year, it involved going to a proper Masquerade Ball—in San Francisco, with the symphony orchestra. The invitation said that masks were supplied, but we decided we didn’t want to fit in with the crowd…so we made our own. I used Christmas ornaments to create mine, and Chris made his out of paper mache, paint, and hot glue! PAPER TOWEL ROLL STARS {day 8} Talk about simple upcycling!

Origami Pine Tree Tutorial. Christmas cracker templates. By Kate on December 10, 2011 I can’t imagine tucking into a Christmas dinner without pulling a cracker first.

I love the naff hats, the cringe-worthy jokes (and just the tradition of it all). Crackers are so easy to make…and if you don’t fancy making some for the table you can make some miniature ones to hang in the tree. They also make really cool gift boxes. 8 DYI Handmade Christmas Cards. How ’bout a Nightcap? Here’s a fun little pattern to embellish your gifts of spirits for the New Year. These sweet little stocking caps look adorable perched atop bottles of all kinds. Knit them in the round with small amounts of scrap yarn in about 30 minutes, then pat yourself on the back for avoiding buying another expensive, throw-away bow! Materials: 3.5 mm double pointed needles (US size 4) small amount DK to worsted yarn Instructions: CO 15 loosely and join in the round being careful not to twist stitches P 4 rows K 12 rows (K2tog, k3) around K 3 rows (K2tog, K2) around K 7 rows (K2tog, K1) around K 14 rows k2tog around k 10 rows cut yarn and thread through remaining stitches.
Happy 2012 to you, Crafty Friends! I Don't Know How She Does It. Have Yourself A ReinBEER! Make black cat o'lanterns. Candles light up the eyes of Halloween cats made from stacked pumpkins painted black.

No need to hollow out the large body pumpkin; the candle sits inside the head. Thomas J. Story Click to Enlarge Knife or carving kit Pumpkins Pen Scissors Stiff felt or paper for ears Newspaper Curved cucumber or skinny gourd for tail Mini pumpkins for paws Black floral spray Wood floral picks (5 or 6 per pumpkin; optional) Mallet or hammer for attaching picks to base pumpkin (optional) Tea-light candle in flat dish or jar lid Clay polymer or poster putty Create a spooky trio of glossy black cats to watch over trick-or-treaters at your door. More great ideas for pumpkins At the pumpkin patch, look for body shapes with character and a stable base. Choose a tall one for an elegant cat, or a squat orange heirloom for a chubby cat curled on its paws. This twist on the traditional jack-o'-lantern cuts down on some of the usual pumpkin cleaning: No need to hollow out the body.
Halloween Decorations. How to "No Carve" a Pumpkin: Ideas for Halloween. 25 Christmas Wreath Crafts. 24 Crafty Christmas Tree Projects. Paper Flowers – Anyone Can Do That. Japanese Kusudama, this tutorial is featured on Craftuts Anyone can do that, I assure you.

The proof: I can, just take a quick look at my result below. And, believe me, I am neither meticulous nor particularly patient. You could even say I’m the opposite. Below you can see my very first attempt to create paper flowers. What you will need to make your own Kusudama paper ball? 1. 3. 4. (optionally) I prefer torn paper instead of cut. You have to start with a single petal. Now you have to glue your 5 petals into a flower. Apply the glue to only one side of each petal, except for the last one, in this case cover both sides with glue.
Your first flower is done. Grapevine Pumpkin. Have you noticed the grapevine garland at your craft store?

People use it for all different reasons and decorations….but I realized I could turn some into a pumpkin. And for so cheap, why not? All you’ll need is some grapevine garland and some floral wire. If you can find dark brown wire, that would be best. Christmas STAR. Need a little something to cheer up your door or a wall with a little Christmas cheer?

This star is pretty simple and doesn’t take a lot of time. (Well, unless you are interrupted a bagillion times by a toddler who wants a cracker, water, play-doh, etc. ……..Oh well.) What you’ll need: If you are using two different colors like I did, you’ll need 5 different cutouts of each of the colors. If you’re only using one color, you’ll need 10 cutouts. Then, lay it flat and trace over the creases to get sharp, accurate lines. Then, cut it out and place it over the side of the star to see if it fits. Then cut out 5 pieces of one color of fabric, turn over the pattern, and cut 5 pieces out of the other color of fabric.