
Screen Printing your own T shirts with Freezer Paper. You've probably seen this sprinkled around the web on various blogs and how-to sites.
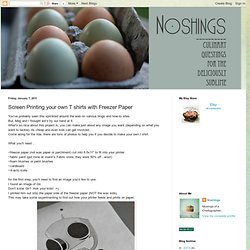
But, Meg and I thought we'd try our hand at it. What's so nice about this project is, you can make just about any image you want (depending on what you want to tackle), its cheap and even kids can get involved. Come along for the ride, there are tons of photos to help you if you decide to make your own t shirt. What you'll need... ~freezer paper (not wax paper or parchment) cut into 8.5x11" to fit into your printer ~fabric paint (got mine at Joann's Fabric store, they were 50% off...woo!) For the first step, you'll need to find an image you'd like to use.
With an X acto knife, cut out the part of the image that you want to become the painted part...in a sense, turn it into a stencil. Place your cut out onto your t shirt wherever you'd like it to be. Now, with a dry iron (heated up to the highest setting for the type of fabric your t shirt is), iron your image down. And finished! Edge of Urge- Make your Own Designer Earring Tutorial. As seen on celebs like Lucy Hale (in Seventeen Magazine) these Edge of Urge earrings are totally popular right now, with the whole feather craze.

So..... of course I had to find out how to make this myself. It seemed pretty simple; a hoop earring with feather, string and charm dangles. What's great about these earrings is that they are totally customizable. Colors, lengths of the dangles, how many dangles, what patterns, what beads, what string etc. are all choices that you can make to come up with a truly original earring, celebrity-style! Plus, why spend $84 on the real deal when you can make one yourself for basically nothing?
Step 1: Gather materials. Step 2: Crimp the ribbon ends to the ends of the feathers, making sure you crimp nice and tight so they are secure. Step 3: Make a small loop with the end of a roundnose pliers at one end of the wire. Take the wire with a regular pliers about .5cm from the other end, and bend straight up to form a 90 degree angle. Circle Zip Earbud Pouch Tutorial. I use a little zippered pouch to carry around my earbuds since they are the fancy microphone ones and I don’t want them to break or get tangled.
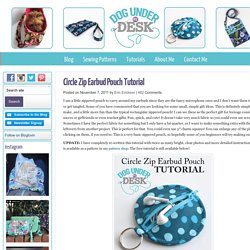
Some of you have commented that you are looking for some small, simple gift ideas. This is definitely simple to make, and a little more fun than the typical rectangular zippered pouch! I can see these as the perfect gift for teenage cousins or nieces or girlfriends or even teacher gifts. Fun, quick, and cute! It doesn’t take very much fabric so you could even use scraps! UPDATE: I have completely re-written this tutorial with twice as many bright, clear photos and more detailed instructions and it is available as a pattern in my pattern shop. First, download the pattern template HERE.
Cut from main fabric: 1 circle 2 half circles 1 tab Cut from lining fabric: 1 circle 2 half circles. My So Called Green Life...: How to Sew a Credit Card Wallet, Business, or Gift Card holder. Update: I've finally created a Flickr group where you can upload photos of the credit card wallets you've made.
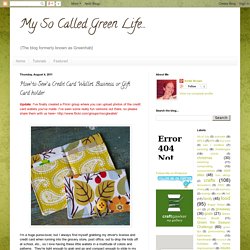
I've seen some really fun versions out there, so please share them with us here~ I'm a huge purse-lover, but I always find myself grabbing my driver's license and credit card when running into the grocery store, post office, out to drop the kids off at school, etc., so I love having these little wallets in a multitude of colors and patterns.
Holiday Decorations. Fun Stuff. Repurpose. Decor. Gift Ideas.