
VRAY ENVIRONMENT FOG TUTORIAL. Tutorial 4: Volumetric lightSome weeks ago, when a saw the marvelous tutorial of making of the “saint-benedict-chapel” at Ronen Bekerman site, I decide to try this for a scene I was working on.
It’s very simple and can be very effective. Using this method allows you to tweak the light. All you need to do, after finishing the whole scene, is as follow:1.Make a copy of your 3d scene and turn off all the lights except the ones you want to effect the fog, like the sun in my case. If you are using a HDRI or EXR turn it off also. (remember, turn off ALL lights except your main light source)2.Apply a 100% black VRayLight material to the entire scene. Butterfly-house-30b.jpg (1732×923) Making of Butterfly House by Thiago Lima / Part 1. Thiago Lima‘s “Butterfly – the book and short film” project is a remarkable undertaking.
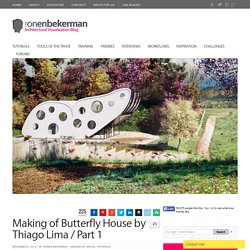
One that awarded him Best Visualization of the Week NO. 12 and lots of respect from our community. The concept of the Butterfly is rooted in his childhood painting play with symmetry and the desire to create something different in terms of subject matter for an architectural visualization project acting as a staging ground for developing and perfecting his skills further. Join him in this first part as he describes this undertaking from concept through 3d modeling, texturing, lighting and camera selections. 3ds Max Rendering Techniques with Christopher Nichols.
» Volumetrics – God Rays. I’ve had a number of people ask recently about my ‘Intro Sequence’ post and how I achieved the volumetrics in the scene, so I’ve taken some time to put together short ‘how-to’ on the subject.
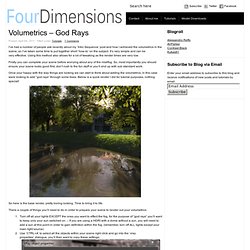
It’s very simple and can be very effective. Using this method also allows for a lot of tweaking as the render times are very low. Firstly you can complete your scene before worrying about any of the mist/fog. So, most importantly you should ensure your scene looks good first, don’t rush to the fun stuff or you’ll end up with sub standard work. Rugs and Carpets - 3Ds Max and VRay Tutorial - VISCORBEL. Render Passes & Compositing - CGSource.net - Ole Kristian's Website and Creative Journal. Making of Iron Cat by Adam Farkas. Once we have reached the required amount, stop the generation and turn off the leaves.
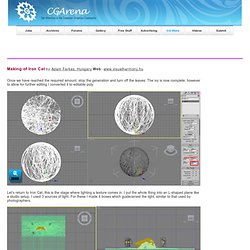
The ivy is now complete, however to allow for further editing I converted it to editable poly. Let’s return to Iron Cat, this is the stage where lighting a texture comes in. I put the whole thing into an L-shaped plane like a studio setup. I used 3 sources of light. For these I made 4 boxes which guide/arrest the light, similar to that used by photographers. Linear Workflow: a guide. This has been the subject of discussions on many forums over recent years.

I realised that there were all sorts of tutorials offering often conflicting information regarding the process. This is not the only way, just my way. I would like to thank my mate Ben Cowell and Phil Shoebottom for offering some clarity on a few points. SO, WHAT IS LINEAR WORKFLOW? (explained without maths, graphs and tables) Compositing Vray Render Elements tutorial. In the following tutorial we will go through the process of rendering an image in separate passes using render elements and compose them afterwards in photoshop.
Although I am a vray user, the same method can be used for any other renderer that supports render elements. 1) Rendering the scene. In the “render scene” menu, select the “render elements” tab and add the following passes: vraydiffusefilter, vrayGlobalIllumination, vrayRAWlighting, vrayRAWshadow, vrayReflection, vrayselfillumination, vraySpecular. Compositing V-ray Render Layers in Photoshop. In this tutorial Ahmed Fathi takes a look at how to composite together V-ray render layers using blending-modes and masks in Photoshop.
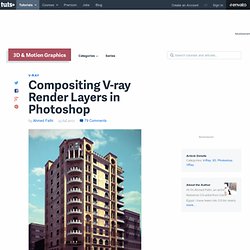
Once completed, this process allows you to change or tweak any aspect of your image in seconds without having to re-render a thing! Ahmed also covers a few extra post production techniques such as Chromatic Aberration and Depth Of Field, as well as how to emulate a Cross-processed look. Republished Tutorial Every few weeks, we revisit some of our reader's favorite posts from throughout the history of the site. This tutorial was first published in July of 2010. Additional Files/ Plugins:Download the Project Files for this tutorial Step 1 As this is a compositing tutorial, not a lighting/rendering tutorial, I'll assume that you have at least a basic knowledge of V-ray, and that you are able to render out your own scenes already.
Step 2. Rusty metal material - vray blend. In the following tutorial we will create an advanced rusty metal shader.
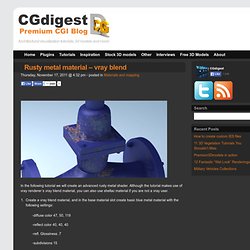
Although the tutorial makes use of vray renderer’s vray blend material, you can also use shellac material if you are not a vray user. Create a vray blend material, and in the base material slot create basic blue metal material with the following settings: -diffuse color 47, 50, 119 -reflect color 40, 40, 40 -refl. -subdivisions 15 -BRDF – ward -bump map – noise (adjust the tilling and the size according to your needs).