
HDRI Hub - Free Samples. Ptgui bad result with raw image and good with tiff image, is possible? (Q & A Forum) Correct Luigi, convert all 15 images from raw-tif first.
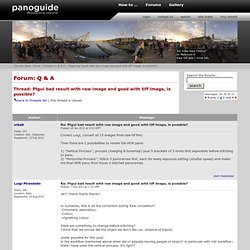
Then there are 2 possibilities to render the HDR pano:1) "Vertical Process"; process (merging & tonemap) your 5 brackets of 3 shots first separately before stitching to pano.2) "Horizontal Process"; Stitch 3 panoramas first, each for every exposure setting (shutter speed) and make the final HDR pano from those 3 stitched panoramas. Are Removing object step and Removing ghost step always subsequent of stitching pano step (indipendently of orizzontal or vertical workflow)? MACFIT WC Connectors - WC Connectors. 3-Way PVC Corner Fitting. Translate. David's Garden Seeds David's Greenhouse 3 Way Elbow For 3/4 Inch Pvc Pipe White 5 Per Box: Home & Kitchen. HDRi Equipment Cost. Pano Maxx - Pano head £139. The PANOMAXX2 is the best solution for taking panoramic images.
It is build of black coated aluminium and weights only 1 kg. All actual digital cameras and it´s wideangle and fisheye lenses fit to the pano-MAXX. The PANOMAXX2 is made of an X- and Y-axis adjustable bracket to fix the camera in portrait-orientation on its NPP "no-parallax-point" and a rotating head with clickstop-system. The NPP is the optical axis you need to turn around the camera to get a seamless panoramic image. The clickstop-system uses a spring plunger which stops in adjustable intervals. 10, 16 and 24 detent stops are possible with the horizontal rotator. The vertical arm has clickstops every 10°. With this strong 100% indexing your panoramic images are made easy and fast! With the vertical arm you don´t need fisheye lenses anymore to make fantastic cubic 360x180 panoramas. The PANOMAXX2 fits to all actual tripods with 3/8" or 1/4" threads.
Manfrotto 303SPH Multi Row Panoramic Head. Let's not mess about, the cost of this head, the size of it, the purpose of it and the weight of it mean that this is highly unlikely to be used by anyone just dabbling in photography unless their wallet is superior to their common sense. My intentions were to take 360 degree panoramas, using a Nikon D700 and a 14-24mm F2.8 lens. A task that I used to achieve by rotating my camera on a normal tripod before wondering and learning about Nodal points which explained why my panoramas were bulgy and stitched in the oddest shapes. This is basically due to the existence of a sweet spot for every lens that when the camera is rotated around the axis of the sweet spot, you heavily reduce lens distortion and panoramas stitch together nicely without a lot of cropping of the original shots.
This is why you need this gadget to allow you to find this point and rotate the camera perfectly around this point. The end result is fast panoramas, great for when there are moving subjects. Panoramic rotator, universal. Lens Hire - Canon EF-S 10-22mm f 3 5-4 5 USM. Canon EF-S 10-22mm FIsheye Lens £617. Sunex Fisheye Lenses. HDR Labs. What kind of camera will I need? A digital SLR camera with interchangeable lenses is the ideal solution, but almost any camera will work if you can lock the aperture, lock the focus, and lock the white balance.
Ultimately, you get what you pay for. Digital SLRs generally have more options for white balance, mirror lockup, etc… the more choices, the better! If you want a camera with the most convenient HDR shooting setup, choose a camera that has an auto-bracketing (AEB) option. Click here for a good list of cameras that have auto-bracketing (3 shots are common, but 5 or 7 is better) It also depends on how many HDRs you will be shooting and for what purpose? Back to top 4 Rules of shooting HDRs Lock f-stop (aperture – which controls your depth of field) Lock focus Lock white balance Turn off any in camera "automatic" image enhancing (i.e.: auto-contrast or auto-saturation, including sharpening) You will be bracketing the exposure time for your various exposures. HDR Skydome Tutorial « Peter Guthrie. - Export as 16 bit TIFFs - Load TIFFs into Photomatix or Photoshop to blend into a single HDR, I use Photomatix as it seems to do a better job of removing ghosting artifacts (from moving clouds).
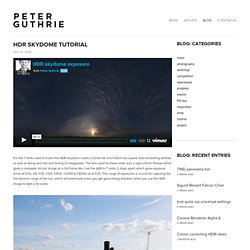
Hdrenviroment2. It was three years ago, when i wrote a Tutorial about using a serie of fisheye images to create an hdri skydome for lighten a 3d scene.
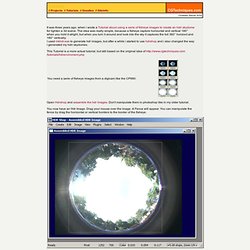
The idea was really simple, because a fisheye capture horizontal and vertical 180° when you hold it stright, but when you turn it around and look into the sky it captures the full 360° horizont and 180° vertically. I used mkhdr.exe to generate hdr images, but after a while i started to use hdrshop and i also changed the way i generated my hdri skydomes. This Tutorial is a more actual tutorial, but still based on the original idea of Open Hdrshop and assamble the hdr images. Don't manipulate them in photoshop like in my older tutorial. You now have an Hdr Image. Go to the image menu and crop the image. Your image is ready to transform now. There we have the final Spherical panorama. Now press + until the image have the mood of the RL scene.