e2 : Contrôle du flash intégré for Nikon D90 Manuel FR Complet. 40 Photoshop Tutorials for Amazing Lighting Effects – Part Two. One of the most popular posts of 2008 on this blog was 40 Photoshop Tutorials for Lighting and Abstract Effects.
Since it has been close to a year since that collection was put together, a number of excellent tutorials for working with lighting effects have been published. With this post I’d like to present the second edition of tutorials. Photoshop and Illustrator Grid and Glows (update: this tutorial is no longer online) Looking for hosting? WPEngine offers secure managed WordPress hosting. Djallal Benyounes. 100 Free Photoshop Actions (And How to Make Your Own) Les cours photo de photophiles. Apprendre et comprendre la photographie numérique.
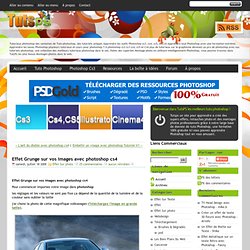
Laurent GARNIER » La photo de Mariage. Tuto 8- réalisation d'une texture de peau ( photoshop ) Effet Grunge sur vos images avec photoshop cs4. Effet Grunge sur vos images avec photoshop cs4 Pour commencer importez votre image dans photoshop les réglages et les valeurs ne sont pas fixe ça dépend de la quantité de la lumière et de la couleur sans oublier la taille j'ai choisi la photo de cette magnifique volkswagen (Téléchargez l'image en grande taille).
Making a Grungy Business Card - Luxa - Photoshop Tutorials, Videos, Brushes, Tips & Tricks. There are many different ways to attack a business card design.
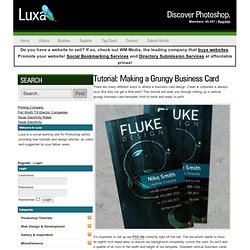
Clean & corporate is always nice. But why not get a little wild? This tutorial will walk you through setting up a vertical grungy business card template, front to back and ready to print. It's important to set up our PSD file correctly right off the bat. The document needs to have an eighth inch bleed area, to ensure our background completely covers the card. Since the cards will be cut after printing, we need to set up guides as a reference to where our artwork needs to be. Now that we have the file set up, we're ready to start on the background. Place your textures on the canvas, and order them in the layers palette as shown. Tutoriel Embellir un visage Tutoriel V2. Embellir un visage Tutoriel V2 Pour commencer importez votre images sous Photoshop personnellement j'utilise la version cs4 mais c'est pas grave le cs3 feras aussi l'affaire Prenez l'outil correcteur (J) et masqué les points noir et les autres truc dans tout le core si vous ne savez pas utilisez cet outil voilà un tuto pour vous expliquer le truc Et voilà pas le moindre bouton Maintenant dupliquez votre calque et appliquez dessus un Filtre Antipoussière.
Effet Bande dessiné (BD) avec photoshop cs4. Effet Bande dessiné (BD) avec photoshop cs4 Pour commencez choisissez votre image et importez la dans Photoshop Vous avez besoin de ces deux image de pub de Puma Cliquez ici pour téléchargez les images en grande format.
La peinture classique modernisée avec Photoshop. La peinture classique modernisée avec Photoshop Avant de commencer téléchargez le pack suivant Ouvrez la texture papier froissé avec photoshop Après avoir installé les brushe que vous avez trouvés avec le pack créez un nouveau calque (Ctrl+Shift+N) puis dessinez les éclats de peinture suivants en utilisant les trois couleurs suivant #a7cbcc /#13c5a9 /#35a8c8 Pour obtenir ceci.
Effet de feu avec Photoshop. Effet de feu avec Photoshop Pour commencer téléchargez le pack suivant Importez l'image de la danseuse sous Photoshop Nous allons commencer par le détourage de la femme parce que nous allons faire des modifications au niveau du fond, pour ceux qui on la version Cs5 utilisez le détourage avec l'amélioration des contours et pour ceux qui on une version antérieur utilisez les différentes méthodes de détourage avec l'outil plume (P) Quand vous finissez vous aurez deux calque celui du fond et la danseuse détourée, mettez vous sur le calque du fond et ajoutez un calque de remplissage dégradé en allant dans Menu > Calque > Nouveau calque de remplissage > Dégradé Changez son mode de fusion en Densité couleur - Maintenant prenez l'outil pinceau (B), dans un nouveau calque (Ctrl+Shift+N) et dessinez des formes radials comme ceci en utilisant la couleur suivant #ffc600 et toujours sous le calque de la danseuse Changez son mode de fusion en Densité couleur + et réduisez son opacité à 75%.
Voilà le résulta. Au Cœur de la Lumière avec Photoshop. Au Cœur de la Lumière avec Photoshop Pour commencer télécharger l'image suivante en grande format Ajoutez un calque de remplissage dégradé en allant dans Menu > Calque > Nouveau calque de remplissage > Dégradé (glissez un peut le dégradé ver le haut) parce que nous allons orienter la lumière dans la direction du regard de notre personnage Changez le mode de fusion du calque de dégradé en lumière linéaire.
Des Yeux triste avec un effet de larme avec photoshop. Des Yeux triste avec un effet de larme avec photoshop Pour commencer téléchargez l'image suivante et importez la dans photoshop Dupliquez votre calque deux fois (Ctrl+J) et sur le 1er allez dans Menu > Image > Réglages > Teinte et saturation Sur le deuxième allez aussi dans Menu > Image > Réglages > Teinte et saturation Puis changez son mode de fusion en Incrustation Maintenant ajoutez un calque de remplissage dégradé en allant dans Menu > Calque > Nouveau calque de remplissage > Dégradé Changez son mode de fusion en lumière tamisée Maintenant nous allons dessiner les larmes Prenez l'outil plume (P) en mode calque de forme et dessinez un truc comme ce ci Appliquez dessus les options de fusion suivante voilà le résultat Maintenant dessinez une autre forme comme ce ci avec les outils de votre choix (Personnellement j'ai utiliser l'outil pinceau (B) et l'outil forme dans le même calque) Rendez-vous dans les options de fusion Nous allons donner plus à cette image en ajoutant un petit quelque chose.