
40 Must Learn Text Effect Tutorials in Illustrator. Tutorials January 31, 2011 The love of creating text effects has become a common ground for many designers and enthusiasts.
Indeed, it has even become an art form in itself. Articles - Texture. When working in Illustrator it's nice to add textures that weren't computer generated (like gradients or pattern fills).

Illustrations like the ones in this lightbox have that extra something, and when you see them, you can practically feel them under your fingers. While gradients have their place, they lack that 'handmade' feel and can limit the usefulness of your image. T-shirt graphics are a great example where gradients don't always work well with silk screening. Handmade textures are an ideal solution: they're unique, interesting, and print very well. We're going to give you step-by-step instructions on how you can create your own hand-made texture effects using a Chinagraph Pencil on simple Watercolor Paper.
Now pull out your pencil and paper and start doodling. Painting a Pinup Girl in Photoshop. Set Up Your Selection Masks Ready to learn how to paint a pin up girl in Photoshop?
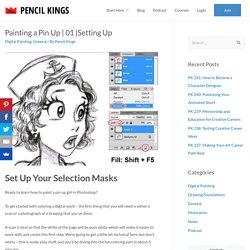
To get started with coloring a digital work – the first thing that you will need is either a scan or a photograph of a drawing that you’ve done. A scan is best so that the white of the page will be pure white which will make it easier to work with and create this first step. We’re going to get a little bit technical here, but don’t worry – this is really easy stuff, and you’ll be diving into the fun coloring part in about 5 minutes. Go into your Channels, and CTRL + Click on the RGB Channel – this will select all of the color information, but none of the black. An easy way to think about this is if all colors are value of zero, there is no color information at all and you will naturally get black. So when you use CTRL + Left Click on the RGB channel it’s selecting all of the color information for all your Red, Green and Blue (also referred to as RGB) in one click.
Create An Awesome Space Rocket in Illustrator. What?
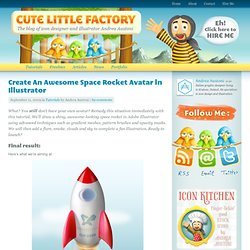
You still don’t have your own avatar? Remedy this situation immediately with this tutorial. We’ll draw a shiny, awesome-looking space rocket in Adobe Illustrator using advanced techniques such as gradient meshes, pattern brushes and opacity masks. We will then add a flare, smoke, clouds and sky to complete a fun illustration. Ready to launch? Final result: Here’s what we’re aiming at: Soundtrack: Psyché Rock I’ve chosen “Psyché Rock” by Pierre Henry to accompany this tutorial. Step 1: Drawing the hull Create a blank document, standard maximum icon size is 512 by 512 pixels (for Leopard). Copy (Ctrl+C) and paste in front (Ctrl+F) the path. Now window-select the top points, hit Ctrl+J on your keyboard to activate the Join function.
Now join the bottom middle points using the same method but this time choose the Smooth option. The hull’s profile is complete. Step 2: Shading the hull Pick the Direct Selection Tool (A), the white arrow from the toolbar. Design with Swirls and Flourishes. Retro car vectors. It's surprisingly easy to create a sharp, clean, attention-grabbing vector graphic based on a photograph, whether it's a pet, a person, a motorbike or a car.
And because it's a vector graphic, you'll be able to resize it without any loss of quality. There are other benefits too. Vector-based images make for smaller files, and smaller files are easier for your computer to open, close and print out. The final Illustrator file from this tutorial is only 5MB, compared with 50MB for a 300dpi Photoshop file of the same dimensions. Because the vector image is an Illustrator file, it's easy for you to change the colours of the illustration if, for example, you want to use it again and again for different clients. Finally, and arguably best of all, the print quality of the final illustration will be second to none. Click here to download the support files (3.84MB) How To Create a Stylish Skull Based Vector Illustration. The skull and crossed pistons mark is a popular adaption of the tradition skull and crossbones symbol and is commonly seen in motorcycle culture, amongst other.
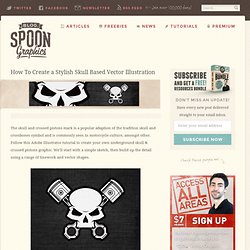
Follow this Adobe Illustrator tutorial to create your own underground skull & crossed pistons graphic. We’ll start with a simple sketch, then build up the detail using a range of linework and vector shapes. Here’s the graphic I’ve put together for this tutorial. The skull and pistons are both made up of simple linework, but with a couple of simple techniques they can really be brought to life. The final illustration would look perfect as a badge or emblem on a motorcycle helmet or the tank of a Harley. View full size skull & crossed pistons illustration The illustration begins with a sketch with pencil and paper. Place the scanned or photographed sketch in Illustrator and reduce the opacity. Increase the stroke weight to around 6pt and align it to the outside using the small icons.
Elsewhere on the artboard draw a triangle.