
My Favorite Photoshop Technique. Thanks for stopping by. Like many people who enter the blogosphere, I’m not entirely sure what I’ll be saying here as time goes by. My current intentions are to use this space to elaborate on some of the techniques I use in the digital darkroom and to reply to some of the comments and questions I’ve received regarding the tutorials on my website. 3 Simple Ways To Blend Exposures With Raya Pro in Photoshop. Reviews the NBP Lumizone Plugin: A New Way to Create Luminosity Masks in Photoshop. Luminosity mask is not anything new, a quick search on this site allow will yield several articles.
How to Blend 3 Bracketed Exposures for Greater Dynamic Range. Want to learn how to blend 3 bracketed exposures of the same scene to create a single photo with greater dynamic range? Here’s a great 17-minute video tutorial by travel photographer and educator Jimmy McIntyre on how to do so in Photoshop CC. “In this example we use 3 exposures because the difference between the brightest exposure (also the base exposure) and the darkest exposure is too much,” McIntyre says. “So we bridge the gap by using a middle exposure.” His technique is a clean, 100% non-destructive workflow. While he shows how easily the job can be done using his own Photoshop plugin, Raya Pro, McIntyre also demonstrates how you can do the same things using ordinary Photoshop.
Things you’ll learn in the tutorial include precision masking and working with smart objects imported directly from Adobe Camera Raw. TKActions V5 Quick Tip #5: Dodging, Burning and Luminosity Painting. TKActions V5 Quick Tip #4: Off Center Mid Tone Masks. TKActions V5 Quick Tip #5: Dodging, Burning and Luminosity Painting. SATURATION/VIBRANCE MASKING. Learn Photoshop - How to Use a Luminosity Mask. Illuminate Your Photos using Topaz and Luminosity Masks, presented by Joe Reardon - Topaz Labs Blog.
TKActions V5 Quick Tip #5: Dodging, Burning and Luminosity Painting. How to Capture the Magic of Sunrises & Sunsets with Exposure Blending in Photoshop (VIDEO) Free Video Tutorials. Transparent Layer Dodge and Burn Photoshop Technique. Photo Cascadia Blog. Landscape photographers are increasingly turning toward more interpretive modes of presentation in order to express their own ideas about the scenes that they encounter.
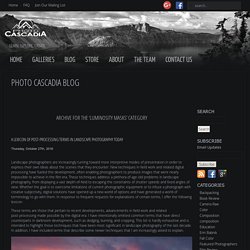
New techniques in field work and related digital processing have fueled this development, often enabling photographers to produce images that were nearly impossible to achieve in the film era. These techniques address a plethora of age-old problems in landscape photography, from displaying a vast depth-of-field to escaping the constraints of shutter speeds and fixed angles of view. Whether the goal is to overcome limitations of current photographic equipment or to infuse a photograph with creative subjectivity, digital solutions have opened up a new world of options and have generated a world of terminology to go with them. In response to frequent requests for explanations of certain terms, I offer the following lexicon. Exposure Blend: Click for more: Example 1 (By Sean Bagshaw) | Example 2 (By Chip Phillips) Transparent Layer Dodge and Burn Photoshop Technique.
Good Light Journal. I recently added “zone masks” to the custom actions panel using the buttons shown at the right.
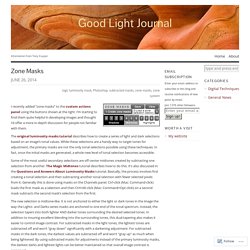
I’m starting to find them quite helpful in developing images and thought I’d offer a more in-depth discussion for people not familiar with them. The original luminosity masks tutorial describes how to create a series of light and dark selections based on an image’s tonal values. While these selections are a handy way to target tones for adjustment, the primary masks are not the only tonal selections possible using these techniques.
In fact, once the initial masks are generated, a whole new level of tonal selection becomes accessible. Some of the most useful secondary selections are off-center midtones created by subtracting one selection from another. The new selection is midtone-like. Below is an image of a black-to-white gradient with the selection edges showing a subtracted selection of the Light Lights minus Super Lights. Infinity Monochromes. NOTE: A folder of smaller PSD documents for the images used in this blog can be downloaded here. Like many photographers, I love good black and white images. Not only do they create a connection with the earlier incarnation of the art form, but there is also a certain elegance to monochrome images when they’re done right.
The lack of color creates immediate abstraction since a color-free world is not what we normally see. Texture, form, and line are elevated and so we engage with the composition at a different level. Black and white images remind us that color can sometimes be a distraction. Unfortunately, my skill in making black and white images does not match my appreciation for viewing them.
Plus.google. Tutorials Archives. If you’ve ever tried to photograph a person underwater, you know how important crystal clear water is to producing usable images.

I do most of my underwater photography in Georgian Bay which is exceptionally clean and clear. Jimmy McIntyre. Raya Pro Support - Shutter...Evolve. This page contains answers to the most common problems when using Raya Pro, including installation problems and luminosity mask errors.
List Of Contents (Click on the link below to be taken directly to the solution) 1. Raya Pro looks different to the one in the YouTube video 2. 3. 4. 5. 6. 7. 8. 9. 10. 11. 12. Raya Pro - The Ultimate Digital Blending Workflow Panel For Photoshop - Shutter...Evolve. “I am an extension junky and I must say, since downloading the Raya Pro panel, I’ve stopped looking as it’s got everything I need!
Yes, including Frequency Separation – love it!” – Jerry Syder “Since I began my own quest to improve my photography and post processing skills, Raya Pro has become my ‘go-to’ tool of choice” – Alistair @ ARD Image “The ability to control the tonal range and depth of an image is amazing! How to Use 'Double Masking' for More Natural HDR Blending in Photoshop. ISO » Beautiful Photography, Incredible StoriesThe Basics Of Luminosity Masks In Digital Blending - 500px ISO. Jimmy McIntyre is travel photographer.
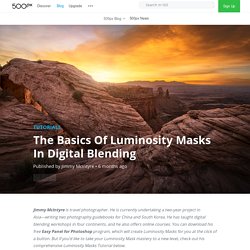
He is currently undertaking a two-year project in Asia—writing two photography guidebooks for China and South Korea. He has taught digital blending workshops in four continents, and he also offers online courses. The Basics Of Luminosity Masks In Digital Blending. 500px ISO » Beautiful Photography, Incredible StoriesJimmy Mcintyre, Author at 500px ISO.