
$20 Portable Silkscreen Kit. No more excuses!
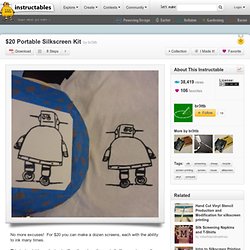
For $20 you can make a dozen screens, each with the ability to ink many times. This instructable seeks to significantly reduce the cost of silkscreening small numbers of shirts. For years I'd wanted to try it, but I couldn't justify the cost. Even the $100 screenprint "systems" seemed too expensive; what if I didn't like it? What if the quality was crap? As far as DIY methods I found, nothing quite scratched my itch. This is the instructable I wish I had found many years ago. Glass Bottle Cutter. A few weeks ago my wife and I saw some interesting wine bottle lamps and after one glance at the price tag, instantly thought to ourselves "we could totally make this!
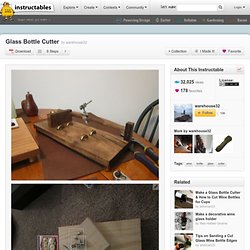
" As i did some research though, I found that cutting the glass wasn't going to be as straight forward as I thought. I had seen plenty of videos all with completely different methods; some people wrapped a flaming piece of string around the bottle, others took a file to it, and some simply scored and snapped.
I think all of them had the right idea, but i couldn't find both a reliable method for consistent cuts AND an adjustable platform on which to cut various shapes and sizes at different points on the bottle (unless of course you wanted to shell out upwards of $50...but I just wanna cut glass here people not build rockets!). So, in true instructables fashion I decided to make my own on the cheap. Hope you enjoy, and thanks for reading! Easy Workbench Photo Backdrop. Combo Miter Saw Station Lumber Rack. This miter saw station does double duty as a lumber storage rack with room for long boards underneath and 4' x 8' sheet goods in the back.
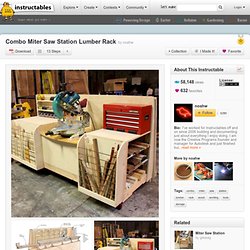
I looked around for a long time online for plans for something like this and all I was able to come up with was a hand drawn sketch in an old Fine Woodworking magazine. I adapted the drawing a bit to create the following Step-by-Step Instructable, adding in easier to use see-through bins for cut-offs in the front instead of solid panels, and adapting the rail-style bed pictured in the drawing for stock to be a bit simpler and deeper so it could serve as a functional work surface as well.
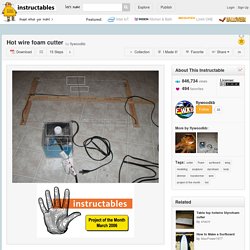
I'm really happy with how this project turned out, in part because I wasn't following any plans, and that can sometimes lead to a wonky build, but also because it's a fully functional semi-portable (has casters but is heavy to move when fully loaded) miter saw station that has tons of additional storage. Hotwire Foamcutting Table. The cutting wire is a piece of tungsten unravelled from inside a toaster or a stainless strand unravelled from a yacht cable.
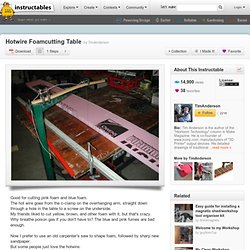
A non-stainless steel wire such as from inside a tire works fine also, but doesn't last as long. When protesters burn tires there's a lot of that stuff around. The wire elongates a bit when it gets hot. The wooden leaf spring at the top keeps it tight. Hot wire foam cutter. The parts should be pretty easy to find. 1. 12 foot, 16 guage extension cord, about $2 at Home Depot 2. 2 wooden yard sticks from the Home Depot paint department, $.97 each 3. 4 #10-24 x 1.25" machine screws with nuts, $1 at Home Depot 4. 10 #10 washers, $1 at Home Depot 5. 6. 7. 8. 9. 10.
Hot-Wire Foamcutter (Battery Powered) Screen Printing: Cheap, Dirty, and At Home. Down and dirty screenprinting for under 10$ For this project, we will need some tools and supplies that are easily available, and a few that might require the tiniest bit of searching....
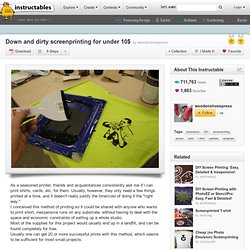
Recycling is key here. Most of the supplies required can be found as trash, including the ink. What isn't direct waste can be recycled from thrift stores or garage sales. Tools:Staple Gun (almost any size will do)X-acto Knife, or Utility knife (you could use a plain razor blade in a pinch)Heat Gun or a Hair DryerScissorsPlastic Putty KnifeSmall Container for mixing Materials:'Spray AdhesiveStaplesAny old picture frame as long as it is bigger than your image. Cheap and easy desktop electric outlet. Papier Mache Planets. Make an Evaporative Terra Cotta Beer Chiller. So I was browsing the Self Sufficient 'ish' sometime last year and came upon the article titled Keeping your cool, Replacing the Humble Refigerator by a guy named Nev Sweeney.
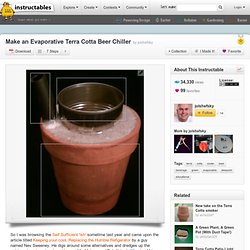
He digs around some alternatives and dredges up the pot-in-pot system developed by one Mr. Mohammad Bah Abba in Nigeria, Africa. The gist is this: take a big, unglazed terra cotta pot and fill it with a little sand then put a smaller pot inside and fill the gap between with more sand. Add water and allow evaporation to provide the cooling. Mr. Well, I decided to go a bit further. First, the science behind the whole thing is that of the wet-bulb thermometer. Second, how can one convert this to something practical?