
How to make a simple Exterior (scratch to post-production) by omer kako. Compositing V-ray Render Layers in Photoshop. In this tutorial Ahmed Fathi takes a look at how to composite together V-ray render layers using blending-modes and masks in Photoshop.
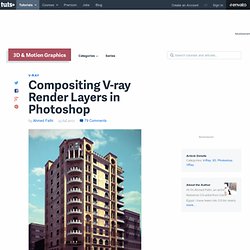
Once completed, this process allows you to change or tweak any aspect of your image in seconds without having to re-render a thing! Ahmed also covers a few extra post production techniques such as Chromatic Aberration and Depth Of Field, as well as how to emulate a Cross-processed look. Republished Tutorial Every few weeks, we revisit some of our reader's favorite posts from throughout the history of the site. This tutorial was first published in July of 2010. Quickscape Tutorials. Project Overview This tutorial describes the process of creating a 3D infrastructure and landscape scene from an AutoCAD design drawing using MAX/VIZ and Quickscape application software.

Popularity: 9.1 visits per day | Last visit: Today | Total visits: 20,052. Preparing an AutoCAD drawing for 3D. By Ian Ibbotson Introduction It is extremely important to prepare an AutoCAD drawing taking into consideration two main issues The drawing should be organised and drawn so as not to compromise the production drawing.

Mental ray & VRay tutorials. Mental ray & VRay tutorials: Correcting the Viewport colour display of imported AutoCAD drawings, when added into a Layer in 3Ds Max. Often, imported AutoCad drawings lose their original colour once added into a new layer (using “Manage Layers” toolbar) in 3Ds Max.

This “glitch” usually frustrates numerous users for a number of reasons, as colour coded drawings help to quickly understand the design and to easily “select by colour” any given layer/s of the relevant drawing in the 3Ds Max scene. After countless requests to post an article/tutorial on how to correct this problem, I have finally managed to put something together with help of a prolific script writer/ senior Visualiser/Photographer called David Venables.David created a simple script to override the above mentioned problem! I have had the pleasure to meet and continue to work with David while at AVR London. Without further ado let us start by importing an AutoCAD file format (i.e. CGarchitect - Professional 3D Architectural Visualization User Community. Free Architectural Visualization Tutorials, Videos + Onyx. Mental ray & VRay tutorials. AutoCad. Houses. Shopping mall. Republic Doors and Frames Steel Doors CAD Details.
Autocad file, .dwg file, download .dwg file, free cad file download, free website for architectural students, cad plans download, .dwg download. Comprendre la complexité d'une construction en 13 chapitres - jacques argaud - architecte & expert près la cour d'appel de Rennes. 1.1 les plans d’architecte : Il est d’usage, avant de commencer la construction d’un bâtiment, d’en dresser les plans.
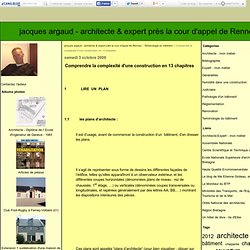
Il s’agit de représenter sous forme de dessins les différentes façades de l’édifice, telles qu’elles apparaîtront à un observateur extérieur, et les différentes coupes horizontales (dénommées plans de niveau : rez de chaussée, 1er étage, …) ou verticales (dénommées coupes transversales ou longitudinales, et repérées généralement par des lettres AA, BB,…) montrant les dispositions intérieures des pièces.
MintViz Workshop « Tutorials, Tips & Resources for CGI. Ivy. My 12 Favorite Tutorials of 2010. 15 Flares Facebook 0 Twitter 7 Pin It Share 4 4 Google+ 0 LinkedIn 3 inShare3 StumbleUpon 1 Reddit 0 15 Flares × 2010 is behind us and just before we start with all the 2011 goodness… here are my favorite 12 tutorial articles of 2010 on this blog.

I wish you all the best 2011 possible. Enjoy! A quick way of adding fog in post using the ZDepth render pass. Described for VRay, but the method is the same for any render engine that is capable of outputting a depth pass. How to create great looking rocks inside 3d Studio max using the Advanced Painter plugin and rendering it all with V-Ray.
A Focus on how to create a great looking ground cover, complete with grass, gravel, leafs and rocks. Short description of the modeling and postwork done to achieve the amazing looking ‘Maison Hermes’ render by State of Art Studio. The creation of 1st place winning ‘Winter Interior’ scene, created for the IDVN Design Visualization Render Challenge 2009. SolidRocks - SolidRocks. VRay FREE Stuff For Download. Hey!

Christmas feeling is in the air and this was a wonderful year of VRay video tutorials, trainings, eBooks and other cool stuff… However I would like to continue the tradition and share some more freebies with you WARNING: Download it only if you are a true VRay user! Oh, and if you liked my stuff don’t forget to SUBSCRIBE Here ————————————————–> This way you’ll be able to follow me on VRay Video Tutorials, News, Reports and Free Downloads… I’ll be sharing Pro 3D tips & tricks only with subscribed users.
HDRI Hub - HDR Stonewall (free) V-Ray DMC Sampler. Introduction In this tutorial I will focuse on giving you the basic technical background of DMC sampler, but before we go into any technical details about DMC sampler, we will go over alternative sampler integrated in VRay, Adaptive Subdivision sampler.
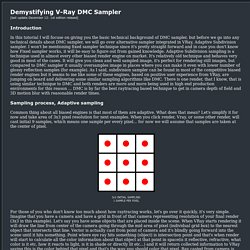
I won't be mentioning fixed sampler technique since it's pretty straight forward and in case you don't know how Fixed sampler works, it will be easy to figure out from gained knowledge. Adaptive Subdivision sampling is a technique used in almost every other biased render engine on market. It's relatively old technique and behaves very good in most of the cases. It will give you clean and well sampled image, it's perfect for rendering still images, but compared to DMC sampler it usually oversamples image in places where you can make it even with lower number of glossy reflection samples (for example).
Just Premium Content – Vray Tutorials, 3ds Max, Free 3d Models, Textures, Photoshop, Zbrush and free stuff. Voido rocking chair. Bits of bread. When working on the Northern light images, I started experimenting with a new workflow to create food assets, in particular bread and other baked products.

After having found a relatively laborious but clean and effective approach, I decided to build a small library of baked, carb-heavy assets. I didn’t go very far, and I will certainly return to this at some point, but I thought I’d post a few of the resulting test images and write a little bit about the scene and the workflow, which I unfortunately didn’t properly document in images and screengrabs – sorry if this seems like a lot of text.