

Arduino Button Tutorial - 3. The Button This is a momentary switch, with one stable position (open) when no force is exerted, and conducting (closed) when pressed.
It is one of the simplest electro-mechanical sensing device. Connect the button like illustrated in the photo of this step. (Don't be impressed by the size of my breadboard. A small one will be actually handier.) The I/O Pin The AVR (aka ATmega, i.e. the Atmel chip powering the Arduino board) has several I/O pins. Pin 2 will be a good choice for our example. Pull-up Resistor.
PCA9512.pdf. Forum. HomePage. Playground - RegulatedPositiveVoltageBooster. Outputs 1/4 Watt, up to +60V DC Max Accepts any input voltage (1V minimum) Uses a simple, flexible circuit Warning: If you don't follow the instructions carefully, wiring this circuit wrong can damage your Arduino.

Playground - Gyro. This is just a basic code snippet for the time being, but please feel free to contribute more information Gyroscopes measure the rate of change of a particular axis at the current moment in time.
This means that to keep track of our angle, we need to sum all of the rates of change over a given period of time. We're essentially looking for the integral of our gyro data. In the sample code below we'll be looking at just one gyro axis. First off, you'll want to set the voltage of your gyro (typically 3.3v or 5v) for the gyroVoltage variable. Next you'll need to know the zero voltage of your gyro. The other value you'll need from the datasheet is the sensitivity. The Arduino has 10 bit ADC which can represent a voltage (0-5V) in values from 0 to 1023. /* Keep track of gyro angle over time * Connect Gyro to Analog Pin 0 * * Sketch by eric barch / ericbarch.com * v. 0.1 - simple serial output * */ float currentAngle = 0; //Keep track of our current angle void setup() { Serial.begin (9600);}
Wire. PortManipulation. Reference Language | Libraries | Comparison | Changes Port registers allow for lower-level and faster manipulation of the i/o pins of the microcontroller on an Arduino board.
The chips used on the Arduino board (the ATmega8 and ATmega168) have three ports: ArduinoToBreadboard. This tutorial explains how to migrate from an Arduino board to a standalone microcontroller on a breadboard.
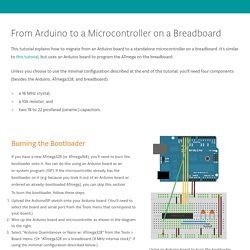
It's similar to this tutorial, but uses an Arduino board to program the ATmega on the breadboard. Unless you choose to use the minimal configuration described at the end of this tutorial, you'll need four components (besides the Arduino, ATmega328, and breadboard): a 16 MHz crystal, a 10k resistor, and two 18 to 22 picofarad (ceramic) capacitors. Setting up an Arduino on a breadboard. Overview This tutorial shows you how to build an Arduino compatible breadboard with an Atmel Atmega8/168/328 AVR microcontroller and FTDI FT232 breakout board from SparkFun.
You could also use the Arduino USB Mini. Originally created David A. MellisUpdated from the ITP version by Carlyn MawUpdated October 23, 2008 by Rory Nugent Parts. ArduinoISP. Learning Examples | Foundations | Hacking | Links This tutorial explains how to use an Arduino board as an AVR ISP (in-system programmer).
This allows you to use the board to burn the bootloader onto an AVR (e.g. the ATmega168 or ATmega328 used in Arduino). The code in this example is based on the mega-isp firmware by Randall Bohn. Instructions To use your Arduino board to burn a bootloader onto an AVR, you need to follow a few simple steps. Open the ArduinoISP firmware (in Examples) to your Arduino board. Circuit (targeting Arduino Uno, Duemilanove, or Diecimila) ISP not work with Arduino 1.0.
Issue 860 - arduino - ArduinoISP sketch broken when compiled with IDE 1.0 - Arduino is an open-source electronics prototyping platform based on flexible, easy-to-use hardware and software. Arduino Ethernet Shield Tutorial. The Ethernet Shield is based upon the W51000 chip, which has an internal 16K buffer.
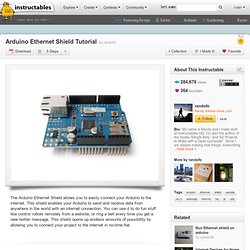
It has a connection speed of up to 10/100Mb. This is not the fastest connection around, but is also nothing to turn your nose up at. It relies on the Arduino Ethernet library, which comes bundled with the development environment. There is also an on-board micro SD slot which enables you to store a heck-of-a-lot of data, and serve up entire websites using just your Arduino. This requires the use of an external SD library, which does not come bundled with the software. The board also has space for the addition of a Power over Ethernet (PoE) module, which allows you to power your Arduino over an Ethernet connection.
For a full technical overview, see the official Ethernet Shield page.