

Impressão. Icones. Fontes & Tipografias. Cores. How To Create a Stylish Skull Based Vector Illustration. The skull and crossed pistons mark is a popular adaption of the tradition skull and crossbones symbol and is commonly seen in motorcycle culture, amongst other.
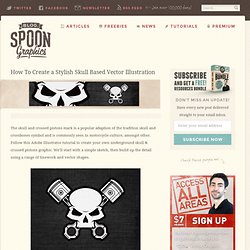
Follow this Adobe Illustrator tutorial to create your own underground skull & crossed pistons graphic. We’ll start with a simple sketch, then build up the detail using a range of linework and vector shapes. Here’s the graphic I’ve put together for this tutorial. The skull and pistons are both made up of simple linework, but with a couple of simple techniques they can really be brought to life. Wrapping Text Around an Image in Illustrator. This post was originally published in 2008 The tips and techniques explained may be outdated.
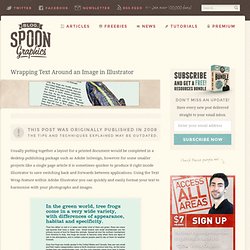
Usually putting together a layout for a printed document would be completed in a desktop publishing package such as Adobe InDesign, however for some smaller projects like a single page article it is sometimes quicker to produce it right inside Illustrator to save switching back and forwards between applications. Using the Text Wrap feature within Adobe Illustrator you can quickly and easily format your text to harmonise with your photographs and images. Put together your textual layout on the relevant page size, here I’ve roughly set out a few paragraphs of text pulled straight from an article on the topic of frogs.
Go to File > Place and import your desired graphic (resized beforehand in Adobe Photoshop), move it into position on the page. Notice however the image sits over the top of the text rather than the text flowing around it. With this new shape selected, go to Object > Text Wrap > Make. How to Create a Crafts Inspired Vector Kids Illustration. This post was originally published in 2009 The tips and techniques explained may be outdated.
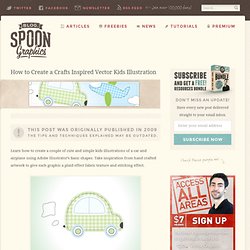
Learn how to create a couple of cute and simple kids illustrations of a car and airplane using Adobe Illustrator’s basic shapes. Take inspiration from hand crafted artwork to give each graphic a plaid effect fabric texture and stitching effect. Start work by opening up Adobe Illustrator. Grab the ellipse tool and draw a large oval on the artboard. With the direct selection tool, select and move the lower most point vertically. Next, select each of the two Bezier curves from the bottom point, and extend them outwards to create a tighter curve on the two lower corners. Draw another oval, this time smaller and size. Illustrator QuickFix – Document Raster Effects. This post was originally published in 2007 The tips and techniques explained may be outdated.
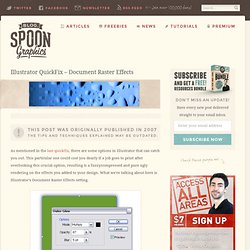
As mentioned in the last quickfix, there are some options in Illustrator that can catch you out. This particular one could cost you dearly if a job goes to print after overlooking this crucial option, resulting is a fuzzy/compressed and pure ugly rendering on the effects you added to your design. What we're talking about here is Illustrator's Document Raster Effects setting. Let's say you have an object within Illustrator, and you add an Outer Glow, Drop Shadow, Inner Glow or basically anything from the Stylize menu. Now the problem comes when you export that file as either an AI or EPS, Illustrator will convert those effects into a raster format but the default setting for this raster conversion is set to 72ppi, which will look hideous on any litho or large format print. So, how do you fix this? In the options box, select 300ppi. What next?
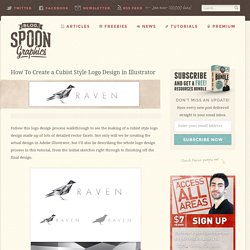
How To Create a Cubist Style Logo Design in Illustrator. Follow this logo design process walkthrough to see the making of a cubist style logo design made up of lots of detailed vector facets.
How to Create an Abstract Vector Design in Illustrator. This post was originally published in 2009 The tips and techniques explained may be outdated.
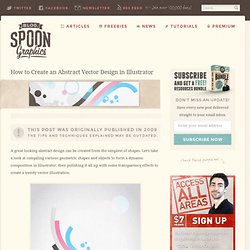
A great looking abstract design can be created from the simplest of shapes. Let’s take a look at compiling various geometric shapes and objects to form a dynamic composition in Illustrator, then polishing it all up with some transparency effects to create a trendy vector illustration. Start work sketching out a rough plan for the design, taking into consideration the composition and general style of the illustration. Open up Adobe Illustrator and create a new document. Choose a generic size such as A4, and set the Color Mode to RGB for a choice of nice, vibrant colours.
Draw a 210x297mm rectangle onto the Artboard, align it centrally then add a soft grey to white radial gradient. Pick out a colour scheme of your choice. With all the coloured squares selected, click the New Brush icon in the Brushes palette. Creating Road Maps in Adobe Illustrator. This post was originally published in 2007 The tips and techniques explained may be outdated.
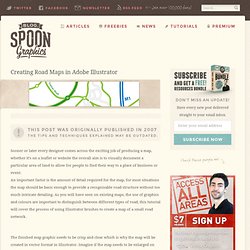
Sooner or later every designer comes across the exciting job of producing a map, whether it’s on a leaflet or website the overall aim is to visually document a particular area of land to allow for people to find their way to a place of business or event. An important factor is the amount of detail required for the map, for most situations the map should be basic enough to provide a recognisable road structure without too much intricate detailing.