
DIY Project Accessories, Gumball Machine Fish Bowl. This Gumball Machine Fish Bowl is sure to get some compliments in your home!
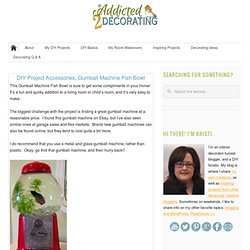
It’s a fun and quirky addition to a living room or child’s room, and it’s very easy to make. The biggest challenge with the project is finding a great gumball machine at a reasonable price. I found this gumball machine on Ebay, but I’ve also seen similar ones at garage sales and flea markets. Brand new gumball machines can also be found online, but they tend to cost quite a bit more. I do recommend that you use a metal and glass gumball machine, rather than plastic. Project Cost: Approx. $45 (including the fish!) Materials: 1. 2. 3. 4. 5. 6. Tools & Supplies: 1. 3. 4. 5. DIY Project Lighting, Contemporary Drinking Straw Pendant Light. Dollar Store Crafts. ( Indie ) Pretty Projects: Project: Perched Birdies Decor. Maureen of Release Me Create has crafted an adorable guest post for us today: Perched Little Birdies.
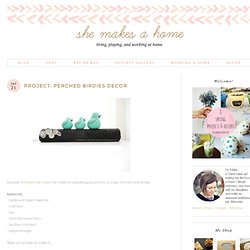
Materials - Cardboard Paper Towel Roll - Craft Glue - Yarn - Small Decorative Pears - Sky Blue Craft Paint - Magazine pages Now, on to how to make it... Making the perch Cover the last 1/4" of your cardboard roll with glue Start with the end of the yarn and place it in the glue. Cover the other end of the tube with glue, and finish wrapping the yarn around. The Birdies Cut the top off the pears, then paint them your color of choice. Next, glue the birdies onto the yarn-wrapped tube.
The paper orbies Trim the ragged edges of your magazine pages To achieve the look of different side orbs, cut the pages into different sizes: Fold in the corner of one sheet to begin: Continue to fold until you reach the end, and secure with a dab of glue:Now, start a small fold at one end... ...and continue to fold until your strip rolls up, rather than fold up. Most gawked last 7 days - page 5. Ultimate Craft Organization Solutions. Secrets of DIY Mastery - Woven Chain Bracelet. Amazing DIY Rope Rug Free People.
Last Minute Pumpkin Decor From Oranges. Halloween is right around the corner!
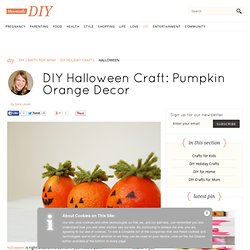
If you need a quick Halloween decor idea, or if you want a healthy option to hand out to trick-or-treaters, this is a fantastic holiday craft. (Note: this is not a craft for kids, because it requires a hot-glue gun. This one is strictly a DIY for Mom.) Grab a few oranges from the fridge for this pumpkin craft, and let's go! Pottery Barn Knock-Off Tutorial – Ribbon and Bird Chandelier. It seems I’ve teased you long enough about the flock of 250 birds on my coffee table.
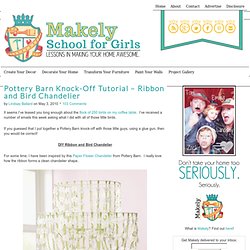
I’ve received a number of emails this week asking what I did with all of those little birds. If you guessed that I put together a Pottery Barn knock-off with those little guys, using a glue gun, then you would be correct! DIY Ribbon and Bird Chandelier For some time, I have been inspired by this Paper Flower Chandelier from Pottery Barn. I really love how the ribbon forms a clean chandelier shape.
However, once I decided on a color scheme for my baby’s nursery, I knew that this particular chandelier wouldn’t work in the room. Supplies Three Macrame rings (available at craft stores) – Mine were 19″, 12″, and 6″.Two wire coat hangersLower gauge craft wire (available at craft stores or home improvement stores)Wire cutter and/or DremelInvisible thread or fishing lineSpray paintRibbon (mine was 5/8″ satin)Glue gunCardstockPaper punch or template in a shape you like 1. 2. 3. 4.
Lucky Ducky Duct Tape Flower Pens. Hello sisters, Lulu here!
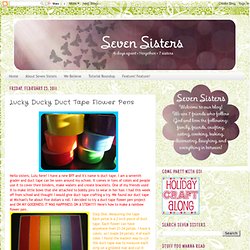
I have a new BFF and it's name is duct tape. I am a seventh grader and duct tape can be seen around my school. It comes in tons of colors and people use it to cover their binders, make wallets and create bracelets. One of my friends used it to make little bows that she attached to bobby pins to wear in her hair. I had this week off from school and thought I would give duct tape crafting a try.
Step One: Measuring the tape Each petal is a 2 inch piece of duct tape. Step Two: To make the petals Take one 2 inch strip, sticky side up and fold down one corner so that you are left with an "L" of sticky. Step Three: Forming the flower Take a small piece of duct tape and cover the bottom of the pen to create the center of the flower (not shown in picture). Once you have finished wrapping your petals....... voila!!
Step Four: Adding the stemMeasure a strip of green tape the size needed to cover the pen from the cap to the base of the flower. Linking To! Splashup. Puffy Paint Pumpkins. Nothing says Halloween like cool pumpkin decorations!
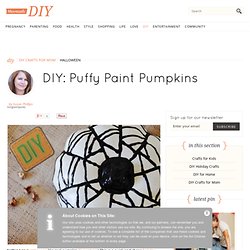
This is a quick and cheap holiday DIY that's great for a party, or to simply get your family into the spirit.