
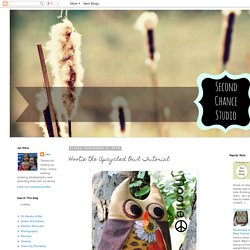
New Green Mama: Hootie the Upcycled Owl Tutorial. Here's what you will need: fabric scraps or 1/2 yard of contrasting fabrics felt embroidery floss.
Cute Fleece Pillow Stuffed Animal Toys. – September 10, 2011Posted in: Fabric Crafts, September Crafts Make pillows for children’s toys and gifts.
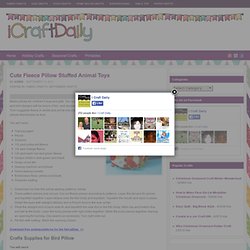
Our quick and easy fish and bird designs will be hours of fun, and double as cute decor. Turn huggable fleece in solids and prints into creatively sewn kid pillows that double as toys. You will need: Tracing paperPencilScissors1/2 yard polka-dot fleece1/4 yard orange fleece1/4 yard each red and green fleeceScraps of felt in dark green and blackScrap of red feltSewing machine and threadHand-sewing needleEmbroidery floss: yellow and blackPolyester battingDownload our free fish pillow sewing patterns, below.Trace pattern pieces and cut out. Dolphin. Stuffed dolphin of felt. 13 centimetres.It's simple and easy.
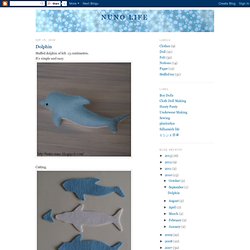
Cutting. Sew up the back with blanket stitch. Sew the upper jaw to the face. Sew the belly to the body. Baby cuddle toy "Fish" Materials: * Three different fabrics (body) * Fabric - 25 cm x 20 cm (10 in x 8 in) (fins) * Cross-stitch threads (eyes and mouth) * Strong machine sewing thread * Stuffing - polyfill Instructions: Download free sewing pattern here.
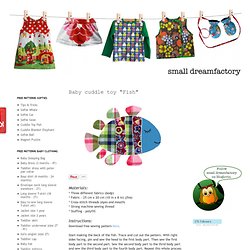
Start making the back of the fish. Trace and cut out the pattern. With right sides facing, pin and sew the head to the first body part. Then sew the first body part to the second part. Continue with the fins. Place the front body piece right-side up on your work surface. . © small dreamfactoryintended for non commercial use only. Free pattern softie car "Lincoln continental" 141Materials: * Blue fleece - 20 cm x 20 cm (8 in x 8 in) * Green fleece - 50 cm x 50 cm (20 in x 20 in) * Stuffing - polyfill Instructions: Download free sewing pattern part one, part two and part three.
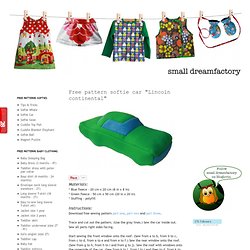
Trace and cut out the pattern. (Use the gray lines.) Sew the car inside out. Sew all parts right sides facing. Start sewing the front window onto the roof. Sew the grill and the upperside of the car together. Free Pattern Softie Swan. Materials: * White fabric - 40 cm x 60 cm (16 in x 24 in) * Vintage fabric - 30 cm x 20 cm ( 12 in x 8 in) * Orange felt (beak) * Brown felt (eyes) * Dark yellow felt - 12 cm x 12 cm ( 5 in x 5 in) (legs) * Cross-stitch thread (dark yellow) * Stuffing - polyfill Instructions: Download free sewing pattern part one and part two.
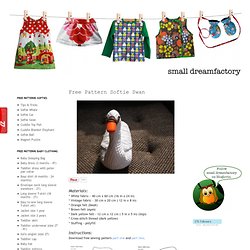
Trace and cut out the pattern, except for the wings of the swan. Seam allowance is not included in the pattern. Start making the body of the swan. The legs consist of two layers felt. A rooster to crow about. You won't have to cook this colorful stuffed bird – but you will "crow" about how you made it yourself!
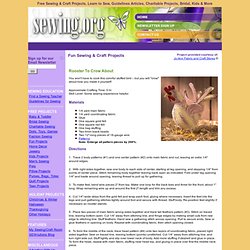
Approximate Crafting Time: 5 hr.Skill Level: Some sewing experience helpful. Materials 1/4 yard main fabric 1/4 yard coordinating fabric Glue One square gold felt One square red felt One bag stuffing Two 6mm black beads Two 12"-long pieces of 18-gauge wire Patterns Note: Enlarge all pattern pieces by 200%. Directions 1. Love bird tutorial. A little quickie love bird.
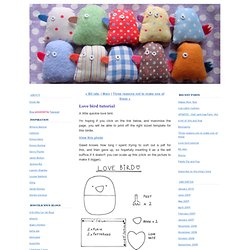
I'm hoping if you click on the link below, and maximise the page, you will be able to print off the right sized template for this birdie. View this photo Gawd knows how long I spent trying to sort out a pdf for this, and then gave up, so hopefully inserting it as a file will suffice.If it doesn't you can scale up this (click on the picture to make it bigger). Stitch one piece of plain fabric to one piece of patterned fabric along the long edge, repeat, then fold your 4" square of fabric in half and press as shown. I've lined the body pieces with a medium weight cotton to make it nice and sturdy, just stitch together along the edges and trim. Pin and stitch around the template on one piece of your plain/patterned fabric. Bear backpack tutorial. Hello everyone that is reading this!
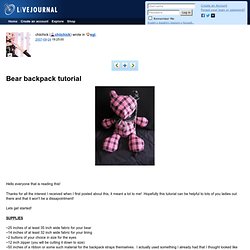
Thanks for all the interest I received when I first posted about this, it meant a lot to me! Hopefully this tutorial can be helpful to lots of you ladies out there and that it won't be a dissapointment! Lets get started! ~25 inches of at least 35 inch wide fabric for your bear~14 inches of at least 32 inch wide fabric for your lining~2 buttons of your choice in size for the eyes~12 inch zipper (you will be cutting it down to size)~50 inches of a ribbon or some such material for the backpack straps themselves.
These are the supplies for a basic bear only! Ready to go? 2.) 3.) Free Pattern Page. Tin Soldiers OlgaFreePattern. Making Pattern Templates, and Marking and Cutting out Fabric It is best to work with a template made from rigid material.
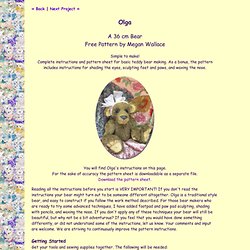
I prefer to use thin card or template plastic. Trace your pattern pieces on to the template material, remembering to transfer all markings such as openings and joint position. Cut out neatly using paper scissors. Before marking out the pattern pieces on the wrong side of the fabric, determine the direction of the fur pile on your fabric.
Put the piece of fabric down in front of you, with the fur side up. Once the joints are in position, stuff the arms, legs and body with fiberfill. Free Doll Pattern - Crafty Carnival. Hi Everyone! I've been wanting to offer this doll as a free pattern on my blog for a long time, and I just finally got around to it! It's the last doll that I did for my LMP pattern line, and it really doesn't fit in well with the other patterns. I think she will be much more at home here in blog land! So here is the pattern for you! I wish I could have done a tutorial, but I promise... this is just as good... it's VERY easy to do!
Download the instructions by clicking here: Download pattern_silly_girl.pdf and then download the template that you need by clicking here: Download template_silly_girl.pdf. Wacky Chicken Pattern - Silver Seams. See photographs of some results from this pattern (including a turkey) in the gallery. Copyright/Licenses Copyright 2003 Silver Seams. This work is licensed under a Creative Commons Attribution-Share Alike 3.0 United States License. This work is licensed under a Creative Commons Attribution-Noncommercial 3.0 United States License. If you're not sure what that means, the Open Source Sewing index has more details. The Pattern Chicken parts: I have a digital version of the chicken, which I'll replace these images with sometime.