
Drivers, Relays, and Solid State Relays. Driver circuits A typical digital logic output pin can only supply tens of MA of current.

Even though they might require the same voltage levels, small external devices such as high-power LEDs, motors, speakers, light bulbs, buzzers, solenoids, and relays can require hundreds of MA. Larger devices might even need several amps. To control smaller devices that use DC, a transistor-based driver circuit can be used to boost the current to the levels needed for the device. When voltage and current levels are in the correct range, the transistor acts like a high-current switch controlled by the lower current digital logic signal. Basic driver circuit using a BJT transistor The transistor primarily provides current gain. 2N3904 Transistor in a TO-92 package Depending on the current gain of the transistor used, some adjustments may be needed in the value of the base resistor.
PWM Control The logic signal (control) turns the transistor on and off to drive high current loads. Driver ICs MOSFETs Wiring. Nwazet Pecan Pi Relays. The Pecan Pi Relays kit is designed to be interfaced with the Raspberry Pi's GPIO connector and features six normally open relays, each capable of switching up to 16A @ 250VAC.
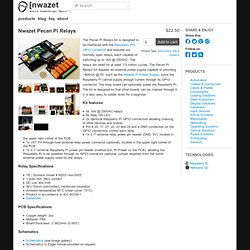
The relays are rated for at least 1.5 million cycles. The Pecan Pi Relays kit requires an external power supply capable of providing ~800mA @ 5V, such as the Nwazet Pi Power Supply, since the Raspberry Pi cannot supply enough current through its GPIO connector. The relay board can optionally power the Raspberry Pi. The kit is designed so that other boards can be chained through it. It is also easy to solder, even for a beginner.
Kit features Relay Specifications TE | Schrack model # RZ03-1A4-D0051 pole 16A, (NO) contactDC coil: 400 mW5kV/10mm coil-contact, reinforced insulationAmbient temperature 85°C (clear cover: 70°C)Product in accordance to IEC 60335-1Datasheet PCB Specifications Copper weight: 2ozMaterial: FR4Board thickness: 2.3622mm (0.093") Schematics Bill of Materials Assembly Directions and Time Sample Code #! SainSmart SainSmart. Controllable Power Outlet. In this tutorial we will discuss a small relay board to control the power to a normal AC outlet using 5VDC control. All the usual warnings apply: Main voltage (120VAC or 220VAC) can kill you. This project, done incorrectly, could certainly burn down your house.
Have your pet spayed or neutered. Shampoo is better. Do not work on or solder to any part of a project while it is plugged into the wall - just unplug it! You can get the Eagle files for the control board here. What’s a relay? A relay is a large mechanical switch. In this example we are going to talk about the simplest version of a relay. The other half the relay is called the coil. It is important to note the coil is physically isolated from the paddles. The paddles are capable of carrying very large currents. The relay that we will be working with, in this tutorial, is a beefcake in my opinion. Like we do with capacitors, we under-rate the relay so that we mitigate the risk of relay failure. The Outlet Materials: Using Relays with Arduino – Turning on the Lights. Warning!!!

This project deals with AC electricity which is dangerous if you don’t know how to treat it safely. You must treat electricity with caution. There are many books and websites about electrical safety procedures and if you’re not sure how to be safe you should read that information. The most basic advice I can give is always assume any exposed wires are live and touching them will hurt a lot at best and kill at worst. Microcontrollers are good at controlling small devices, but frequently we DIY-ers want to use them to control things that aren’t so micro.
The first thing you need is a cheap extension core that you are willing to cut in half. Arduino Controlled Relay Box. The great thing about this project is that there aren't a lot of parts that you need to get started.
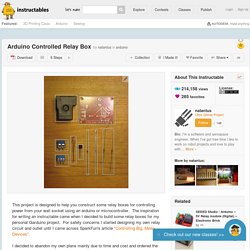
You probably have most of the parts lying around your junk box and the rest you can order directly from SparkFun or your favorite supplier. I've made a list of parts available on my wiki. SparkFun can supply the relay and PCB and your local hardware store will have your GFCI Outlet and electrical housing. Now a brief note about safety. Every time you work with electrical lines you may be risking your life if you don't use the right precautions. Connecting a 12V relay to Arduino.