
Bubblebot: a littleBits Project by monty_littlebits. C. Robot: a littleBits Project by mika. Sound Activated Bowtie: a littleBits Project by littleBits. Start by building the circuit: power + wire + sound trigger + wire + pulse + dimmer + servo.

The servo should be set on “swing” mode. Adjust the the sensitivity of the sound trigger using the little purple screwdriver. Then adjust the pulse and the dimmer to determine the angle of rotation and speed of your bow tie’s movement. Make a small box out of cardboard to house the sound trigger and the servo. This box will sit right in front of your neck so try to make it as small as possible.
Kids Ahead - Robotics Activities - Make a Smart Umbrella. Clapper Machine: a littleBits Project by lb_test2. Tips & Tricks: littleBits + Lego® Now you can connect littleBits to LEGO®!

With the Brick Adapter and motorMate, we’ve made it easy for you to integrate the two systems. > With brick strip studs, your littleBits’ modules will defy gravity! Simply snap strip underneath your LEGO® bricks and press the feet of your littleBits’ modules into place. > With sockets, you can mount your littleBits’ modules on top of LEGO® bricks. Table Tennis Scorekeeper #bitOlympics: a littleBits Project by JackANDJude. Light controlled car: a littleBits Project by Surya Kompella. Robo Fighter - Chef combattenti: a littleBits Project by LaTataRobotica.
Create a Swarm of Robot Minions with These Popsicle Stick Arduino Hexapods. Line Following Snack Serving Robot: a littleBits Project by rory_littleBits. Take the two mounting boards and sandwich them together so their mounting sides facing outward.

Zip tie the two mounting boards together by placing a tie through the mounting holes at each corner (four zip ties total). Begin building your circuit, start by placing the following on one side of the mounting boards: P1-Power → Branch → 2 x Wire On the other side of the mounting boards, you are going to build two identical circuits along the long side. Keep in mind the orientation of the DC motor will be different on each side. The DC motor shaft must face towards the outside of the board. Attach the Pololu wheels to the shaft of each DC motor. Warm up your hot glue gun and place your caster on the mounting board somewhere between the two bright LEDs.
Set the direction on each DC motor so they turn in the correct direction. Set the light sensors to “light” mode. At this point, it may be a good idea to test your robot and see how it’s operating. How did your robot do? Pizza Box Phonograph: a littleBits Project by Echo the Bat. Puppet Master: a littleBits Project by littleBits. Take a power module and connect the battery cable and 9V battery to it.
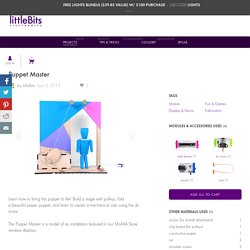
Be sure that the teeny on/off switch on the power module is switched to "on". build the circuit as the follow: power + wire + slide dimmer + dc motor. Note that instead of the slide dimmer you can really use ANY input you like. In our case we got picky and went for a dimmer and added a button to make it more tactile. Now, fold your puppet! Download the folding paper template below, "PuppetMaster_PaperTemplate.pdf" Let's gather materials to make cam. Time to make a d-shaft attachment. Now let's assemble the cam and pulley. B+C Shop Exclusive Offer: LED Birthday Candles, Light-Up Jackets & More! Big news!

We teamed up with littleBits to create seven exclusive DIY electronic project packs, and we’re psyched to crack them open and get wiring! Each project pack includes beginner-friendly modular bits that snap together with tiny magnets so you can make all kinds of gadgets to add creativity to every occasion. Wanna spice up a dance party like no one’s ever seen? Put a twist on a traditional birthday celebration? Or just tinker with something for your own hacking pleasure? Littlebits. RichB Northern Illinois University I guess that teaching has always been in my blood.
I remember as a youngster "playing school" with friends in my back yard. After graduating from college, I taught physics, earth science, and computer science at the high school level for fourteen years. Then I continued my education and earned a Doctorate in Computer Science, and have been teaching computer related classes at the university level for the past 28 years. Littlebits. Littlebits. Littlebits. Lessons. CloudBit Starter Kit. LittleBits Remote Pet Feeder. When away, make sure your pet (fish, cat, dog) never goes hungry with this WiFi-activated feeder.
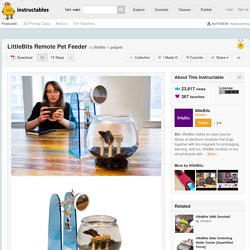
With this littleBits project, you can either feed your pet remotely by pressing a button on your phone or automating a feeding schedule through IFTTT (If This Then That). IFTTT is a service that lets you connect to different web apps through simple conditional statements. Make this project with littleBits. littleBits is the easiest and most extensive way to learn and prototype with electronics. We are making hardware limitless with our award-winning, ever-growing library of electronic modules, ranging from the very simple (power, sensors, LED) to the very complex (wireless, programmable). Getting Started with your CloudBit. Little Bits Bugs. LittleBits LazerTag Sensors. Littlebits Fan Assembly Video. Automated Littlebits Dog Feeder. LittleBits Tips & Tricks: The Sound Trigger Bit.
June 26, 2013 AT 9:10 am This is the first in an on-going series of posts about littleBits.
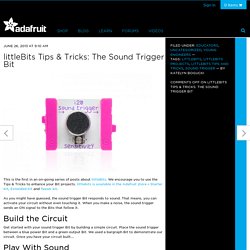
We encourage you to use the Tips & Tricks to enhance your Bit projects. littlebits is available in the Adafruit store – Starter Kit, Extended Kit and Teaser kit. As you might have guessed, the sound trigger Bit responds to sound. That means, you can activate your circuit without even touching it. When you make a noise, the sound trigger sends an ON signal to the Bits that follow it.
Get started with your sound trigger Bit by building a simple circuit. The Sound trigger responds to all sorts of sounds. You can adjust the sound trigger to respond to different ranges of sound. Use the sound trigger with the buzzer to make an infinite loop. We have all done it – slept in way past the time we are supposed to wake up.
When you are on the phone, you often don’t want to be disturbed.