
How to Make Easy Friendship Bracelets Out of String. How to make easy friendship bracelets that are out string?
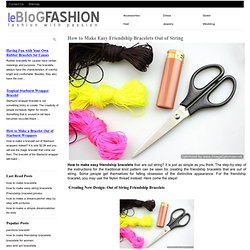
It is just as simple as you think. The step-by-step of the instructions for the traditional knot pattern can be seen for creating the friendship bracelets that are out of string. Some people get themselves for falling obsession of the distinctive appearance. Tutorial. View also: german website) and: view this you need a deviantArt account) Hello People!

:) This is a larger tutorial about how to knot a macramee pouch... For this version you need 98 double strings (up to 14 colours - if you want to, but you could also use only 2 - I used 11, some of them twice, some 3 times) - each as long as possible (about 150 cm) - colours are your choice. But don't be affraid, you start with 7 strings only and the other strings will be inserted later At the end of this tutorial I added a picture that shows the string order!
Btw: I used this kind of string: For to get a better view of the pictures click on "full view" below and use the magnifier of your browser, or save them and open them with some graphic software... also on deviantART you'll have to option to magnify the image if you click on it Other tutorials and patterns, that could be helpful to do this: Mandala Flower Tutorial: Plaid Pattern: Tutorial. In this tutorial you can learn how to make the Ankara-bracelet from supplemented by beads in the middle.
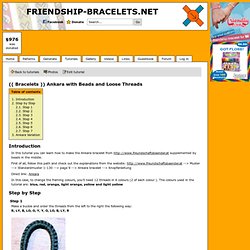
First of all, follow this path and check out the explanations from the website: --> Muster --> Standardmuster 1-130 --> page 9 --> Ankara bracelet --> Knopfanleitung Direct link: Ankara In this case, to change the framing colours, you'll need 12 threads in 6 colours (2 of each colour ). The colours used in the tutorial are: blue, red, orange, light orange, yellow and light yellow Step 1 Make a buckle and order the threads from the left to the right the following way: R, LY, B, LO, O, Y, Y, O, LO, B, LY, R.
Tutorial. So Here's the Original Prototype Made By Kamyk (The one at the extreme bottom) : After Experimenting Twice, I finally got it right ;) Halleellujjah !
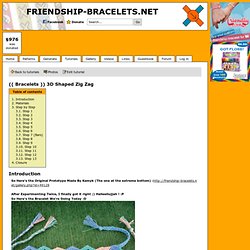
:P So Here's the Bracelet We're Doing Today :D -Colours:3 different colors according to your preference. -Strings:12 working strings, i.e. 4 strings per colour-Length:Cut approximately 60 to 65 inches or longer depending on your wrist size. To be on the safer side, stick to longer strings because they're much easier to work with. For this bracelet I will be using the colours blue, teal, and cream. You can start your bracelet however you want to. Step 1 Set Your strings up like shown below into 3 different groups Step 2 Start off with your middle most colour which is cream for me.
Step 3 Pick up your next string in line which is the 2nd string of the cream colour and do the same as the previous step, making 5 forward knots this time. Step 4 After you've used up all your cream strings you will have something that looks like this. Tutorial. - 8 strings (embroidery floss usually works best) 2 threads of each colour - 2 pieces of yarn.
These two should be thicker than the floss but if you have no yarn, you can use 2 or 3 strings of floss for each piece of yarn. You will not see these 2 strings! - You should make each string approx. 90 cm long. To start off, let's say your colours are red (A1 and A2), blue (B1 and B2) and green (C1 and C2), and the yarn colour is black (D1 and D2).
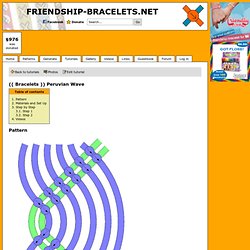
So your string order to start off with should be: Step 1 Take string C2 and make a forward knot over string D1, and another forward knot over D2. Take string C1 and do the same. Tutorial. Cut 28 inches of 4 colors you like.
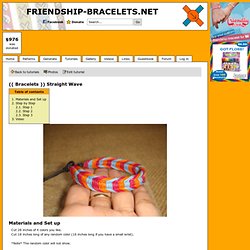
Cut 18 inches long of any random color (16 inches long if you have a small wrist). *Note* The random color will not show. Set up your strings in this order: | A | B | C | D | E | E | D | C | B | A | Tutorial. This tutorial shows you how to tie the bracelet buckle of mine.
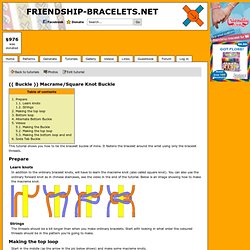
It fastens the bracelet around the wrist using only the bracelet threads. Learn knots In addition to the ordinary bracelet knots, will have to learn the macrame knot (also called square knot). Image Result for. Friendship bracelets. ► Friendship Bracelet Tutorial 14 - Beginner - Alternating Leaves Pattern. How to Make Easy Friendship Bracelets Out of String.