
KoalaHead. We're going to put those vector eyes you learned how to make not long ago to some good use!
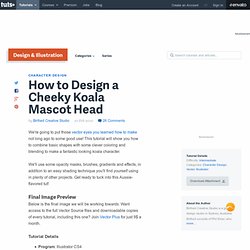
This tutorial will show you how to combine basic shapes with some clever coloring and blending to make a fantastic looking koala character. We'll use some opacity masks, brushes, gradients and effects, in addition to an easy shading technique you'll find yourself using in plenty of other projects. Get ready to tuck into this Aussie-flavored tut! Final Image Preview Below is the final image we will be working towards. Tutorial Details Program: Illustrator CS4Difficulty: IntermediateEstimated Completion Time: 30 - 40 minutes Step 1 Open a new 900px by 700px document, set it to RGB, at 72 dpi. With the Ellipse Tool (L) selected hold Alt + Shift and drag out a circle in the middle of your document.
Step 2 To get into a good habit from the outset, let's name our layers! Click on the small white arrow next to the thumbnail to show the paths of this layer. HumanFace. With a simple and direct methods described in this tutorial, you can create a female portrait easily.

This process will have you creating anatomically correct human faces in no time. Final Image Preview Below is the final image we will be working towards. Want access to the full Vector Source files and downloadable copies of every tutorial, including this one? Join Vector Plus for just 9$ a month. Tutorial Details Program: Adobe Illustrator CS 3Difficulty: IntermediateEstimated Completion Time: 60 minutes Step 1 Let's open a new document in Illustrator (File > New). Step 2 We start with the construction of the ideal female proportions of the head in full face. Take the Ellipse Tool (L) and create a circle centered at the intersection of the guides, move the cursor to the mid point of intersection and extend the circle, while holding down Alt + Shift to constrain.
Step 3 Step 4 Let's split this into five sections. Step 5 The diameter received five parts. Step 6 Step 7 Now press Command + D. TeddyBear. In this tutorial, you'll learn how you can easily add a retro feeling to your creations.

We'll also cover techniques such as using gradient mesh tool to add inner shadows to your objects, which gives them a subtle rounding while keeping your artwork scalable. Let's learn how to make a character head of a retro circus bear, then you can apply these techniques in your own work! Final Image Preview Below is the final image we will be working towards. Want access to the full Vector Source files and downloadable copies of every tutorial, including this one? Tutorial Details Program: Adobe Illustrator CS4 Difficulty: Intermediate Estimated Completion Time: 1 hour Step 1 In order to create this simple illustration I started with a raw sketch. Step 2 Now we'll outline the shapes of our teddy bear head. I decided not to use the Pen Tool. Step 3 The colors that we are going to use come from the yummy Adobe Illustrator built-in swatches palette: Foods > Ice Cream. Character Eyes. This tutorial will teach you how to create detailed vector eyes that can be used for all sorts of character design projects.

The techniques used here are basic and the processes quick and simple, but the result looks great. If you're a beginner, expect to learn a little more about opacity masks, gradients, effects, and handy shortcuts. If you're a more advanced Illustrator user then we encourage you to experiment a bit with the steps shown here! Enjoy! Final Image Preview Below is the final image we will be working towards. Tutorial Details Program: Illustrator CS4Difficulty: BeginnerEstimated Completion Time: 10 - 20 minutes Step 1 Open a new 800px by 800px document, set to RGB, at 72 dpi.
Step 2 With the Ellipse Tool selected, hold Alt + Shift and drag out a circle into the middle of your document. Step 3 Using the Direct Selection Tool (A), move the points using the Nodes and Handles to create a more irregular shape. Step 4 Step 5 Step 6 Step 7 Rotate your ellipse layer to around 45 degrees.