
DIY Gold Leaf Notepads. Lately we’ve been following a new craze popping up around the web.
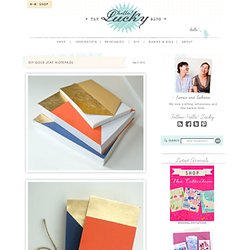
Gold leaf, historically used as an art medium, has now turned into one of the trendiest decor accessories this year. We’ve seen it on picture frames, furniture, fingernails, and jewelry, and once we saw Eat Sleep Cuddle use it for handmade notebooks we knew we had to give it a shot. Naturally our taste for nautical design comes into play when coming up with a new project, so these DIY Gold Leaf Notepads fit right in. Inspired by traditional nautical flags, we felt the pop of gold would compliment the classic color palettes seen in the flags. Tutorial aging paper by ~Joshua-Mozes on deviantART. Genius-or-stupid-11.jpg (500×1561) Paint chip calendar. A few weeks ago, I saw this paint chip calendar on my friend David’s blog Cheltenham Road and knew I had to make one!
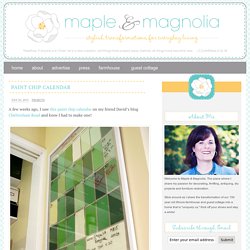
It combines two things that I love…stylishness and organization. And the fact that it utilizes paint chips? Even better. I mostly followed David’s tutorial with just a few modifications. That’s the beauty of this project…it’s totally customizable. Since I planned for this calendar to hang in my office, I chose paint chips that would coordinate with the room and with the pin board that hangs on the adjacent wall. Here’s my version. materials needed: poster frame, fabric, hot glue gun, 35 paint chips, paper trimmer, corner rounder, fabric glue, foam brush 1) Purchase a poster frame (mine came from Target…$9.99). 2) Remove the edges from the frame. 3) Cover the cardboard insert with fabric using hot glue to secure it on the back, pulling tightly to keep the fabric smooth. 4) Trim the paint chips with a paper trimmer (I chose to leave the paint color names but cut off the brand).
Dl.dropbox.com/u/505801/TU_typeone/twittertype/accordion_5x5.pdf. Craftside: Don't be a "Square" try a Triangle folded book from Creating Books & Boxes. As promised-here is a wonderful "how-to" for the Triangle Accordion Book I shared with you in yesterday's post.
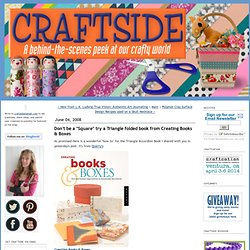
It's from Quarry's: Creating Books & Boxes:Fun and Unique Approaches to Handmade StructuresByBenjamin D. Rinehart Complete step-by-step instruction, full-color project photos, detailed step illustrations, diagrams, and tips. Creating Books & Boxes presents a new volume on book-making techniques by contemporary book instructor Benjamin Rinehart. Ben Rinehart is a trained artist, and teacher. (Click on images to enlarge) Nature-Inspired Paper Projects.
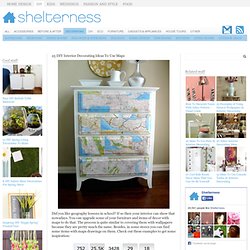
25 DIY Interior Decorating Ideas To Use Maps. Home design DIY Kids Weddings Fashion and Style FOOD Cool stuff 25 DIY Interior Decorating Ideas To Use Maps.
Mobile #001 Balloon « PaperMatrix. Anna has designed and made the pattern for these cute small hot air balloons.

Make a mobile and watch them fly and turn perpetually. For each balloon cut two sheets in the colours you prefer. All strips are joined already and you only need to weave as described for Sphere #001. Use the glue stick to fix the strips at the edge when finished. Choose the basket pieces from the same colour as the top centre of the balloon. For the mobile on the pictures we used five balloons and 4 slim wooden sticks (12, 12, 16 and 24 cm). The making of an origami Koi in stop motion. DIY Cupid's Arrow Cupcake + Treat Bag Toppers. Hello sweets!
Back in November (during the madness of the holidays) Fossil got in touch and asked if I would like to create a Valentine DIY project to share on their site. I love Fossil, so my answer was a quick “yes.” I ended up dreaming up a sweet little set that is perfect for a Valentine’s Day party for both kids or adults, or just for one special someone: Cupid’s Arrow Cupcake Toppers and Cupcake Bands (see how the cupcakes look like they’ve been shot by Cupid’s arrow!). The directions and free download can be found over on Fossil. UPDATE: The download and directions can now be found below! Download Cupid’s Arrow Cupcake Printables Follow the steps provided on the PDF download above.
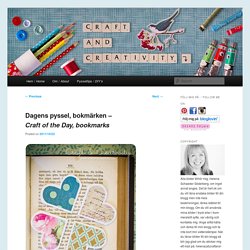
If you’d like you can also follow the simple directions below to create charming little Cupid’s Arrow Treat Bag Toppers (using the same free download that I made for Fossil). Option II: Treat Bag Toppers. Paint chip bookmarks. Bokmärken – Craft of the Day, bookmarks. Du behöver: Kuvert (återanvänd gärna gamla kuvert), ett ark med vitt papper (för mallen), sax, penna, lim och ett mönstrat papper.
Bow tie paper clips from fabric scraps. I had a couple little scraps left over from stiffened fabric projects, and after fiddling with them, I noticed they'd easily make tiny bows.
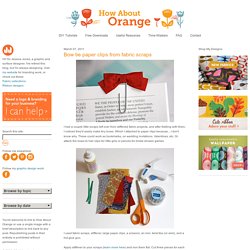
Which I attached to paper clips because... I don't know why. These could work as bookmarks, on wedding invitations, Valentines, etc. Or attach the bows to hair clips for little girls or pencils for bridal shower games. I used fabric scraps, stiffener, large paper clips, a scissors, an iron, twist ties (or wire), and a hot glue gun. Apply stiffener to your scraps (learn more here) and iron them flat.
Form the longest strip into a loop, overlapping the ends generously. DIY Fri: Map Card and Envelope. Carambola Flowers by Carmen Sprung. How to make boxes from paint swatches. If you've got paint chips sitting around begging to be made into something, try folding them into boxes for paperclips, thumbtacks, party favor candies, or tiny gifts.
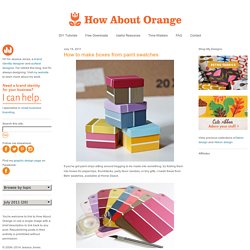
I made these from Behr swatches, available at Home Depot. You'll need paint swatches, double-stick tape, an X-acto knife, ruler, and cutting mat. For the box bottom, cut a 1/2" strip off each of the two rounded ends of the swatch.