
Mc221vXBVb1rijqzto1_500.jpg (479×719) Need to do this. Beautiful Toilet Paper Holder. Bump Smitten: DIY Tutorial: Paint Swatch Chandlier. My heart goes pitter patter for this do-it-yourself chandelier -- a perfect addition to your baby shower decor and/or a present for the baby nursery.
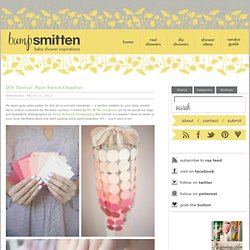
Created by Rhi of Hey Gorgeous (an oh-so-gorgeous blog) and beautifully photographed by Jenna McKenzie Photography, this tutorial is a keeper! Head on down to your local hardware store and start swiping some paint swatches. FYI... you'll need a lot! From Rhi... I have to admit guys, that ‘borrowing’ the paint swatches for this little project wasn’t the easiest thing to do. Monoprint Fabric. In college, when I was studying design, printmaking classes were always my favorite.

DIY: Stencil Text on Fabric. January 16th, 2012 Have you tried fabric markers yet? I finally got around to it, and they work great. Dreamcatcher DIY – How to make your own Dreamcatcher. Pin It if you love dreamcatchers as much as i do, you must check out the work of rachael rice. she’s a very talented artist who makes dream catchers that are beyond anything i’ve ever seen. and that’s just one thing she makes – she is extremely creative and was kind enough to share some of her projects and how she makes them for our blog!
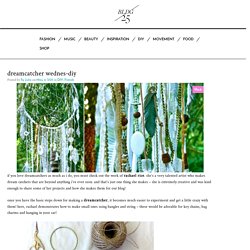
Once you have the basic steps down for making a dreamcatcher, it becomes much easier to experiment and get a little crazy with them! Here, rachael demonstrates how to make small ones using bangles and string – these would be adorable for key chains, bag charms and hanging in your car! Once this part is complete, attach feathers or any other embellishments using string! Rachael has also been making more conceptual dream catchers using pieces of cardboard or thick paper, vintage doilies and hand-made paper feathers! “Doily is a funny word. Schue love: Tufted Headboard Tutorial! A couple months ago, I featured my good friend Jamie Antonioli and her amazing DIY projects here.
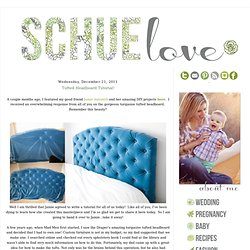
I received an overwhelming response from all of you on the gorgeous turquoise tufted headboard. Remember this beauty? Butterflies.... Imparting Grace. A few weeks ago I completed a fun project for my kitchen.
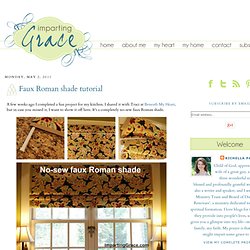
I shared it with Traci at , but in case you missed it, I want to show it off here. It's a completely no-sew faux Roman shade. Here's exactly how I made it. First I chose a fabric. I considered something light-colored, but this is a west-facing window, so I wanted a dark background color to provide good heat-blocking on summer afternoons.
This fabric looks cheerful and summery to me. After selecting fabric, I followed these steps to make the shade. Decide on the measurements you need. Lay your fabric out on a large work surface. Once you have your fabric to the desired width with the sides finished however you like, double the fabric over, right sides together. Turn the fabric right side out. And now for the secret tool that makes this shade possible: the tension rod. Insert the rod into one end of your fabric rectangle, like so: Hang your fabric rectangle in the top of your window frame. See? Glowing jar project – varázslat a lakásban (EN/HU) DIY Design Community « Keywords: firefly, summer, outdoor, Craft.
My birthday is on June 17th, which, when you're a kid, is a pretty great day for a birthday.
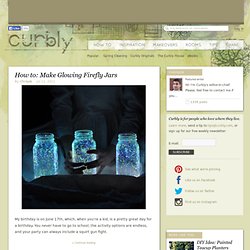
You never have to go to school, the activity options are endless, and your party can always include a squirt gun fight. Related Video: But, each year I also get another special, seasonal gift. Even now, among the good times with families and friends, I always see the first fireflies of the year on my birthday. It started with those outdoor parties and cookouts as a kid, and continued through the bonfires of high school, the theme parks of college, and now, a quiet evening walk with the people I love the most. Unfortunately, they seem to be one of those internet phenomena where things get passed around, and no one seems to know the original source. "Flick glow-in-the-dark paint onto the inside of a mason jar. Make 'em. Update: Cyndee, in the comments below, was able to locate a how-to from what seems like the author of the original photograph.
Guest Post: Inspired by Valerie Boy. Today we have our first guest post from a cute and famous blog, theletter4!
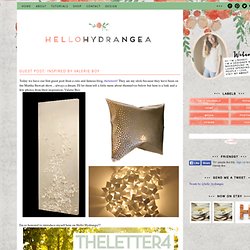
They are my idols because they have been on the Martha Stewart show... always a dream. I'll let them tell a little more about themselves below but here is a link and a few photos from their inspiration, Valerie Boy. I'm so honored to introduce myself here on Hello Hydranga!!! We are The Letter 4. A blog of 4 sisters with all different talents and tastes. I had a couple of blank canvas's that were calling my name and Valerie Boy's wall art inspiredthis cut canvas creation. So I sketched out some clouds on the back of the canvas. EnJOY it.: project 12 of 26 / a pinwheel painting. I have been dying to try a pinwheel painting since I saw this on pinterest ages ago.
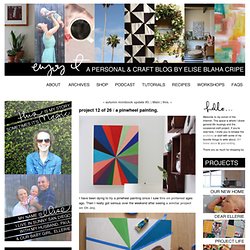
Then I really got serious over the weekend after seeing a similar project on Oh Joy. I bought a birch 18x24 canvas at Blick and marked the center with a pencil. Then I used painter's tape to create triangles (one at time) so their points all matched up at the center. I bought yellow, red, teal, cobalt blue and white acrylic paint and mixed to create different colors. The paint dried pretty quickly so I was able to tape off triangles right next to each other by adding a line of tape right on top of the painted edge.