
Bottom Mellow Dress. Taking Notes Skirt. Cool Car Caddy Straps On To Headrest. ROOOOOAAAAADDDDD TRIIIIPPPPP!
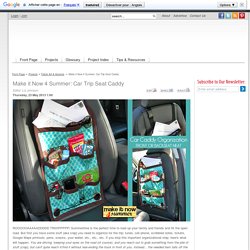
Summertime is the perfect time to load up your family and friends and hit the open road. But first you have some stuff (aka crap) you need to organize for the trip: tunes, cell phone, scribbled notes, tickets, Google Maps printouts, pens, snacks, your wallet, etc., etc., etc. If you skip this important organizational step, here's what will happen: You are driving, keeping your eyes on the road (of course), and you reach out to grab something from the pile of stuff (crap), but can't quite reach it/find it without rear-ending the truck in front of you.
Instead... the needed item falls off the seat, lodging somewhere between the seat and the door. SEWING 101: Patterns are your Friends. I think many people are intimidated by patterns and somehow feel it is easier to sew w/ out them.I am here today to try and convince you that it is actually way easier to sew with a pattern.
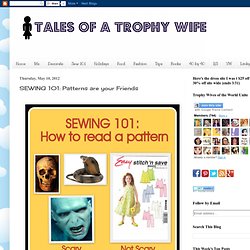
Pattern makers already figured out all the quirks and did the hard part. Patterns are not scary-they are your friends, and they are super cheap friends. You can usually by them for $.99-$1.99 at the fabric store. For this post, I'm going to pretend that I am making view B. Here's a couple of hints:Choosing a Pattern:1. Lots of lace. My new no pattern required top! A tutorial. Ok, so I finally have the pics to prove that I have been doing some sewing!
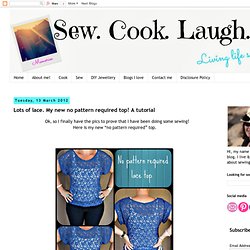
Here is my new “no pattern required” top. It really is so quick & easy to make a top like this. I didn’t even need to use the overlocker! I just used a zig zag stich to finish the edges as I think that sometimes, an ovelocked edge, can be too visible through lace. Folded Pleated Ruffles-Sewing 101. Today we are going to talk about pleats: I love pleats almost as much as pintucks.
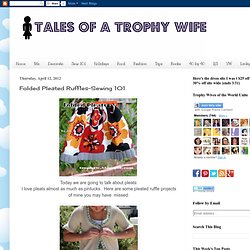
Here are some pleated ruffle projects of mine you may have missed: Are you ready for today's lesson? Taking Notes Revisited. There are only two more Sew For Me posts!
I have LOVED this series and working with the wonderful girls over at KOJO Designs! Today I am going to revisit one of my most popular tutorials. The Taking Notes Skirt. For some reason when I switched over to the new blog it didn’t bring ALL of the posts (grrrrrrrr). Sewing 101 Week 5: Pintucks. Welcome to week # 5 of: You can find weeks 1-4 HERE.
Today I want to talk about pin tucks -I confess, that I am a little in love with them. Check out my Pinterest Pin Tuck Board. Pin tucks are when you make a narrow fold purely for decorative purposes. They can be a little tedious, but are not difficult and add a little special touch to garments. I love this skirt from The Loft. Choosing fabric: Pin tucking will add extra weight to your garment, so pick something light, that will form a crisp fold when ironed. Welcome Back! Decide where you want your pintucks. Now fold the fabric over the pins. Then, remove the pins and place on top to hold it into place. Finally, I iron pin tucks toward the bottom of the skirt. FYI #2, it takes me about 10 minutes for each pin tuck, so you may just want to start w/ a few (after 11 rows, I decided The Loft skirt was a real bargain.
To finish, cut a strip of fabric for the bow. Sewing 101 Week 4: Love your curves. Welcome to week 4 of: Sewing 101 Today we are going to make a sweet little petal skirt and talk about the importance of clipping curves.
As always, you are going to need 2 measurements: the waist and the desired length of finished skirt. Step 1: Cut 2 pieces of fabric 2 X waist wide and length +2 inches long. Step 2: Find some sort of circle to use a pattern (glass, jar,etc.) Step 4: Place the pretty sides together (one inside the other) and stitch along the scalloped bottom edge with a 1/4 inch seam allowance. Sewing 101: How to Sew a professional seam w/ out a serger. If your a sewing newbie, please check out week 1(envelope pillow) and week 2 (easy bubble skirt) .

I've structured this series, so each week builds on previous weeks' lessons. It's great to sew your own clothes, it's just not great when it looks like you did. Finishing your seams is an easy way to make your finished garment look store bought. Step 1: Cut 2 pieces of well- ironed fabric. The desired length of the skirt + 4 inchesThe waist measurement+ 1.5 inchesFor example I am making a 6month size. Sewing 101 Week 2: Easy Bubble Skirt. Sewing 101-Lesson 1: Supplies and Basic Envelope Pillow. I love to sew.
People tell me all the time that they would love to learn to sew and I thought it would be a fun series for the blog. Each Friday, I will post some sewing tips, as well as a simple project that you can work on to try out your new skills. I am designing the series so that each lesson will build on each other. Concentric Squares Pillow. Eckhart Tolle on How to Free Yourself from Your Ego Armor - OWN TV. DIY Tutorial - Recycled Tie Dress. Before we begin, don't miss the post this week with 33 inspirational recycled tie projects, and a few more at Pinterest.
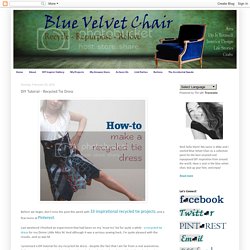
Last weekend I finished an experiment that had been on my 'must try' list for quite a while - a recycled tie dress for my Divine Little Miss M. And although it was a serious sewing hack, I'm quite pleased with the results...and so was M. I promised a DIY tutorial for my recycled tie dress - despite the fact that I am far from a real seamstress. 100 Days – Week of Prints – Altering Print Fabrics With Bleach « The Modern Quilt Guild. Dyeing and overdyeing fabrics is fun, but the time and materials involved can be overwhelming. Fortunately, there’s a fun and simple way to alter your favorite print fabrics using a product that’s probably already in your laundry closet (or at least readily-available at your local grocery store).
Bleach discharge is very simple. Fabric is soaked in a water and bleach bath for a period of time, during which the bleach in the water may discharge (remove or alter) some of the dye in the fabric. All fabrics don’t discharge in the same way. Basketweave Quilt Pattern. We get you sewing at PatternSpot.com - Sewing, Quilting, Garment Patterns, Projects, Ideas, Tutorials, Videos. Free Project: Felt Headband for New Year's Eve.