
27 Nail Hacks For The Perfect DIY Manicure. DIY Drippy Nails. We were immediately inspired the moment we saw bare nails with blood-like, drippy polish accompany Prabal Gurung‘s spring collection at New York Fashion Week.
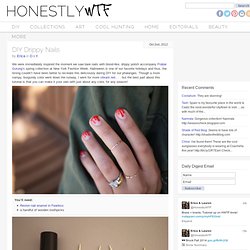
Halloween is one of our favorite holidays and thus, the timing couldn’t have been better to recreate this deliciously daring DIY for our phalanges. Though a more vampy, burgundy color went down the runway, I went for more vibrant red . . . but the best part about this tutorial is that you can make it your own with just about any color, for any season! You’ll need: Dip the toothpick into the nail polish bottle so that the tip collects a round bead of polish. Place the bead of polish on a bare nail and drag it upwards, creating a tapered line. Create two to three more tapered lines, re-dipping the toothpick into the polish each time. Reload the toothpick with polish and drag a line across the tip of the nail. Repeat the steps on the other nine fingers and voila, you’re done!! (all images by HonestlyWTF) Marcela F.'s (maforti) Photo. Newsprint Manicure.
I’ve never been one that has had long, beautiful, natural nails.
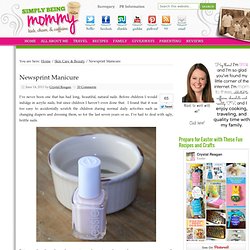
Before children I would indulge in acrylic nails, but since children I haven’t even done that. I found that it was too easy to accidentally scratch the children during normal daily activities such as changing diapers and dressing them, so for the last seven years or so, I’ve had to deal with ugly, brittle nails. But recently, there have been a turn of events and some how some way, my nails are miraculously growing strong and healthy! I’m not sure what has happened to promote this change, but I’m absolutely loving it and not complainin’ one bit! While stumbling one evening, I found this tutorial for a unique Newsprint Manicure and I knew I had to give it a try.
Before you get to paintin’, you should cut your newspaper strips so they are ready as soon as your nails dry. Let your nails dry completely. Hey, Nice Nails! Water Marble Tutorial.
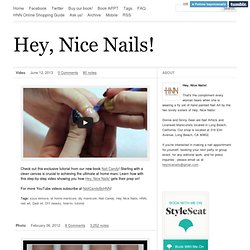
Supplies: orange stick or toothpick, shot glass or cup (the smaller the circumference, the less polish you end up wasting), room temp. water, nail polish, tape (optional, but it helps with the clean up) I like to begin by prepping my nails with base coat and one coat of polish. Here I used China Glaze Innocence for a nice neutral base. Steps: 1. 2. 3. 4. 5. 6. 7. 5 minutes nail polish removal tutorial. Disclaimer: I am definitely recommending this method.
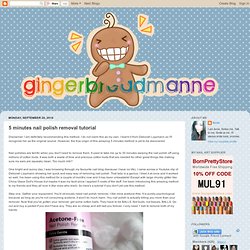
I do not claim this as my own. I learnt it from Deborah Lippmann so I'll recognise her as the original source. However, the true origin of this amazing 5 minutes method is yet to be discovered. Nail polishes are terrific when you don't need to remove them. It used to take me up to 30 minutes swiping the nail polish off using millions of cotton buds. STICKY SITUATION. Photos + design by Kristin Ess It’s really hard to get clean lines when it comes to putting stripes on manicures. MANI MONDAY. Photos + post designed by Kristin Ess There’s nothing more decadent than the Art Deco era so it was really exciting to translate that concept using black + gold on our nails.

Scalloped edges are a major factor in deco designs and create a very feminine feel. Love, Life, Family... and then some: Things I Love: Awesome Nail Designs part 2. Love Life Family...and then some Houston Texas Mom Blogger Never Miss a Single Post Not Found, Error 404 The page you are looking for no longer exists. Perhaps you can return back to the site's homepage and see if you can find what you are looking for. MANI MONDAY. Photos and post by Kristin Ess So Valentine’s Day has come and gone… but it’s never too late to learn how to do this!

We got a lot of emails after Valentine’s Day asking how to make a heart on your nails. Love is a year ’round thing so here we go: TOOLS: Toothpick, polish, a piece of paper or foil. Mermaid Nails - Cupcakes and Cashmere - StumbleUpon. Share this image Share It Pin It For our trip to Costa Rica, I wanted fun nails that had an almost tropical vibe.

I went back to Marie Nails (where I got this glittery combination) and got a bright tangerine color with graduated gold sparkles on just my ring fingers (which you can see here). It felt just festive enough and I couldn't wait to try out different combinations. Share this image {Essie's Mint Candy Apple & Martha Stewart's Aquamarine Glitter} {Paint two coats of the nail polish} {Add top coat along the bottom half of the nail} Share this image {Dip a separate brush into top coat and then into the glitter} {Apply glitter to the bottom half of your nail} {End result} How-To: Instant Nail Arts - Do Yourself.