

Tuto : un noeud parfait! Les magasins de vêtements sont de plus en plus nombreux à proposer de jolis accessoires type boucles d’oreilles, colliers, broches, etc, souvent à base de tissus, de rubans ou de biais, largement dans nos compétences de couturières.
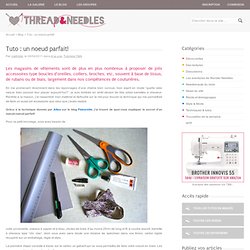
En me promenant récemment dans les rayonnages d’une chaîne bien connue, mon esprit en mode “quelle idée vais-je bien pouvoir leur piquer aujourd’hui?” , je suis tombée en arrêt devant de très jolies barrettes à cheveux. Rentrée à la maison, j’ai rassemblé mon matériel et farfouillé sur le net pour trouver la technique qui me permettrait de faire un aussi joli accessoire que celui que j’avais repéré. Grâce à la technique donnée par Altea sur le blog Fiskarette, j’ai trouvé de quoi vous expliquer le secret d’un noeud-noeud parfait! Pour ce petit bricolage, vous avez besoin de : La première étape consiste à tracer sur le carton un gabarit qui va vous permettre de faire votre noeud en biais.
Les deux “jambes du gabarit vont servir à faire les deux boucles du noeud. Headband Refashion. Our headband had a flower that was starting to look a little tired and worn so we made it new again!
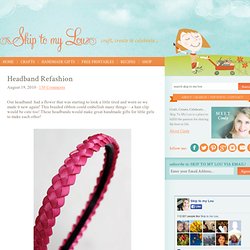
This braided ribbon could embellish many things— a hair clip would be cute too! These headbands would make great handmade gifts for little girls to make each other! Woven Ribbon Headband Gather a headband and about 4 1/2 yards of ribbon. You can use any with — I chose 1/4 inch. Begin by finding the middle of the ribbon. Now bring the bottom ribbon up and make a loop and send it through the beginning loop that you just made by crossing the ribbon. Pull the right side snug.
Now repeat for the other side, picking up the right side, making a loop and sending it up through the loop just made on the other side. Pull the left side snug. Pull right side snug. Continue braiding until you have a piece long enough to cover the headband. Bring the other side over and then trim. Tuto de bob & capeline - Melting Pots. Pour confectionner un bob ou une capeline (c'est uniquement la taille des bords qui fait leur différence) il faut ... vous remettre dans les formules de math!
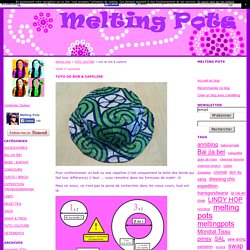
:D Mais no souci, ce n'est pas la peine de rechercher dans les vieux cours, tout est là: Donc, une fois avoir découpé 1, 2 et 3 en double exemplaire (en ayant laissé le "1 cm de couture" bien sûr), vous pouvez mettre "endroit contre endroit" les deux "3" et coudre ensemble le grand cercle.Repliez "endroit contre endroit" le "2" afin de former un cercle et cousez le bord (procédez de la même manière pour les deux "2")Ensuite, cousez sur l'envers les "2" tout autour de leur "1" respectif (vous me suivez toujours?! Coco-bandeau réversible (tuto) Braided Headband Tutorial. It's chilly outside here today and I'm loving it!
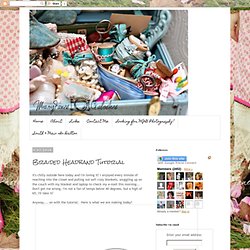
I enjoyed every minute of reaching into the closet and pulling out soft cozy blankets, snuggling up on the couch with my blanket and laptop to check my e-mail this morning... Don't get me wrong, I'm not a fan of temps below 40 degrees, but a high of 65, I'll take it! Anyway.... on with the tutorial. Here is what we are making today! What you need- Thick hair tie Six 1" strips of fabric Bulldog clip or safety pin Sewing machine (or needle and thread) Fabric tac I ripped my fabric strips so they were a bit frayed on the edges, personal choice. Tack each end of the braid just enough that it doesn't come undone . Then tack both braids together on each end, be careful not to twist the braids. Cut your hair tie so it's one strip of elastic.
Sandwich your elastic ends between the ends of your braids on each end, again, careful not to twist the braids. DIY : Cool T-Shirt headband. Hey Hey, Today's topic is about making your own headband.
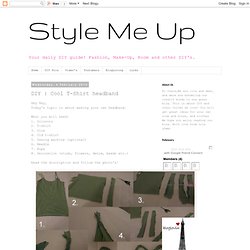
What you will need: 1. Scissors 2. T-shirt 3. Glue 4. Fat Quarter Project ~ Scalloped Headband. Vanessa from Punkin Patterns is up today with a new fat quarter project for this sweet, scalloped headband.
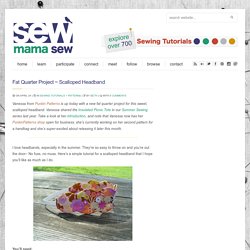
Vanessa shared the Insulated Picnic Tote in our Summer Sewing series last year. Take a look at her introduction, and note that Vanessa now has her PunkinPatterns shop open for business; she’s currently working on her second pattern for a handbag and she’s super-excited about releasing it later this month. I love headbands, especially in the summer. They’re so easy to throw on and you’re out the door– No fuss, no muss.
Re-purposing: Tshirts into 5-strand-braided-headbands. I was walking through Target a few weeks ago and noticed this little knit fabric headband that was not just braided together…….but woven.
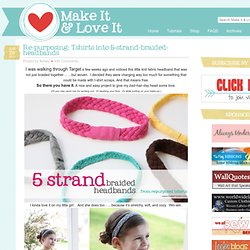
I decided they were charging way too much for something that could be made with t-shirt scraps. And that means free. So there you have it. A nice and easy project to give my bad-hair-day head some love. (Or you may need one for working out. I kinda love it on my little girl . She always has little hair fly-aways that get into her face…….and this helps with that problem. It even works great with her hair down…..and keeps that hair tucked behind her ears. And yep, good for me too. Thanks little t-shirt scraps. Want to make your own? First, find some old t-shirts. Then, cut your fabric into long strips. Next, stack your 5 strips on top of each other and sew together at one end.
Now, pull on each strip of fabric so that they kind of curl on the edges. But let me explain a little better. First, you’ll work on the left side. And that’s it. This post is sponsored by: Petitesbarrette.