

Tinting Bottles. April 16, 2012 by Aimee • Here is one of my favorite, SIMPLE Craft/Decor tips… How to Tint Bottles and Jars with Mod Podge, Water, and Food Coloring!
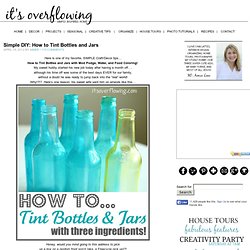
My sweet hubby started his new job today after having a month off…. although his time off was some of the best days EVER for our family, without a doubt he was ready to jump back into the “real” world! Why!?!? Honey, would you mind going to this address to pick up a box on a random front porch {aka, a Freecycle pick up}?! Usually, he rolls with it, but picking up a box of used beer bottles totally weirded him out! You can use any jar for this tutorial! Microwave 3 Tablespoons of water for 30 seconds, then add a lot of gel food color and dissolved FULLY. Mix the mod podge solution with a regular spoon or knife.
Start with your lightest color, then deepen your color with progressive bottles so that you can have varied shades of blue bottles. Can creation.
Teacup Candles. Crafter and all around awesome-girl kate pruitt will be joining d*s this month to share some fun, material-themed diy projects. she’ll be focusing on one material for the month and using it in a variety of different diy projects. for this month kate has chosen a material both she and i share an obsession with: ceramics!

If you’re like us you probably have a surplus of cute cups and bowls sitting around the house, and maybe would like to refresh them. these teacup candles are super easy to make and would be nice little handmade gifts for the upcoming holidays…if you can bear to part with your treasures! Click here for the full post and instructions or just click “read more” below happy crafting!
Kate’s Teacup Candles: What You’ll Need Directions: 1. 4. Pinecone fire starter. [today i'm thrilled to announce the the talented sisters from bbb craft, who had one of the most popular guest blogging stints we've seen at d*s, will be joining d*s as diy contributors!

Twice a month they'll share a project with us and we're so thrilled to have them. and a big congratulations to anna who just welcomed a new baby!] We first spotted these pinecone fire starters at the cool UK site hen and hammock, and thought we would try our hand at making our own. they are so easy and satisfying to make, and by adding essential oils, like eucalyptus, pine, or cinnamon, you can make your whole home smell amazing and cozy. they also make a great housewarming gift, so we stamped muslin tags and tied them onto the wicks. even for those without fireplaces, they are a pretty (and prettily scented) decoration! -the bbb craft sisters CLICK HERE for the full how-to after the jump! Materials: instructions: 6. after about five minutes, pull the pinecone out slowly with a twisting motion. Pink lip balm. This is a re-post of my guest post from the Color My Summer series Kojodesigns and I co-hosted in May….
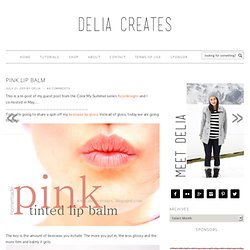
Today I’m going to share a spin off my beeswax lip gloss. Instead of gloss, today we are going to make: The key is the amount of beeswax you include. The more you put in, the less glossy and the more firm and balmy it gets. The great thing about beeswax is that it has natural sun protection qualities. As you can tell…I haven’t been in the sun much yet. Disclaimer: This recipe is just me experimenting and sharing what I did with you. Alright… let’s get started. Gather your supplies: 2 Tablespoons of grated beeswax Grate it with a dollar store or old cheese grater. 1 Tablespoon Coconut Oil {the kind you cook with} 2 teaspoons sweet almond oil A chunk of some red lipstick.
How much depends on your preference. 1/2 teaspoon of shimmery eye shadow – to add some subtle sparkle. Spoon Ring.
Sunshine Pillow. Hi there!

It's time for the special Holiday edition of the Red Velvet Workshop. In our newest webisode, Rachel, will teach you to make this adorable mod pillow! Floral Suitcase. Plain vintage suitcases are pretty great but cover them in your favorite coordinating fabrics and your house just got cuter! Not only do they look cute in your home, they're great photo props.
Decorate a nursery, stack them high in your living room, stand them up behind other items on a shelf, etc. It's an easy way to add color to your space without investing a lot of money. Keep an eye out for hard cases with stitched seams (for tucking fabric in) and think about using a variety of sizes for great impact. You no longer have to pass up the perfect case shape because of a nick in the vinyl! First, gather your supplies. . , a paint brush, a pen, scissors, a rotary cutter (or a butter knife). Carefully spread a thin layer of Mod-Podge over one third of your case starting at one side.
Transfer Photo to Fabric. Did you know you can transfer photos to fabric without using iron-on sheets?

I love this technique. It's simple to execute and the end results are really pretty. It's another method for hand printing! I made some fabrics the other day and used them to add pockets to one of my wool skirts.