
Little Boy Bowties. Our family computer bit the dust so my posts are going to be few and far between.
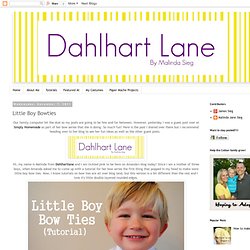
However, yesterday I was a guest post over at Simply Homemade as part of her bow series that she is doing. So much fun! Here is the post I shared over there but I recommend heading over to her blog to see her fun ideas as well as the other guest posts. Hi, my name is Malinda from Dahlhartlane and I am tickled pink to be here on Amanda's blog today! Since I am a mother of three boys, when Amanda asked me to come up with a tutorial for her bow series the first thing that popped in my head to make were little boy bow ties. For these ties, you need to cut out four 3x4 slightly rounded rectangles and one long 2 1/2x 19 inch strip.
Take your little rounded rectangle-ish shapes and place them in two pairs with right sides facing in. Sew each pair around the edges but be sure to leave one inch open in the middle of one side of the base. Next, fold your long strip of fabric in half and sew along the long edge. T-shirt Transfer Jeans. I used to love t-shirt transfers when I was younger, but eventually got fed up at how the image would (inevitably) crack and crease over time.
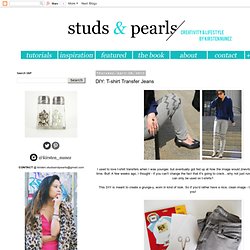
But! A few weeks ago, I thought - if you can't change the fact that it's going to crack...why not just run with it? And who says they can only be used on t-shirts? This DIY is meant to create a grunge-y, worn in kind of look. So if you'd rather have a nice, clean image - then, well, this one isn't for you! Supplies: - T-shirt transfers, at least 2 - Scissors - Light colored jeans - Printer (not shown) - Charcoal or colored pencil - Adobe Photoshop, or another graphic design program (or just download the print I used below) Studded Shoulder Top. I love love love basics.

Maybe it's because they're so easy to customize, or maybe because I know they'll match with everything. Either way, I like my basics to be well made and comfy. If you're the same way, check out Bella - I love the aesthetics of this brand. Their clothing is simple but sexy, providing the perfect base for making it completely your own. I was given the chance to DIY some of my favorite pieces from Bella's line, and here's the first one! I also used cone studs (crustpunks.com & studsandspikes.com are both great places to buy studs). You'll need 32 total, 16 for each shoulder. 1) Find the seam on the side of the sleeve. 2) Carefully insert the first stud on top/along the seam. The prongs will pierce through the fabric, like above. Because you're not working with a leather or a coat, you don't have to use a lot of force while doing this. 3) Keep studding until you have 4 studs along the seam. 4) Add 3 studs on each side.
Studded Sleeve Hoodie. This past summer, Bella Clothing sent me some of my favorite pieces from their simple yet sophisticated collection.
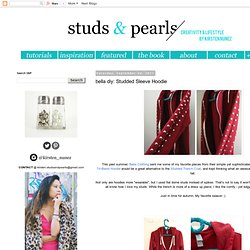
I knew their Tri-Blend Hoodie would be a great alternative to the Studded Trench Coat, and kept thinking what an awesome piece it would be for the fall. Glitter Converse. Heart Jeans. If you haven'tnoticed, I have a bit of an obsession with hearts.

I even designed a pair of high waisted jeans with hearts on the knees recently. This got me thinking... it would be super fun (and easy) to add hearts to the knees of almost any pair or jeans! I'm enjoying gathering new pieces for my fall and winter wardrobe, including a few DIY pieces like these jeans. I'll share how I printed mine below... Outfit Details: Jeans c/o Levi's, Blouse c/o ModCloth, Shoes/Jeffrey Campbell, Necklace/My design for ModCloth. Owl Costume. Hello all, I'm Chelsea from Seablanket.com!

I was so excited when Elsie asked me to create a DIY for Tricks & Treats, and I knew just what to make. I love dressing up on Halloween and really wanted to wear something fresh this year - something cute and unique. This Lady Bird Owl Costume is made entirely from items I had around the house, and by settling down with some popcorn and a funny movie i was able to make it in under one hour. The steps for this costume could make so many different animals, all it takes is a little imagination.
Materials Needed:Pillow Case Multiple Textured, Colored and Patterned Fabrics (Scraps work great for this project!) Step 1. Step 2. Step 3. Step 4. Step 5. By adding fun eye shadow, a few feathers, and messy nest-like side bun, the outfit is complete! PS. the official Tricks and Treats Schedule (for days 1-6) is right here. Glitter Shoes. Elbow Patches.