
How to Make Beautiful Beads From Recycled Newspaper. I love finding ways to turn everyday common items, which would otherwise go into the garbage, into beautiful items that everyone can enjoy!
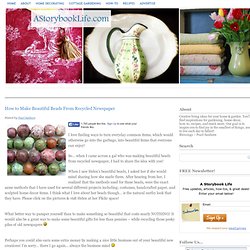
So… when I came across a gal who was making beautiful beads from recycled newspaper, I had to share the idea with you! When I saw Helen’s beautiful beads, I asked her if she would mind sharing how she made them. After hearing from her, I realized that the methods used for these beads, were the exact same methods that I have used for several different projects including; costumes, handcrafted paper, and sculpted home decor items.
I think what I love about her beads though… is the natural earthy look that they have. Please click on the pictures & visit Helen at her Flickr space! What better way to pamper yourself than to make something so beautiful that costs nearly NOTHING! Perhaps you could also earn some extra money by making a nice little business out of your beautiful new creations! Step #2 – Rip the paper into small pieces. How to Make Your Own Easy Picture Frame Earring Holder. Place a cloth or towel on your work surface before flipping your frame over onto it to prevent any scratches on your new paint.

I prefer staples as this lets the screen stay nice and tight, and is a lot easier. However, if the wood on your frame isn't thick enough, the staples will go through the wood on the other side. In this case it is best to use a hot glue gun. With Staples: You want to fasten it right in the crease of the frame where the glass would have lain in. Don't cut the screen yet.
With a Hot Glue Gun Start the same - at the top of the frame, fastening it at the middle with a bead of glue. Quickness and a very hot glue gun are the key to this method. Colored Pencil Jewelry - StumbleUpon. Note from Design Mom: I asked Kate of Mini Eco to create a Back to School themed project for us to try.
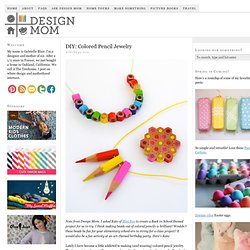
I think making beads out of colored pencils is brilliant! Wouldn’t these beads be fun for your elementary school-ers to string for a class project? It would also be a fun activity at an art-themed birthday party. Here’s Kate: Lately I have become a little addicted to making (and wearing) colored pencil jewelry.
I think the results look great and you, or your child, will definitely stand out from the crowd wearing them! You will need Colored PencilsJunior hacksawFine sandpaperDrill and small drill bitThread (for the necklace)Superglue (for the brooch and earrings)Brooch back (for the brooch) How to: Basic Bead Necklace 1. 2 & 3. 4. How To-sday - Wooden Branch Buttons. Jewelry Organizer (and a giveaway) - Create-Celebrate-Explore - StumbleUpon. UPDATE PART 2: My Jewelry Organizer won the Elmer's Spring Creation Contest.

I'm absolutely thrilled. Aside from receiving a visa gift card for winning, I also had the privilege of drawing 3 more winners from the comments via random.org to each receive an Elmer's DIY kit. The winners were: April, Barbara (VinoLuci), and Bestie. UPDATED: This giveaway has closed. The winners as drawn by random.org are wendyp, JulieB and Miranda Taylor. Peg Board and Accessories Station. This project believe it or not is for my sweet husband. … We have been married for almost 14 years!

My poor guy has not just put up with me but with my jewelry all over the place. Now I have to be honest it is not just jewelry since I admit to have an “accessory problem” that includes belts, scarves, purses and shoes. Well… those messy days are OVER honey .… because I made a jewelry station that sits right inside of our walk-in closet. I think this is my new favorite place in our home. Let me start with the Peg Board. Before anything else you need to frame the back of the board since it has to come out from the wall… Yo can use any thin board, 1″ wide is good enough… Just make sure all corners are covered for best support. After the backboards are ready all you have to do is attach them to the peg board. The next thing I did was paint the board.
Decor 101: Make a DIY jewelry tree - New York How-To Home Design. Here is an easy way to display jewelry that can cost less than $1 to make.

Jewelry trees can be purchased at retailers like Bed, Bath and Beyond and Urban Outfitters. Urban Outfitters has more than eight different kinds of jewelry trees, including the Little Birch Jewelry Stand shown below. They are handy and stylish but can run $20 to $40. The do-it-yourself version involves finding a real tree branch, painting it and displaying as is or putting it on a stand. The first example is from Connie at the blog A Sweet Concoction. "A while back I bought a jewelry stand on Ebay but [it ] was too small and failed to keep any of my jewelry organized," Connie wrote.
For Connie's version, you'll need a large tree branch with lots of offshoots and white spray paint. The second version comes from Amanda and Chelsea at the blog Two Tumbleweeds. The third from Kate at Centsational Girl is similar but larger, with lots of room for all your bling.