
How to set up your ZapBox. Important!

Before you start please make sure to read the safety instructions. You can find them here or in the ZapBox box 1. Controller Assembly Transform a single piece of card into a mixed reality controller in less than 5 minutes. 2. Connect your shiny new controller with the ZapBox app. 3. Increase the field of view of the camera by placing the included fisheye lens on your mobile device. 4. Calibrate your device’s camera with the calibration grid for the best ZapBox experience. Beatsy on the App Store. Requires iOS 14.3 or later.
Augmented Reality Paper Mario : 4 Steps. Augmented Reality Tutorial for Beginners With Vuforia and Unity 3D : 3 Steps. Augmented Reality Sandbox : 14 Steps. Whew!
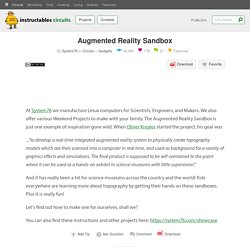
You've made it through the setup and calibration! As long as you don't change the physical setup of your sandbox (in particular, the position of the Kinect, the projector, and the sandbox relative to each other), you never need to calibrate it again. Although now that you have the hang of it, you might want to go through the calibration again in order to achieve a more accurate setup. If you hold your hand above the sand surface (like a cloud), you can "make it rain" like in the image above. As a convenience, the System76 packaging for Ubuntu includes a launcher you can search for in the Ubuntu dash. SARndbox -uhm -fpv -evr -0.01 The -evr -0.01 bit of the above command sets the evaporation rate. So you typically want to set an evaporation rate, especially when deploying the Augmented Reality Sandbox in schools or museums. If our recommended evaporation rate seems too fast for your tastes, try: SARndbox -uhm -fpv -evr -0.005. How to Take a 3D Photo with Any Smartphone.
3D has a way of popping in and out of short-lived trends, but the ability to create a 3D photo without any added hardware could give the technology more staying power than 3D TVs.
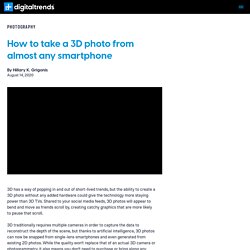
Shared to your social media feeds, 3D photos will appear to bend and move as friends scroll by, creating catchy graphics that are more likely to pause that scroll. 3D traditionally requires multiple cameras in order to capture the data to reconstruct the depth of the scene, but thanks to artificial intelligence, 3D photos can now be snapped from single-lens smartphones and even generated from existing 2D photos. While the quality won’t replace that of an actual 3D camera or photogrammetry, it also means you don’t need to purchase or bring along any additional gear in order to make one.
Of course, if you plan on shooting a lot of 3D, dedicated 3D cameras will still offer more quality and less room for error. 1. There are a few dozen 3D photography apps dotting the app stores, but not all are created equal. Holo on the App Store. Looking Glass Portrait by Looking Glass. Sans titre. Just a Line - Draw Anywhere, with AR - Apps on Google Play. Sans titre. Weird Cuts uses the procedure of cutting and assembling to augment the space and to explore the poetics of AR with collages.
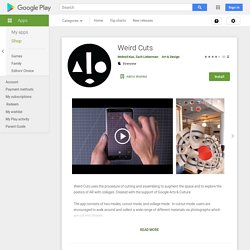
Created with the support of Google Arts & Culture. The app consists of two modes, cutout mode, and collage mode. In cutout mode, users are encouraged to walk around and collect a wide range of different materials via photographs which are cut into shapes. In collage mode, users can assemble and arrange their cutouts in 3d space by moving and tapping the screen. A user may also make adjustments of the shapes while holding down their finger and moving it up, down, left or right to rotate and scale. The output is a multi-dimensional work made from combinations of collected and found objects and spacial improvisation.
The inspirations come largely from artists such as Hannah Hoch, David Hockney, Gego (Gertrud Louise Goldschmidt), Ruth Asawa, Jean Arp, to name a few. Just a Line - Draw anywhere, with AR. Augmented Reality Apps - Augment. AR-media™ - Store. Créer sa réalité augmentée avec l’application Aurasma (versions inférieures à (...) La réalité augmentée (ou RA) est la technologie qui permet d’ajouter des éléments virtuels (texte, image, vidéo, animation, son, sensation tactile…) à notre environnement proche.
Aurasma, c’est tout d’abord une application mobile permettant de « lire » la réalité augmentée réalisée spécifiquement pour cette application. Elle permet également de créer sa propre réalité augmentée. En effet, on peut facilement, depuis son smartphone ou de sa tablette, incruster une image ou une vidéo sur un élément du réel. Liens de téléchargement d’Aurasma Un peu de vocabulaire : Avec l’application Aurasma, on peut créer, partager et lire des Auras.
L’élément déclencheur ou Trigger image c’est ce qui est reconnu par Aurasma pour déclencher l’incrustation de l’élément virtuel ou Overlay [1]. Il est possible de créer des canaux ou channels dans lesquels seront ajoutées les Auras. Pour bien commencer : Pour créer une Aura il n’est pas utile d’autoriser l’accès de l’application au service de géolocalisation.