
FASTEST RECYCLED T-SHIRT TOTE BAG. Recycled glove chipmunk. Ribbon Flower Tutorial. Ribbon Flower Tutorial By Lisa M.
Pace 1. Cut ribbon approximately 12 inches 2. Starting at one end of your ribbon weave your threaded needle in and out of the ribbon as shown (I thread my needle with the thread still on the spool. This way I don’t have to worry about not having my thread long enough or my ribbon coming off of the thread) 3. 4. 5. 7. 9. 10. Have fun! Related Posts: Loft or Bunkbed Organizer. Curtain making for dummies - by a Dummy. Hot Rice Bags. Warm face, warm ‘ands, warm feet Aow, wouldn’t it be loverly?
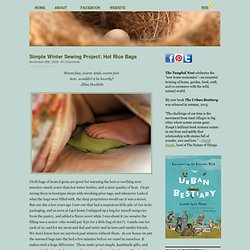
–Eliza Doolittle Cloth bags of heated grain are great for warming the bed or soothing sore muscles–much cozier than hot water bottles, and a nicer quality of heat. I kept seeing them in boutique shops with shocking price tags, and whenever I asked what the bags were filled with, the shop proprietors would say it was a secret. Sleeper of a Bag. Dragon Slippers. I thought I’d kick off our month of boy with a tutorial for these extracute dragon slippers.
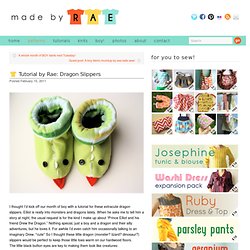
Elliot is really into monsters and dragons lately. When he asks me to tell him a story at night, the usual request is for the kind I make up about “Prince Elliot and his friend Drew the Dragon.” Nothing special, just a boy and a dragon and their silly adventures, but he loves it. For awhile I’d even catch him occasionally talking to an imaginary Drew. *cute* So I thought these little dragon (monster? The little black button eyes are key to making them look like creatures: and the little tongues are pretty hilarious.
Elliot got really excited about the first green pair I made him and wore them all over the house right away. Although I designed this slipper especially for Celebrate the Boy Month, I think you’ll find that other members of your family might want a pair as well. How to make a tutu. Today I am going to teach you how I make a tutu.
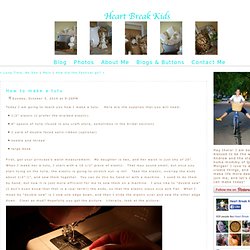
Here are the supplies that you will need: 1/2" elastic (I prefer the braided elastic)6" spools of tulle (found in any craft store, sometimes in the bridal section)1 yard of double faced satin ribbon (optional)needle and threadlarge book First, get your princess's waist measurement. My daughter is two, and her waist is just shy of 20".
When I make her a tutu, I start with a 16 1/2" piece of elastic. Set your elastic aside, and get ready to cut your tulle. Ten inches is the standard length that I use when making a tutu. I am just noticing that it is a bit hard to see the orange tulle that I am cutting in this picture. Once you are done cutting, you are ready to start tying. Find the middle slide the tulle under the elastic start your slip knot pull the ends through pull the ends down (this is a loose knot) this is what the loose knots for a play tutu should look like this is a tight knot Finally, I like to add a ribbon to my tutus. Felt Camelia tutorial and pattern. Remember when I shared that I wanted to celebrate spring? Well the celebration has begun =] First I am going to share flowers made out of felt.
And these particular ones are very easy! Wallet-to-Tote On the Go ~ Tutorial. Lorraine from ikat bag is a favorite around here… She has tons of fun tutorials on her blog and she’s joined us before with this wonderful Back to School Pencil Case tutorial.
Today Lorraine shares a tutorial for a new summer essential, the On the Go Wallet-to-Tote! Construction includes three main parts: Assembling the Wallet, Assembling the Outer Bag and Making the Lining. The tote zips into a convenient wallet in this unique and handy design. From Lorraine: Hello, Everyone. I am very excited today to share this tutorial for a wallet that morphs into a tote! These little bags have been around for as long as I can remember, and I thought they’d be a useful addition to the arsenal of summer gear I stash in my car and/or purse.
I have three little girls, aged 3,4 and 6, and we’ve found that summer always takes us on adventures we hadn’t planned for– detours to farmer’s markets, dancing in the rain or treasure hunting en route to the park. Part One: Assemble the Wallet:You will need: Fingerless Mitts parts 1+2: Recycled Sock Mitts! Remember the Fingerless Mitts Times 3 project I had in Craft: 10 back in February?
Well, now that it’s getting colder, I want to share the tutorials with all of you do stuff! Readers! I’m dividing the 3 mitt types into 2 parts, because the first 2 go together – the 2 different recycled sock mitts, shown together below.