
Bracelet Making Tips & Design Inspiration by Tracy Statler. DIY Braided Bead Bracelet. It’s been awhile since our last bracelet DIY.

I don’t know about you, but our wrists have been begging for another colorful addition for months now. So after playing with some materials that were already on hand, we’ve created a tutorial for a braided bead bracelet, which is a not so distant cousin of the hex nut and wrap bracelet. Because honestly, you can never have too many . . . You’ll need: Cut the waxed linen cord into a 26″ and 19″ piece. Tie a knot about half an inch down from the loops.
Start braiding the strands. Push the bead against the base of the braid, and cross the left strand over the middle. Keep a finger at the base of the braid, holding the beads in their place and keeping the braid tight. Finish the bracelet with another inch of braided cord, measuring it against the wrist. Thread on a two hole button – two strands through one hole and one strand through another. Trim the end. Lightning In A Bottle Tutorial. Remember that time (a few days back) I showed you this Guess The Mystery Thing necklace, featuring a little captive Cupid?
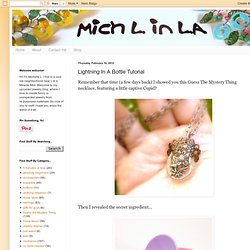
Then I revealed the secret ingredient... Binky!!! How to Make Book Earrings (with pictures) Bird nest necklace} I have been seeing a lot of bird nest jewelry around lately.
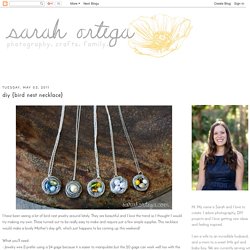
They are beautiful and I love the trend so I thought I would try making my own. These turned out to be really easy to make and require just a few simple supplies. This necklace would make a lovely Mother's day gift, which just happens to be coming up this weekend! What you'll need: - Jewelry wire (I prefer using a 24 gage because it is easier to manipulate but the 20 gage can work well too with the help of some round nose pliers) - pearls or glass beads - necklace chain - jump ring and a clasp Select the beads you want, string them onto your wire and arrange them as you'd like. then simply wrap the wire around the beads wrap some wire in the space between each bead (I like the look of three loops but you could just do one or two if you prefer) this is what the back looked like.
19 Beautiful Must Haves For Your Fall Wardrobe, According To Fab You Bliss. A beaded fabric flower necklace tutorial. Lately, I've noticed both Etsy and Anthro featuring fabric beaded necklaces.
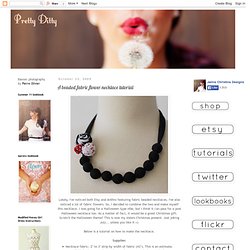
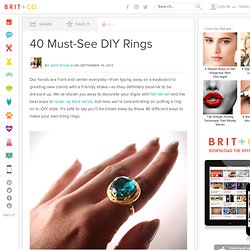
I've also noticed a lot of fabric flowers. So, I decided to combine the two and make myself this necklace. State of Unique. Button Statment Rings. It’s September and that means it’s time to add another statement piece to your collection…. obviously!

I heart almost every piece Nicole Richie designs for House Of Harlow 1960, especially her oversized rings. As amazing as these rings are they’re also an easy DIY. My friend Jenni, from I Spy DIY, did a project a few months back where she transformed buttons into earrings. #SuperFab This got me thing…let’s transform buttons into statement rings! Buttons, buttons everywhere!! Materials: Buttons, Clippers, Glue, Rings With Flat Tops (available at the jewelry supply store) Use your clippers to remove the shank from the back of the button. Once you’ve made the back of the button flat, use an ample amount of glue to secure the ring to the back of the button. Button Statment Rings. 40 Must-See DIY Rings. Our hands are front and center everyday—from typing away on a keyboard to greeting new clients with a friendly shake—so they definitely deserve to be dressed up.
We’ve shown you ways to decorate your digits with fall nail art and the best ways to cover up bare wrists, but now, we’re concentrating on putting a ring on it—DIY style. It’s safe to say you’ll be blown away by these 40 different ways to make your own bling rings. 1. Emerald Green Statement Button Ring: This stunner is seriously as simple as DIY rings get. Find a gorgeous button, snip off its shank, then glue that gem to a ring back. 2. 3. 4. 5. Colored Pencil Jewelry - StumbleUpon. Note from Design Mom: I asked Kate of Mini Eco to create a Back to School themed project for us to try.

I think making beads out of colored pencils is brilliant! Wouldn’t these beads be fun for your elementary school-ers to string for a class project? It would also be a fun activity at an art-themed birthday party. Here’s Kate: Lately I have become a little addicted to making (and wearing) colored pencil jewelry. I think the results look great and you, or your child, will definitely stand out from the crowd wearing them! Lucky Penny Charms Tutorial. Posted on July 18, 2012 by Christina Feeling lucky because you’ve snagged the best guy in the universe?
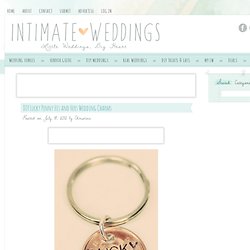
Make lucky penny charms for you and your sweetie to commemorate the year of your marriage. DIY Beaded Spiders. Great Tutorial on how to make these ...