
A Beautiful Mess: SCRAPBOOK. I always stumble upon beautiful handkerchiefs at antique malls, but with no practical use for them I usually pass them by.

But today I will be sharing how to turn those pretty hankies into a photo-a-day journal. This is a great project to commemorate the last of your summer days! You could an instant camera or print off Instagram photos! You'll Need: Vintage handkerchief, sewing machine, book pages or other paper, embroidery thread, letter stickers, Instant photos or other printed photographs. 1. Now fill up your pages with a photo-a-day project. I decided to keep my book simple and date each photo with a White Dymo pen underneath each photo. The Basic Binding of Books: A Tutorial. Tutorials | About Me | Contact | Soapmaking Tutorial.
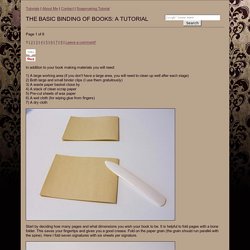
Curiously crafty. Welcome to the wonderful world of journalling! I promise, if i can make one then you can too. the following instructions will make a journal that is 5 3/4″ x 4 1/2″. (view more journals here) Materials: 60 – 70lb. paper (i use 20 sheets per journal) one sheet of white paper for the cover guide, cut to 5 3/4″ x 9 1/2″ decorative paper for end papers (I used scrapbook paper: you will need 2 papers that measure 5 1/2″ x 8 1/2″ each)cardboard covers are 5 3/4″ x 4 1/4″ eachspine is 5 3/4″ x (width of pages; to be discussed later)fabric (1/2″ wider than cover guide on all edges)pencilscissorsgluewax paperclothespins/paperclipsrulersewing needlestrong thread (you can buy bookmaking thread, or just use hand-quilting thread)bone folder (*optional)awl (*optional) Part 1: Sewing the pages.
Tacket binding - CaiLun.info - Artist Books Paper & Bookbinding Blog - Cai Lun - Dennis Yuen. I have always loved tacket binding, because its sasuage-like packing on the spine is so cute.

I have just finished one for my co-worker's boyfriend, Todd, and I think I might have perfected my tacket binding skill so it's about time to share it as much as possible. I have been devising my own tacket binding method, as I haven't actually seen one physically to deconstruct and examine its construction. My method may or may not be the same as the conventional one, but so far, it works. Pierce 4 holes for every single tacket pattern. Contruct the "backbone" for the packing with the 2 holes that are the furthest apart. Each section is stitched individually with 1 single thread.
Pull the thread out from A2 to the outside and you're ready to create the tacket pattern on the top "backbone". Pull the thread out from B2 to the outside to beging packing the lower pattern. Longstitch Bookbinding Tutorial for a Leather Journal. The most common type of sewn bookbinding that I often default to, falls into the category of longstitch binding.

It’s really a general categorization for many different methods of sewn binding. People have invented their own patterns and techniques and have probably called it something else as well. Suffice to say, it’s a general way to denote sewing your paper to the cover of your book. I’m sure you’ve noticed journals out there with exposed sewing in the binding in a variety of patterns and designs. They are all technically longstitch binding techniques, but in different patterns. The materials for this project include leather, paper, thread, needle, an awl and cutting device of some sort. Regarding the thread, I’m using a natural linen thread in this example, but you can also use waxed thread sold specifically for bookbinding to prevent knotting up when sewing. Regarding my little awl, I use it to punch holes in the paper. This is what you see on the outside binding… Related Posts: Make This - Stab Bound Journal - Luxe DIY - How Did You Make This?
Make a hand bound journal with elaborate side stitching for yourself or as a gift.
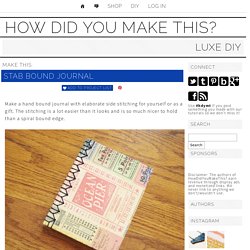
The stitching is a lot easier than it looks and is so much nicer to hold than a spiral bound edge. Supplies and Equipment – sharp utility knife and cutting surface BE VERY CAREFUL WITH THE SHARP BLADE – rulers – drill with 1/16th inch bit OR a small paper punch BE VERY CAREFUL WITH POWER TOOLS – fancy cover paper – I used Cavallini Vintage Tickets Wrapping Paper – 20″ x 28″ – 1 sheet of 8.5×11 for endpapers (this can be fancy or the same paper as your pages) – 10 sheets of 8.5×11 paper for pages – 3 yards of embroidery floss – mat board – I used Crescent No. 33 White & Cream Smooth Mat Board – Yes Stikflat Glue or other archival glue that leaves paper flat – heavy object to use as a weight – waxed paper – cutting/hole punch template – click here to download – thin cotton or linen fabric (optional) – needle with an eye large enough to fit embroidery floss – brush for glue Stitch down through the next hole.