
TBDswirlyupdosteps.jpg (512×1263) Handmade ‘tying the knot’ save the dates made from brown card and twine. The joys of having a photographer husband-to-be! If you’re the lovely Lisa, one of my blog readers, it means you can make pretty wedding details and get great pictures of them – which in turn means lovely photos to share with you all. Lisa was inspired by my own rustic ‘save the dates’ and got in touch to share hers – I think they are so beautiful and they incorporate a really neat extra that Lisa found on this blog whilst searching for inspiration – a twine knot.
So Lisa combined two ideas – the brown folded card ‘save the date’ that we made, which didn’t need an envelope and was tied like a tiny parcel with raffia, and a sweet idea that when you open the card the knot in the piece of twine tightens, so you literally ‘tie the knot’. I never realised that when I dreamt up and made our ‘save the dates’ that they would be so loved by other couples.
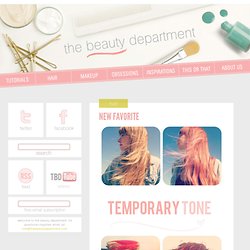
There is something about the recycled rustic brown card and simple black text that just works so wonderfully together. NEW FAVORITE. Photos + post by Kristin Ess.
Pinky's Nails. CROWN OF BRAIDS. Photos + post design Kristin Ess It seems pretty easy, but it’s not.
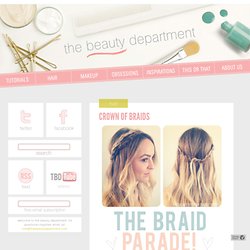
Not everyone has long hair that reaches all the way around the head to make a perfect crown of braids. Girls with short hair need braids TOO! Using this technique, you make small, overlapping intersections of braids to create a full crown. Here’s how: Start with straight, wavy or curly hair. A veil of hairspray isn’t necessary but will help keep things in place if your hair tends to slip. Hair DIY - Bow Bun Tutorial. It's February 29th, Leap Day, which means the rules don't apply, so we are going rogue today with a hair tutorial, a first here for Mama Duck.
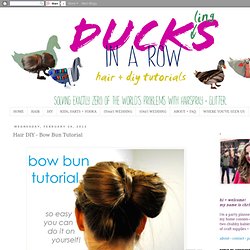
I made up this bow one day in a frantic effort to make my hair "event ready" before a Broadway show opening, and it's since become my "go to" hair when I have events. You will need a hair elastic, hairspray and a heaping mess of bobby pins. I have a ton of hair, so I use about 15 pins, but you won't need nearly as much with shorter hair. Your hair should be straight and tangle-free. So without further ado, here's a step-by-step photo guide for your own bow bun. Tunnelvision - Welcome. How-To: Newsprint Manicure. I saw this newsprint manicure over on The Daily Nail and thought it was adorable (especially for bookworms and word lovers like myself).

I did a little Google detective work to see how to recreate it, and was surprised at how easy it is! All of the tutorials I found called for vodka or other clear distilled spirits, but we were fresh out. I used isopropyl alcohol instead, and it seemed to get the job done. Summer Hair Braid Trends. Braids, pleats, or plaits—whatever you call them, we're absolutely loving all things twisted in hair this season.

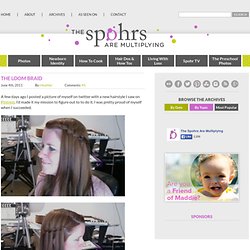
Beautylish brings you the three hottest braid trends this season and three easy braid DIY tutorials to replicate the look yourself. Who needs a headband when you can make one from your hair! We're loving this European, Heidi-inspired front braid that you can style into an updo or wear with your hair down. The Loom Braid. June 4th, 2011By: Heather.
Peacock Makeup. Hey everyone! I was looking at Van Gogh's Starry Night online because it has an amazing range of colors and wanted to do a look inspired by it! As I started doing the look however, I started adding peacock colors and slowly shifted towards that instead so it's now a mixture of both. Either way, I love this look because I went out of my comfort zone and tried a different technique of shadow. The look: Let's begin! To start off, take a white eyeshadow base (NYX Milk) And apply all over the lid And blend out with your ring finger Now, take a black eyeliner and draw out a semi circle (it doesn't have to be perfect) Now take a dark matte teal color (Mac Plumage) And apply with a small concealer brush, packing on the color little by litlle above the semi circle To look like.
Twist Pony-Tail. Pin-It-Up Hair Style. Our email box is literally flooded with requests for updos so here’s a fun one to get us all going!
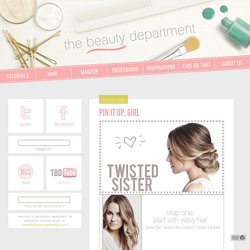
This is always a favorite for attending an event. This updo looks gorgeous on any hair color but particularly amazing with hilighted hair because it gives the hair lots of depth and dimension. For lack of a better word, I love the way it becomes “swirly”. Best thing is; it’s easy to do, gorgeous and keeps your hair out of your way for the night. I made this a printable tutorial, so all of the steps are next to the photos. Tools you’ll need: curling iron (to prep the hair with waves), sectioning clips, teasing comb or brush, clear elastic rubber band, bobby pins, light to medium holding hairspray (to mist over at the end).