
Twist Collective. Part One: Minor Blunders by Robin Melanson If there is one thing a knitter can be certain of, it’s that mistakes will happen.

No one is immune to the occasional dropped stich, wrong-slanting cable, or other error and you will never stop making mistakes like these as long as you knit. Why? Because knitters don't just sit there and stitch (not most of the time, anyhow). The biggest difference between the errors of an experienced knitter and those of a newbie is the ease with which they are fixed.
This series will look at some of the most common errors knitters make and take you through ways to fix them without ripping back the work to the point before the mistake was made. Mistakes fall into three categories: Minor Blunders, Average Gaffes, and Grave Errors. Tools You will Need Crochet hookCable needleTapestry needleLocking stitch markersTwo double-pointed needles (dpns)Patience (a bit less is required for fixing mistakes than for ripping out and starting over) Triage Minor Blunders. Contiguous [the series 7] seelie. Pattern : seelie by me yarn : recycled cotton (white) needles : us 8 so here is what the sweater came out looking like. i got bored with the stockinette and buttonholes half way down and switched to just garter for the bottom of the sweater. buttons are from my stash. they are size 1 inch. i love the neckline up or… 3/4 sleeves are great because this sweater is pretty warm. really like how the buttons hold everything together until the waist and then i have free movement for my hip area. even looks great loose. i hope that this series has helped everyone figure out the intricacies of the contiguous style for designing a sweater. let me know if this has helped you out and what your sweaters look like!
![contiguous [the series 7] seelie](http://cdn.pearltrees.com/s/pic/th/contiguous-series-sneezerville-54374223)
Here are the links to the whole series: [series 1] getting started [series 2] shoulder shaping [series 3] sleeve cap / armhole shaping [series 4] finishing the upper body [series 5] waist shaping [series 6] the sleeves [series] more about shoulder “seams” and darts wide neckline for contiguous sweater. Short Rows: Shadow Wraps. Over the last couple weeks I’ve reviewed the plain wrap, the yarn over wrap, the Japanese wrap, and the double stitch wrap.

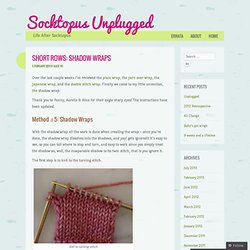
Finally we come to my little unvention, the shadow wrap. Thank you to Penny, Aurelia & Alice for their eagle sharp eyes! The instructions have been updated. Method #5: Shadow Wraps With the shadow wrap all the work is done when creating the wrap – once you’re done, the shadow wrap dissolves into the shadows, and yay! The first step is to knit to the turning stitch. Knit to turning stitch Before going any further, let’s just take a moment to identify the relevant stitches. Daughter & Mama Stitches Pick up the mama stitch with your right needle. Pick up mama sittch Place the mama stitch on your left needle to the right of the daughter stitch (ie closest to the tip of the left needle), being careful not to twist it.
Place mama stitch on needle Knit mama stitch New shadow created The shadow wrap is now on your right needle; the mama and her daughter still on the left needle.