

Hanging Chains Headband DIY. While browsing Topshop last week, I came across this fun hanging chains headband and thought with Coachella right around the corner, an easy DIY for something similar would be fun.
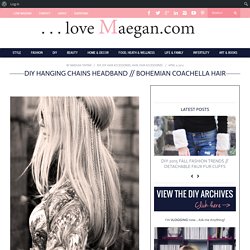
I used an old plastic zig zag stretchy comb headband I’ve had for years because it was the most logical choice to hang chains from but you can use an elastic band in a similar way. The chains disappear a little in my blonde hair but they would stand out really pretty agains brunette locks {it would also look great on a shorter cut as well}. If you’re super crafty, add a feather or bead/charm to the bottom of a few chains. What You’ll Need… * Circular headband* Chains: fine, thick, gold, silver, rose gold… use a variety of colors and sizes or all the same… choose chains that are lighter in weight.* Jump rings {for small chains only}* Beading pliers Steps… * Prepare your chains.
. * Using the extra loose chain links or jump rings for small chains, attach one chain to each section of your plastic headband. And…Voila! DIY Shrinky Dinks for Adults. Here’s a cool DIY that puts the shrinky dinks you used as a child to good use!
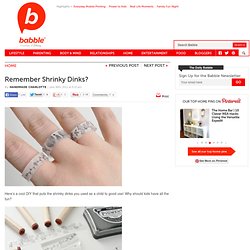
Why should kids have all the fun? All you need to get started is shrink plastic (google for sources), a pair of scissors and stamps to apply your design. I’d love to give it a try with bracelets! June Gilbank of PlanetJune has the full tutorial available on her website. Visit PlanetJune for the full tutorial! Check out other articles by Rachel here! Viking Crafts: A Lucetted Necklace/Scarf. When I was in Norway this summer, I visited the Norsk Folkemuseum to see the famous Stave Church, sample the fresh-made Lefsa and Geitost (goat cheese pronounced “Yay Toast!”)
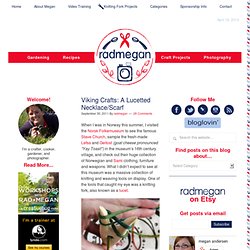
In the museum’s 16th century village, and check out their huge collection of Norwegian and Sami clothing, furniture and weapons. What I didn’t expect to see at this museum was a massive collection of knitting and weaving tools on display. One of the tools that caught my eye was a knitting fork, also known as a lucet. Vikings used these lucets to make cords and clothing. Since the weather is cooling off, and since (despite previous blog entries) I don’t practice many Viking habits, I wanted to use my lucet to make an insulate necklace/scarf hybrid!
I cast on my lucet by lacing one end of my yarn through the hole just under the top two prongs, and then (starting from the back to the front) wove the yarn around the prongs in the shape of a figure eight. When I was all done, I was pleased with my oh-so-warm accessory. A Ring of Thread. Hello Lovers, just to reiterate I’ve closed comments on this for the two reasons: 1.
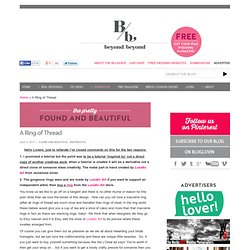
I promised a tutorial but the point was to be a tutorial ‘inspired by’ not a direct copy of another creatives work, when a tutorial is created it will be a derivative not a direct clone of someone elses creativity. The metal part is hand created by Lunatic Art from reclaimed silver. 2. The gorgeous rings were and are made by Lunatic Art if you want to support an independent artist, then buy a ring from the Lunatic Art store. You know us we like to go off on a tangent and there is no other rhyme or reason for this post other than we love the bones of this design. Of course you can give them out as pressies as we are all about rewarding your bridal homegirls, but we just love the craftsmanship and these are unique little beauties. About the author I'm the big kahuna with the whole shebang. Re-Vamp your Friendship Bracelets!
No, this tutorial does not have you making any type of designer DIY!
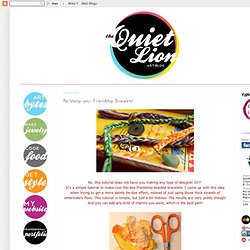
It's a simple tutorial to make cool the-dye friendship braided bracelets. I came up with this idea when trying to get a more dainty tie-dye effect, instead of just using those thick strands of embroidery floss. This tutorial is simple, but just a bit tedious. The results are very pretty though! And you can add any kind of charms you want, which is the best part! Step 1: Gather materials. Step 2: Cut your embroidery floss. Step 3: Group all of your individual threads into 3 big groups, making sure you get a variant amount of colors in each group.
Knot at the end, when it's long enough to tie on your wrist.