
DIY Met Daan - BALLS (pompoms) Honeycomb DECORATING! By:... Tutoriel Déco Ruban : customiser une boîte à mouchoir.
La raison pour laquelle vous ne devez plus jeter les rouleaux de vos papiers hygiéniques. Home Page : Studio Snowpuppe paper origami lampshades, since 2010. Boucles d'oreilles en Mizuhiki - Goutte -0023 : Boucles d'oreille par kami-art. Le Mizuhiki est un art traditionnel japonais de confection de nœuds spéciaux pour les cérémonies.
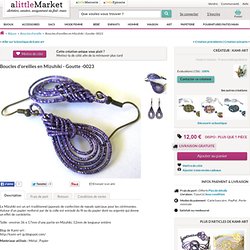
Mizuhiki. Collier rouge énorme bulle collier de perles collier par Arkpearl. DIY Collier de fête! Je voulais absolument vous préparer un petit DIY original avant les fêtes et je me suis un peu creusée la tête.Il faut dire que la blogo regorge de DIY tous plus sympa les uns que les autres mais c'est finalement sur un collier que mon choix c'est arrêté.J'avais acheté du matos pour faire des bijoux en corde il y a longtemps mais je n'ai jamais eu le temps de m'y mettre.J'ai donc ressorti mes boîtes à merdouilles merveilles et avec un petite idée en tête je me suis lancé avec une toile d'abord puis avec ce beau tulle plumetis bleu (Mondial Tissu) que je trimballe depuis des années!
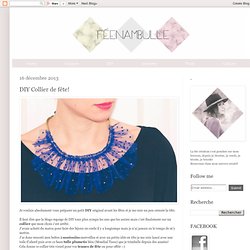
Cela donne ce collier très visuel pour vos tenues de fête ou pour offrir :-)Pour la réalisation, il vous faut: Tout d'abord, imprimer ou reproduire le gabarit, découper le tissu en double.Plier la partie haute du tulle sur 1,5cm et faites une couture à 1cm pour réaliser une coulisse. Glisser la corde dans la coulisse à l'aide d'un épingle à nourrice.
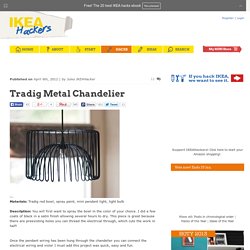
Froncer le tulle sur la corde. Make your own cd sculpture. 02May In today’s project we’re going to go over how you can go about making your very own “CD sculpture”.
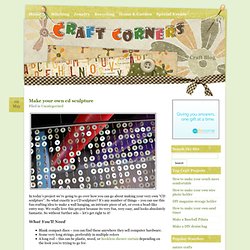
So what exactly is a CD sculpture? It’s any number of things – you can use this fun crafting idea to make a wall hanging, an intricate piece of art, or even a bead-like entry way. We really love this project because its very fun, very easy, and looks absolutely fantastic. So without further ado – let’s get right to it! What You’ll Need Blank compact discs – you can find these anywhere they sell computer hardware.Some very long strings, preferably in multiple colorsA long rod – this can be plastic, wood, or hookless shower curtain depending on the look you’re trying to go for. What To Do You’ll want to start off by tying off your pieces of rope or string to the rod you’ve prepared. - Bijoux. How To Make A Recycled Jewelry: Old CD Necklace - Sining Factory.
Old CDs that you would normally throw away can be recycled into chic jewelry.

Before you throw them away, why not try to make them into a trendy necklace by cutting them into different shapes and attaching each piece on a chain. You can actually make a lot of different kinds of items, but for this tutorial, I will make a necklace. Procedures: 1. Using a pair of scissors, cut the CDs into the shapes you want. 2. 3. 4. 5. 6. Check other tutorials for different occasions at If you have good ideas for recycling and crafts and want to share it here, let me know by commenting below. My tutorial is all about saving money and helping our nature. Nowadays, if you're a mindless spender, you're guilty - yes, guilty of not allowing your mind to explore ways to save your resources, given the general state of the economy and the sheer number of people going hungry. FAKTUM sideboard. Materials: Faktum, Perfekt, Rationell Description: My hunt for a decent size sideboard for the dining room was not fruitful, so I decided to make my own out of Ikea kitchen cabinets and some timber.
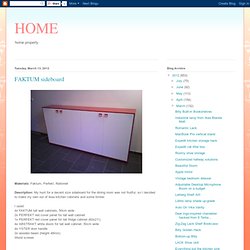
I used: 4x FAKTUM tall wall cabinets, 50cm wide 2x PERFEKT red cover panel for tall wall cabinet 1x PERFEKT red cover panel for tall fridge cabinet (60x211) 4x ABSTRAKT white doors for tall wall cabinet, 50cm wide 4x YSTER door handle 2x wooden beam (height 48mm) Wood screws Took me about 6h, with an extra pair of hands to cut the large board to size on my saw table (which I recommend to do the 2m long cuts).
Hope you like it. Happy hacking! Billy Built-in Bookshelves. Materials: 3 Billy bookcases, 3 Billy height extension units Description: We started with three standard Billy bookcases (11" deep) and three height extension units from Ikea.
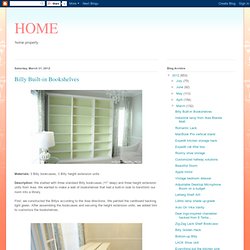
We wanted to make a wall of bookshelves that had a built-in look to transform our room into a library. First, we constructed the Billys according to the Ikea directions. We painted the cardboard backing light green. After assembling the bookcases and securing the height extension units, we added trim to customize the bookshelves. We used 3 1/2" baseboard to cover the feet of the bookcases and crown molding on the top of the bookcases. IKEA Hackers Clever ideas and hacks for your IKEA. Expedit mobile work station. Materials: Expedit 4x4, Ekby Viktor, Rationell Variera...
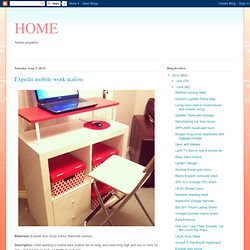
Description: After wanting a mobile work station for so long, and searching high and low on here for one... but having no luck :( I made myself one. This is what I used... - Rationell Variera (the brackets only) - Ekby Viktor - Expedit - Deka - Franklin Chair I'm a work at home mum... mixing cooking with answering emails and plenty of multi-tasking. We live in a small house and when I'm working, it does spread across the dining table, but it annoys me when I have to pack every thing away when the kids get home from school. So I have added castors to the bottom, so when I'm not working, I can push the whole unit under my stairs cupboard out of the way, without disturbing my work.
I had wanted to add a Spontan magazine rack to the side, but my local Ikea was out of stock. I will put my keyboard and mouse on top of the Expedit and the laptop on top of the shelf, which is a nice height for standing at or sitting on a bar stool. IKEA Hackers Clever ideas and hacks for your IKEA. Featured.
IKEA Hackers Clever ideas and hacks for your IKEA. Accessories Published on September 24th, 2013 | by Dani Nesca Materials: 1 x SPONTAN magnets, satin ribbon of your choice, SY iron-on fabric tape, Iron, scissors, tape meter.
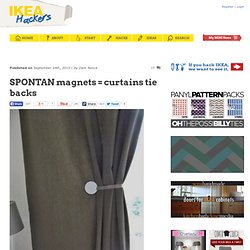
Description: Measure 2 pieces satin ribbon, to match the curtain about 30-40 cm, then slide the ends through the hole in the SPONTAN magnets, cut two small pieces SY hem band, and iron shortly at the back side next the hole to glue. Overlapping gliding panels. Materials: Kvartal, Anno Tupplur Description: We have a rather large window on the living room, approx 2.5m wide, where we wanted to place some panel curtains (like the Anno Tupplur ones).
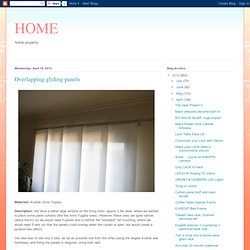
However, these ones are quite narrow (about 60cm), so we would need 5 panels and to rethink the "standard" rail mounting, where we would need 5 rails (so that the panels could overlap when the curtain is open, but would create a pyramid like effect). Our idea was to use only 2 rails, as far as possible one from the other (using the largest Kvartal wall hardware), and fixing the panels in diagonal, using both rails. This way, when fully opened, the panels would cover all the window in a slight overlapping way, but will occupy little space when we want to see the through the window. Finally, so that the panels move together, we used a small screw on the back of the top panel rail which will push the rail on the back as soon as they touch. Work bench made from Trofast toy storage units.
Materials: Two Trofast storage units, Trofast storage boxes, Numerar countertopDescription: About 12 years ago, when my child was young, we bought two Trofast storage units to hold all the toddler toys. Time passed, and the toys got put away in the attic -- but what to do with the Trofasts? They were super sturdy -- we could see their potential for other uses.
Fournisseurs.