
SqueakiMST:WedoScratch. Le logiciel Scratch peut être utilisé (à la place du logiciel officiel Wedo) avec le matériel de robotique Lego Wedo.

Voici nos traces de travaux avec cette TIC. (idées de projets) Projet SAÉ Village olympiqueTraces (étapes) du projet «Village olympique robotisé», 1ère année du primaire : TracesVillageOlympique Une synthèse sous forme de schéma. Using Scratch to Control Mindstorms Robots. Hardware That Can Connect to Scratch. Scratch can connect to some real world hardware.
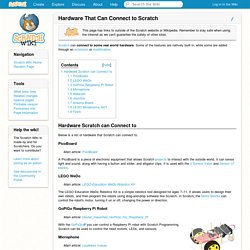
Some of the features are natively built in, while some are added through an extension or modification. Hardware Scratch can Connect to Below is a list of hardware that Scratch can connect to: PicoBoard Main article: PicoBoard LEGO WeDo Main article: LEGO Education WeDo Robotics Kit The LEGO Education WeDo Robotics Kit is a simple robotics tool designed for ages 7–11. GoPiGo Raspberry Pi Robot Main article: Dexter_Industries_GoPiGo_For_Raspberry_Pi.
ScratchDuino. ScratchDuino is a highly customizable, simple and interactive open source robot construction kit with magnetic-mount sensors.
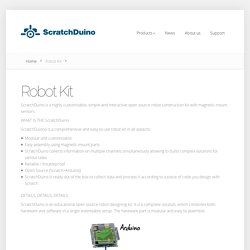
WHAT IS THE ScratchDuino ScratchDuiono is a comprehensive and easy-to-use robot kit in all aspects: Modular and customizableEasy assembly using magnetic-mount partsScratchDuino collects information on multiple channels simultaneously allowing to build complex solutions for various tasksReliable / troubleproofOpen Source (Scratch+Arduino)ScratchDuino is ready out of the box to collect data and process it according to a piece of code you design with Scratch. ScratchDuino is an educational open source robot-designing kit.
It is a complete solution, which combines both hardware and software in a single extendable setup. ScratchDuino is reliable and designed to work under tough conditions: each sensor is protected by its individual plastic shield that can be mounted onto the motorized platform in a foolproof way. Our ScratchDuino body comes in three versions: Scratch 2.0 Programming. Scratch is a tile-based visual programming language, which is an excellent first language for children to learn.

We are providing a helper app that allows you to use Scratch 2.0 with Finch and Hummingbird. This is beta software, there are known bugs you should read about before using Scratch. Please test it and let us know if there are others bugs or if you'd like us to make changes to anything. Table of Contents Video Tutorials This playlist of videos takes you through launching Scratch, describes the Hummingbird Scratch blocks, and demonstrates how to create several Hummingbird Scratch programs: Installation Step 1: BirdBrain Robot Server In order to connect Scratch 2.0 with Hummingbird or Finch, you will need to install a helper application, the "BirdBrain Robot Server". Windows Download the Windows installer and double click on it.
Mac Download the Mac installer and double click on it to mount the disk image and open the installation folder. Linux. Learning Scratch. mBlock is based on the Scratch2.0 editor, customized to work on robotic projects and electronic projects with Makeblock platform.By adding all kinds of electronic script blocks, teachers can write scripts to control robots or interact with sensors and actuators, inspiring students’ interests to learn by playing.
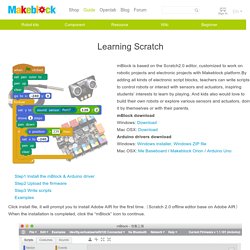
And kids also would love to build their own robots or explore various sensors and actuators, doing it by themselves or with their parents.mBlock downloadWindows: DownloadMac OSX: DownloadArduino drivers downloadWindows: Windows installer, Windows ZIP fileMac OSX: Me Baseboard / Makeblock Orion / Arduino Uno Click install file, it will prompt you to install Adobe AIR for the first time. (Scratch 2.0 offline editor base on Adobe AIR) When the installation is completed, click the “mBlock” icon to continue. You should update the firmware ( view source ) of the Arduino board firstly through usb cable. Drag the module block you need from Robots Area, select the correct port/pin. Building a Raspberry Pi Robot and Controlling it with Scratch - Part 1. Last weekend we ran a workshop at the Digimakers event at @Bristol where we taught people how to program a Raspberry Pi robot with the Scratch programming language.
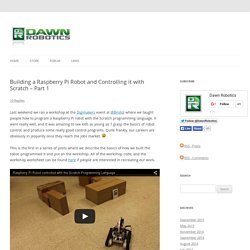
It went really well, and it was amazing to see kids as young as 7 grasp the basics of robot control, and produce some really good control programs. Quite frankly, our careers are obviously in jeopardy once they reach the jobs market. This is the first in a series of posts where we describe the basics of how we built the robot, programmed it and put on the workshop. All of the workshop code, and the workshop worksheet can be found here if people are interested in recreating our work. Aim of the Workshop This workshop asked the students to write a control program for a robotic rover that had been landed on Mars by NASA. The Raspberry Pi Robot used for the workshop The students were each given an SD card to put into their Raspberry Pis that contained Scratch and a simple robot simulator running in the background. Next Time… Raspberry Pi Robot controlled with the Scratch Programming Language.
Davidjsherman/inirobot-scratch-thymioII. Piloter un Thymio-II avec Scratch - Kits pédagogiques / IniRobot - FORUM DESSINE-MOI UN ROBOT.