
Bespoken Art - Art that Speaks Volumes. How to Make Leaf Skeletons. I wanted to share with you a project from one of my readers who shares with us how to make leaf skeletons.

I LOVE this! I have several leafs in various forms displayed in my home and knew I needed to make some of her leaf skeletons to add to my decor. I love how a pattern of leaves can enhance the beauty in your home. So I asked Heather if she would mind sharing her project with you. You can find more great projects from Heather at her blog The Other White House. I have spent hours and tried various ways of making these. You need washing soda, not baking soda! Gather your leaves. Washing soda is a strong base so you may want to wear gloves when handling the leaves. You will add 3/4 cup of washing soda and 4 cups of water to your pot of leaves. Keep going, you will need to add more water so your pan doesn’t dry out.
When 1.75 hours are up fill a glass baking dish with cool water. I carefully removed them and rinsed with water and added clean water to the pan. 37.1Kstumbleupon. Design*Sponge ? Blog Archive ? diy project: recycled scrap paper notebooks. We blessing sisters have loved notepads, notebooks and all things paper since our first wide-rule pads we bought in gradeschool. we have trouble letting go of even a single sheet of paper, lest we find a use to reuse or recycle it in the craft room! This time, we repurposed our old faxes and paper scraps into notebooks and made them useful again. we pulled out old wrapping paper, books we didn’t mind ripping pages out of, and other odds and ends to make the covers pretty. this is quick and easy to do with what you already have at home, and you end up with a stack of handy, useful pads that might even give you a tinge of back-to-school nostalgia.
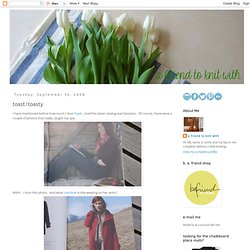
–bbbcraft sisters CLICK HERE for the full how-to after the jump! Materials: - 8 ½” x 11” scrap paper (from faxes, printing mishaps and mail) - binder clips - scraps of cardboard cut into 1” inch strips OR 2 wood paint mixers cut to size -elmers glue, pvc or a glue gun - paint brush - decorative scrap paper - masking tape and/or decorative tape. Universal wrapping paper. Toast/toasty. I have mentioned before how much I love Toast.

And this latest catalog was fantastic. Of course, there were a couple of photos that really caught my eye. Ahhh...I love this photo. And what cool knit is she wearing on her arms? And then there was this photo. So, I grabbed the nearest yarn. And remember I said that I had a little photo shoot while in Carmel? My two sisters. So here they are. These are my personal favorites. Toast Needles: size 7 double point needles Gauge: 5.5 stitches to the inch Measurements: 7 inches round, 11 inches long Cast on 34 stitches. See! Toasty Measurement: 7 inches round, 11 inches long Cast on 34 stitches. Next round, needle 1: Knit 4, slip next 4 stitches to a piece of waste yarn, CO 4 stitches using the backward loop method, knit to end. Thumb: Place 4 stitches from waste yarn on a double point. Join. Weave in ends. Al-righty then. Have a fabulous day.