
The Twenty Minute Tote. Updated September 2011 We have remade these awesome, simple bags for fall!

This time around, I used a gorgeous new collection of upholstery weight cotton called Outside Oslo. These bold, stylish prints are sophisticated without being serious and come in a rich palette of colors perfect for fall. I added some sturdy contrasting cotton webbing handles for a pop of color, and I love the way they came out! The new materials are as follows: To make one tote bag: 1/2- yard of Outside Oslo Fabric. Updated February 2011 These totes really do come together in 20 minutes a piece which makes them a great, quick, way to add a little Springtime color and excitement into the dull end of Winter months. 1/2-yard of Kokka Apples. The Original The fabric in these how to shots is from Echino and is now out of print but you can see more from the same designer, Etsuko Furuya here. Cutting Cut two 16-inch tall by 14-inch wide panels from the fabric. Cut two 22 1/2-inch long pieces from the webbing. Zip-It-Up Pencil Case. “It’s Back To School time, boys and girls.”
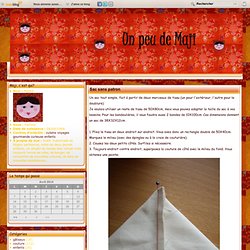
This zip-it-up pencil case would be of great help for them to keep their stationary in place. Not only that, it is also a great topic for “Show And Tell” session to their new class-mates of how the magic works with this zipper + ribbon strip…”See, this is a strip of ribbon, and I am going to turn it into a pencil case…. *zip**zip**zippppp***…. tadaaaa…. a pencil case!!!!”. School is fun with friends and books around. Recently, I received an overwhelming and fantastic responses came all over the world to visit the tutorial of the Zip-Itself Tetrahedron Coin Purse, the same concept of this zip-it-up pencil case. I hope you like this Zip-It-Up Pencil Case as much as the coin purse. Finished Dimension: approx. 4″ x 8″ x 1 1/2″Materials: 1. Get ready the materials and tools as per quantities stated above. Measure 4 3/4″ from zipper’s bottom-stop. Come back to the start point. Unzip the pencil case a little. Get all updates via email:
Little boxy pouch tutorial « three bears. My latest favourite thing to make, little boxy pouches.
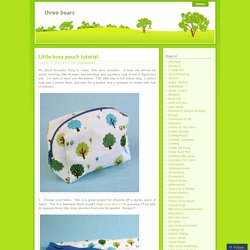
It took me almost an entire morning, lots of paper and sellotape and countless cups of tea to figure this out. I’m here to save you the bother. This little bag is 4.5 inches long, 3 inches high and 2 inches deep, just right for a lipstick and a compact (or better still, lots of sweets). 1. Choose your fabric. 2. 3. Tuto trousse à angle droit... carré ou rectangulaire. Tuto trousse à angle droit... carré ou rectangulaire Je vous l'avais promis... le voilà: tuto de la trousse à angle droit Cette trousse est doublée, mais vous pouvez tout aussi bien ne pas la doublée si vous la faites dans une matiere plus rigide que du tissu, telle que de la toile cirée etc....
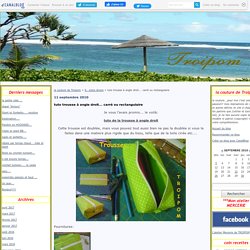
Fournitures: * exterieur: 1 carré de tissu de 25 X 25 cm *doublure: 1 carré de tissu de 25 X 25 cm * viseline thermocollante pour rigidifier le tissu: idem...25x25cm * 1 fermeture à glissière de 25cm * 2 tirettes (pour ma part, j'ai choisi de les faire avec du biais plier en 2 et surpiqués) Sac sans patron - Le petit monde de Marianne. Un sac tout simple, fait à partir de deux morceaux de tissu (un pour l'extérieur, l'autre pour la doublure) Je voulais utiliser un reste de tissu de 50X80cm, mais vous pouvez adapter la taille du sac à vos besoins.
Pour les bandoulières, il vous faudra aussi 2 bandes de 10X100cm. Ces dimensions donnent un sac de 38X32X12cm. 1. Pliez le tissu en deux endroit sur endroit. Vous avez donc un rectangle double de 50X40cm. 4. 5.