
Spring Art: Art projects for kids using kitchen tools. My favorite season used to be fall.

Now I’m a convert. To celebrate the wildflowers in full bloom, we have been having fun outdoors with tons of hikes and nature walks. To bring the season indoors we did this fun spring art activity which is great for both toddlers and preschoolers. Things we used 3 Pronged forkPaintBrushes Using the 3 pronged/tined fork we pressed firmly into the paint while making sure both the prongs and the base get paint. While printing she made sure to print using a 2 step motion. Once we printed using our forks, we drew the stems and leaves using green acrylic paint.
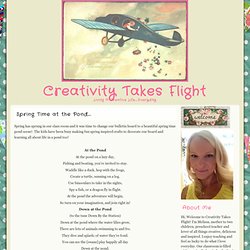
My toddler on the other hand is not very focused on the design or the pattern element of the spring art activity. Toilet Roll SPRING FLOWER. An easy flower for your kids to color.
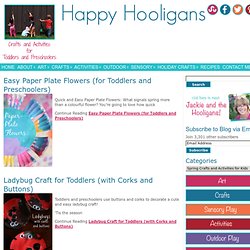
You will need 4 empty toilet rolls. Creativity Takes Flight. Spring has sprung in our class room and it was time to change our bulletin board to a beautiful spring time pond scene!
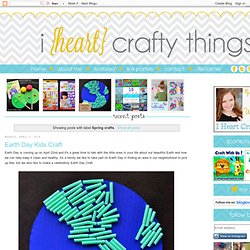
The kids have been busy making fun spring inspired crafts to decorate our board and learning all about life in a pond too! At the Pond At the pond on a lazy day, Fishing and boating, you’re invited to stay. Waddle like a duck, hop with the frogs, Easter and Spring Crafts - Enchanted Learning. Spring Crafts for Kids. Spring Bulletin Board Ideas. Spring crafts Archives. Quick and Easy Paper Plate Flowers: What signals spring more than a colourful flower?
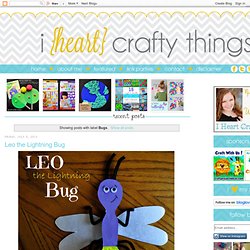
You’re going to love how quick Continue Reading Easy Paper Plate Flowers (for Toddlers and Preschoolers) Toddlers and preschoolers use buttons and corks to decorate a cute and easy ladybug craft! ‘Tis the season. Spring crafts. We had some Winter weather today which forced us to play inside this afternoon.
I came up with this Contact Paper Butterfly Craft to help entertain my daughter and it turned out to be a beautiful work of art as well! Materials you will need: Contact Paperpencilpermanent markerwashi tape painters tapetissue paper squaressheet of cardstock (I used a 12" x 12" sheet) or construction paper1 pipe cleaner cut in halfred crayonWiggly Eyes (We received our Wiggly eyes courtesy of Craftprojectideas.com, but all opinions expressed are 100% our own.)
Directions: 1. 2. 3. Activités pour le Préscolaire: Couronne printanière en papier - Spring paper crown. PLEASE NOTE, this blog post is written in ENGLISH and FRENCH.
Here is a fun and colorful Spring paper crown to make with kids. Voici une couronne printanière colorée et amusante à faire avec les enfants. Fold 3 sheets of green construction paper and fold them in half. Then, cut strips starting from the fold and leave a border of 1 inch. Pliez 3 feuilles vertes de papier construction et pliez-les en deux. We made Origami Fortune Teller as the flowers. Nous avons fait les fleurs avec des coin-coin. To create the leaves, we folded green sheets in 4 and we cut a leaf shape, starting from the fold. Pour les feuilles, nous avons plié des feuilles vertes en quatre et avons découpé une forme de feuille, en partant du pli.
(1) BRICOLAGE ENFANT/GARDERIE. (1) BRICOLAGE ENFANT/GARDERIE. Easter Egg Fireflies, Easter Crafts For Kids. Transforming Preschool “BAND AID” love into a Butterfly’s Life Cycle! Using band Aids for a Butterfly’s Life Cycle Most kids WANT to use band aids (even for those imaginary “ouchies” that sometimes arise!) While our kids were in a particularly long phase of “band aid love,” we transformed the interest into a “Butterfly’s Life Cycle” (and practiced our fine motor skills with all of the peeling and sticking).
Materials needed per craft: One paper plate, 2 colored band aid strips, 3 circle band aids, 1 fingertip butterfly band aid, 1 small white gauze pad and first aid tape (or the children can roll two regular band-aid strips for the pupa stage), markers or crayons, scissors, glue sticks, and one life cycle printable - Life Cycle of a Butterfly Help the children draw lines to divide their paper plate into 4 sections (or do prior to the activity). Print the Life Cycle of a Butterfly labels (linked above) and have the children cut apart. 1. 2. 3. 4. Activités pour le Préscolaire: Une coccinelle printanière fait à partir d'un bouchon d'aérosol.
D'une facilité désarmante, j'ai fait une coccinelle à partir du bouchon du contenant de crème à raser que j'ai vidé cette semaine.
(1) BRICOLAGE ENFANT/GARDERIE. Bugs. We had fun today being inspired by the famous Eric Carle book "The Very Hungry Caterpillar".
I've seen some awesome caterpillar prints around blog land lately using a balloon and thought my boys would really enjoy this technique. Before we actually painted our caterpillars we had fun making one out of our balloons first. Don't you just love how kids find joy in the simplest of things?? Anyways, on to our balloon painted caterpillar. Here is mine pictured below. Simply dab a small balloon into paint and place it onto your paper. While we waited for the caterpillar to dry we had fun watching some You Tube videos of caterpillar's transforming into butterflies. Then we came back to our caterpillars and added some finishing touches like eyes, nose, antennae, lets. Faire un nid d'oiseau avec des assiettes en carton. Petit nid d’oiseau, bricolage pour enfants. Nid d'oiseaux. Spring Kid's Craft. Hello!

Kristen here with a fun craft for kid's! These cute, crafty and earth friendly toilet paper roll butterflies are so colorful, and easy to make. You could make just one, or a big flock of them. They are sure to brighten any spot you put them. First, you will need: Bobunny dot cardstock, a toilet paper roll, Bobunny double dot ribbon, googly eyes, a 1.5 inch flower punch and a 1/2 inch circle punch, and adhesives. To create the base of the butterfly, I cut a piece of cardstock into a 4.25 x 5.25 inch rectangle. Next, cut two 3 inch strips of ribbon. Now we can work on the wings. Trace the wing pattern onto cardstock, and cut out.
To finish the butterfly, place adhesive along the middle of the wings, and adhere to the back of the finished tube.