
Download Adobe Photoshop CS6 Beta - Adobe Labs. Digital painting basics. Diario #Photoshop. Videotutorial para diseñar un cartel publicitario con Photoshop. Sundae de Elefante / Photoshop. Photoshop is great at seamlessly combing photos to create an entirely new scene.
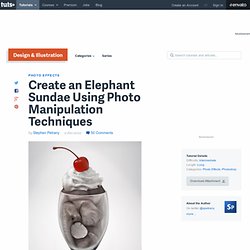
In this tutorial we will create an elephant sundae using several stock photos. Let's get started! Resources This tutorial uses the following images but you are welcome to find alternatives for the ice cream and wine glass images. Step 1 Open the wine glass image. Step 2 Transform > Warp this layer to drop the base of the glass more. Step 3 As an additional step, I've used the Liquify Tool on the base of the bulb of the glass.
Step 4 Go back to the original "Background" Layer and select the base of the wine glass. Step 5 Transform (Command/Ctrl + T) this layer by scaling it vertically until the base of the wine glass has a stronger perspective. Step 6 Move this layer up so that it appears to be a shorter dessert glass. Use a layer mask to help blend this layer with the rest of the glass. Step 7 Step 8 To finish the dessert glass, we need to correct the perspective on the top of the glass. Pintura Digital Avanzada en Photoshop. 12th September 2011 at 09:09 14,285 views | Posted by admin in Adobe Photoshop, Digital Painting, Drawing Hey everybody I just opened up my store with some of my personal artworks at zazzle.com, and all promotion would be very much appreciated!
Soon, I will be sharing some different illustrations in cards. So please check out some of the ornaments and greeting cards among other post card ideas. I would like to inform you that my tutorial published on this website So we have a Spanish version of this tutorial. Esta pintura se va a hacer totalmente en Photoshop CS2. Create Super Glossy 3D. In today’s tutorial we will demonstrate how to create super glossy 3D typography using Illustrator and Photoshop.
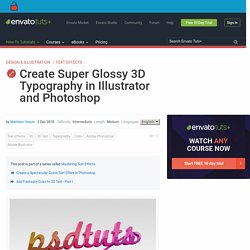
Let’s get started! Open Illustrator and create a new RGB document, 1000px by 800px, 72 DPI, and write your text in a nice big font. I've used Marketing Script size 234pt. Next, with you text selected, go to Object > Expand, and hit ok on the pop up window. Our text is no longer editable as text, instead it's a series of paths that we can edit with the direct selection tool. Currently, our letters are separate objects grouped together, we want them to be one single compound path. With the Pen Tool (P) selected, draw a new path starting from the last flick of the last letter s, and swirling its way down underneath our type.
Change the Stroke Weight of our new path to a size that matches the width of the text path that it will be joining. Duplicate this path by dragging the Group's thumbnail (in the layers palette) to the New Layer button. You should now have six groups - Crear un Texto en 3D y darle estilo con Photoshop. Seguimos aun con el Bundle Art, en esta ocasion vengo a presentarle un gran tutorial realizado por Zerj19 un excelente diseñador Mexicano, en este tutorial no enseña sobre como crear un efecto 3d desde el Cinema 4D (Programa de diseño en 3D, bastante completo en ese aspecto), el tutorial muestra desde como crear el texto 3d, darle un estilo, orientacion e ubicacion y luego mejorarlo con el siempre conocido photoshop, agregando objetos y otras tecnicas. Antes de comenzar con el tutorial, les presentamos los stocks usados en el tutorial: Stocks: Paso 1: Texto Para crear el texto en 3D necesitamos Cinema3d . Lo abrimos y nos vamos a la parte de splines y seleccionamos uno de tipo texto: En la parte inferior derecha vamos a introducir nuestro texto.
Para que la tipografía se vea mas personalizada use la fuente “ Airstream “: (La palabra puede ser la que sea asi como la fuente,es a gusto personaly puedes escoger cualquier combinación que se moldee a tu concepto). Efecto de Horizonte desde un Edificio con Photoshop. Hace poco tuve la oportunidad de ver una estupenda película llamada “ Fight Club ”, entonces una escena que me guste es la del final, donde se hace notar un efecto de horizonte desde un edificio; después de eso decidí experimentar con Photoshop para poder lograr el mismo efecto. Disfrútalo! En este tutorial les enseñare a crear este efecto, únicamente necesitaremos nociones de perspectiva, iluminación y sombras, este es un tutorial un poco avanzado, así cualquier duda no duden en dejar un comentario. Aparte usaremos un par de recursos que muestro a continuación: Stocks: Empty space , Netley Abbey Photoshoot 34 , Night Skyline 10958004 , Scratch Textures 2 _large , Office Stock 015 Paso 1: Preparando nuestro diseño Lo primera que haremos será crear nuestro archivo donde trabajaremos, en mi caso cree un archivo de 1100 x 850 con las configuraciones predeterminadas.