
The Technique Zone: Acrylic Paint Transfer. Supplies needed: Acrylic dabbers, photocopy of an image, water spritzer bottle, paintbrush, card stock, craft sheet and heat tool (optional) Take the lid off the dabbers and brush the paint onto the card stock, ensure you get a good coverage Take your photocopied image ( remember that you will get a reverse of the image, so don't use bold words), flip it over and place it in the acrylic.

Lightly press it down making sure it's smooth and not wrinkled Leave to air dry for at least 15 minutes and then if you wish give it a blast with the heat tool Only move onto this step when you are sure your paint is completely dryTake your water filled spritzer bottle, spray the back of the paper no more than two squirts, you don't want it too wet Next start to rub the paper very gently with your finger Keep rubbing and extra spritzing if you need too Eventually you will get rid of all the paper, but it does take a bit of patience as you have to be careful not to wet it too much and rub the image away.
Megan nielsen design diary - DIY tote bag. Sign up to the Megan Nielsen Patterns Newsletter and get access to our library of FREE sewing patterns!

Store Newsletter Get access to our library of FREE sewing patterns, exclusive monthly discounts and be the first to hear about new patterns! Never miss a blog post! Enter your email address to receive Design Diary blog posts right to your inbox. Renske’s minimalist tote bag. A talented seamstress with a mission, Renske Solkesz decided to create her own wardrobe after finding herself frustrated with high fashion prices.

When we saw her chic and modern wardrobe creations, we asked if she’d be willing to create and share a fun accessory tutorial with us. I’m super excited about what she’s come up with: an amazing self-closing utilitarian tote! I’m a huge fan of the graphic contrast and the leather and rivet details. Like her fashion designs, this tote is made from inexpensive materials, yet looks totally luxe. I’m halfway out the door to the fabric store already! CLICK HERE for the full how-to after the jump! When I designed this bag, I wanted to integrate the grip/straps in a more functional way with the rest of the bag. A friend of mine called it a “yin yang bag,” which is pretty accurate, I think. Materials Tools HammerSewing machineScissorsPinsChalkMeasuring tapeIronPattern template Instructions 1. 2. 3. 4. 5. 6. 7. 8. 9. 10. 11. 12.
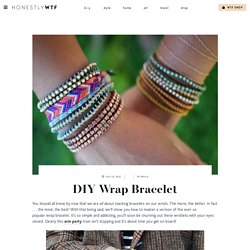
DIY Wrap Bracelet. You should all know by now that we are all about stacking bracelets on our wrists.

The more, the better. In fact . . . the most, the best! With that being said, we’ll show you how to master a version of the ever so popular wrap bracelet. It’s so simple and addicting, you’ll soon be churning out these wristlets with your eyes closed. Clearly this arm party train isn’t stopping and it’s about time you get on board! You’ll need (for a double wrapped bracelet) :* Lengths will vary depending on the size of your wrist (see comments for suggestions). Fold the length of leather cording in half to form a loop. DIY Braided Hex Nut Bracelet. We’re nuts for nuts.

Is there a more versatile and inexpensive DIY component than a hex nut from the hardware store? You can imagine our excitement when we first discovered Philip Crangi’s Giles & Brother Hex Collection. Honestly, nuts braided into jewelry is WTF genius! With a few items that we always seem to have lying around, we tackled the technique and made our own spine-like braided hex nut wrap bracelet. You’ll need:3 strands of cotton butcher’s twine cut into one yard pieces18 small brass hex nutsa bit of dexterity!
Gather the 3 strands of twine and tie a knot at the top, leaving about 2 inches of slack. Keep your thumb at the base of the braid, holding the nut in its place. Repeat the steps, by threading the rest of the nuts to the outer pieces of twine before they are crossed over. The bracelet should wrap around your wrist at least two or three times. Good luck!! (top image from here, rest of images by Honestly…WTF)