
22 Best Photoshop Text Effect Tutorials, Part I. Typography means a lot in any medium kind of presentation.
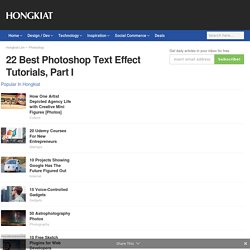
Whether it’s a logo, banner or just a title; being able to inject creativity into it not only help in delivering the message across, it also leaves solid impression on the viewer. Good typography design is not easy, or should I say getting the type match and speaks for the product is often a very challenging job. Here are some of the best Photoshop text effects tutorials on the web, and as usual it’s the creativity that counts. Full content after jump. How To Create a Realistic Money Effect in Photoshop. The classic illustration style used on money is something I’ve always wanted to figure out how to replicate in Photoshop.
There’s plenty of Photoshop tutorials that show how to create a basic halftone line effect, but they never quite capture that authentic engraved look with plenty of shading and tone. After lots of trial and error I finally managed to figure it out, so here’s an in depth tutorial on how to create a realistic money illustration effect in Photoshop (with some help from Illustrator!).
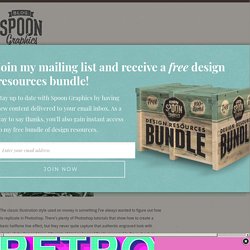
The effect we’ll be creating in today’s tutorial is this vintage engraved or etched illustration style that builds up the tonal areas of an image with lots of tiny lines. Unlike the basic halftone line effect used in other tutorials, this method actually uses curved and wavy lines that vary in weight to produce an accurate replica of this classic illustration technique. Enter 4mm in the Size option and apply 11 ridges in the settings. Change the Selection option to Shadows then hit OK. Create a Baseball-Inspired Text Effect in Photoshop. Applying texture to a text effect can be a lot of fun.
In this tutorial we will explain how to create a baseball-inspired text effect using layer styles, patterns, and brushes. Let's get started! The following assets were used during the production of this tutorial. Create a new document that is 1024 x 645 px. You can use any other values for the Height and Width depending on the text you are going to create. Download the Grass Texture 1, and place it on top of your "Background" layer, then resize it as needed. Rename the layer to "Grass Texture". The grass colors are a bit dark and desaturated.
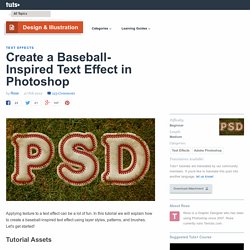
Go to Image > Adjustments > Levels, and change the Highlights value to 226. Create the text using the font Merkin. Press the Ctrl/Cmd key and click the text layer's icon to create a selection. Go to Select > Modify > Expand, and type in 15. Create a new layer below the text layer and call it "Stroke". Set the Foreground color to #e7e7e7, and fill the selection with that color. Text In Stitches. Introduction Over the years as a graphic designer I’ve accumulated a wealth of custom brushes, shapes and actions that I keep carefully organized and labeled for future use.
The brush set I’ll be sharing with you today has been in my collection for probably five of six years and every once in a while I’ll find a good reason to load it into my brushes palette. If you’ve never done that before, don’t worry, I’ll walk you through it as we go. If you’re playing along at home you should download the brush set before we get started. Step 1 Lets go ahead and begin by opening a new document in Photoshop. Since stitching on a plain white canvas is a little silly, lets go ahead and spice up the Background layer with a little texture.
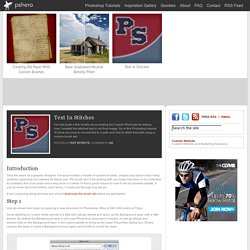
How to Create Inset Typography in Photoshop. By Jacob Gube In this beginning-level design tutorial, I’ll show you how to apply a beautiful and super-easy text treatment in Photoshop: the inset text effect.
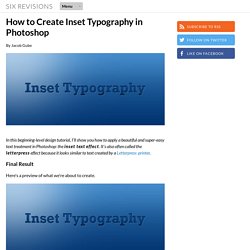
It’s also often called the letterpress effect because it looks similar to text created by a Letterpress printer. Final Result. Free Fonts Download, Fonts for Free. Polices à télécharger. Reader Tutorial: Typography Wallpaper in Photoshop. We have accepted some tutorials from readers and we think it's really good to open the blog, so anyone can share their skills with the community.
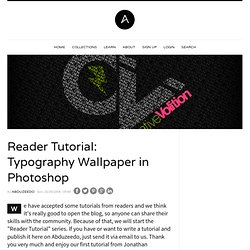
Because of that, we will start the "Reader Tutorial" series. If you have or want to write a tutorial and publish it here on Abduzeedo, just send it via email to us. Thank you very much and enjoy our first tutorial from Jonathan Connolly. Hey guys this is Creative Volition, an advertising and design agency based out of South Florida. Just a quick thanks to Abduzeedo for being such a great help to the design community. Here is a quick tutorial from one of our latest designs. Step 1 Create a new document at 1200 x 800 pixels with a resolution of 72dpi.
Step 2 Hide all vectors and create a new text box. Step 3 Text settings: 16pt font, Regular, 16pt height spacing, Color #404040. Step 4 Continue to copy/paste the text until it fills the entire canvas. Step 5 Step 6 Make one of the smart objects visible. Step 7 Step 8 Step 9 Step 10 Step 11 Conclusion.