
Re-purposing: Tshirts into 5-strand-braided-headbands. I was walking through Target a few weeks ago and noticed this little knit fabric headband that was not just braided together…….but woven.

I decided they were charging way too much for something that could be made with t-shirt scraps. And that means free. So there you have it. A nice and easy project to give my bad-hair-day head some love. (Or you may need one for working out. I kinda love it on my little girl . She always has little hair fly-aways that get into her face…….and this helps with that problem. It even works great with her hair down…..and keeps that hair tucked behind her ears. And yep, good for me too. Thanks little t-shirt scraps. Want to make your own? First, find some old t-shirts. Then, cut your fabric into long strips.
Next, stack your 5 strips on top of each other and sew together at one end. Now, pull on each strip of fabric so that they kind of curl on the edges. But let me explain a little better. First, you’ll work on the left side. Find out about Braids: Our Top 7 Picks. By kenziepoo | It’s so hard to believe that fall will be upon us soon.

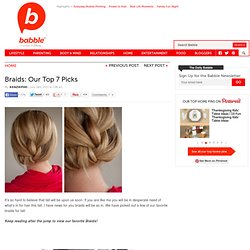
If you are like me you will be in desperate need of what’s in for hair this fall. I have news for you braids will be so in. We have picked out a few of our favorite braids for fall. Keep reading after the jump to view our favorite Braids! Nggallery id=’121177′ Milkmaid Braid You can't go wrong with a Dutch Milkmaid Braid Tucked Braid Try this pretty tucked braid for an evening out. Milkmaid braid via here Tucked Braid via here. Braided Headband Tutorial. It's chilly outside here today and I'm loving it!

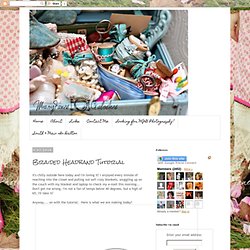
I enjoyed every minute of reaching into the closet and pulling out soft cozy blankets, snuggling up on the couch with my blanket and laptop to check my e-mail this morning... Don't get me wrong, I'm not a fan of temps below 40 degrees, but a high of 65, I'll take it! Anyway.... on with the tutorial. Here is what we are making today! What you need- Thick hair tie Six 1" strips of fabric Bulldog clip or safety pin Sewing machine (or needle and thread) Fabric tac I ripped my fabric strips so they were a bit frayed on the edges, personal choice.
Tack each end of the braid just enough that it doesn't come undone . Then tack both braids together on each end, be careful not to twist the braids. Cut your hair tie so it's one strip of elastic. Sandwich your elastic ends between the ends of your braids on each end, again, careful not to twist the braids. Sew over the elastic so that it's secure.
Your done! Enjoy! ...love Maegan: hair tutorials Fashion+Home+Lifestyle. DIY Bejeweled Hair Combs | Pretty Brooches for your Hair I fell in love with hair combs the other day after writing 18 Statement Hair Combs | Brooches for your Hair and was totally… Faux Fringe Hair Tutorial… Bangs w/out Cutting your Hair… BlogHer asked if I wouldn’t mind choosing a video from their vast inventory of BlogHerTV segments and recreate one of the beauty or hair… How to Make Girls' Hair Wraps" Hair wrapping is a really fun thing girls can do when they get together.

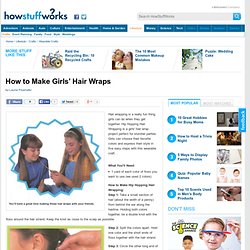
Hip Hopping Hair Wrapping is a girls' hair wrap project perfect for slumber parties. Girls can choose their favorite colors and express their style in five easy steps with this wearable craft. What You'll Need: 1 yard of each color of floss you want to use (we used 2 colors) How to Make Hip Hopping Hair Wrapping: Step 1: Take a small section of hair (about the width of a penny) from behind the ear along the hairline. Step 2: Split the colors apart. Step 3: Circle the other long end of floss around behind the strand. Step 4: Continue with one color until you are ready to switch colors. Step 5: Continue to wrap, loop, and tighten knots. Option: To add a bead, be sure the bead has a large enough hole to slide onto the hair strand. Thread the hair and the floss through the folded end of the wire and push the bead onto the hair. ...love Maegan: * Faux Bob Hair Tutorial * Fashion+Home+Lifestyle.
HAIR: How to get Vintage Style Curls without Heat! How To Style Maiden Braids. Last month I did a makeover story with Kelsie and had many requests for a maiden braid tutorial.

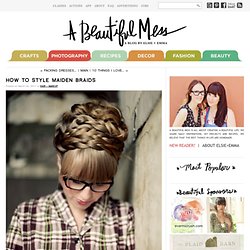
Yesterday she came in and we photographed these simple step by steps. Kelsie has extremely long and thick hair, but anyone with shoulder length or longer can do these braids (see my photo below for an example). Steps 1-2: Braid two strands on each side of a center part. Steps 3-5: Wrap braids around the crown of your head and pin in place with one pin each.