
T-Shirt Remodel: A Tutorial. There have been SO many t-shirt remodels on Pinterest, that I thought I’d give one a try my own way.

I found the most gorgeousss colored shirt at A.C. Moore today (for less than $4!) And I knew that this would be The Shirt. I got an extra large so I could make a dress (I’m short, so it works for me, if you’re tall, you would make a long shirt, or add a layer to the edge of the shirt to make a dress). If you have some knowledge of sewing, this is pretty easy, I finished it in less than 2 hours! Here is my remodel! So, I started by putting my shirt on inside out, and marked with some chalk where my shoulders actually start (they sure don’t start halfway down my arm! Then, I marked from the top to the arm pit, and cut! I marked, pinned, and sewed (but forgot to get a picture of that!) After I sewed the sleeve smaller, I pinned it back to the original hole. After sewing it, it was time to deal with the excess fabric from the original sleeve length.
Almost coming together!! Next…the sleeves. Diy reusable snack bag. Paper airplane clutch. It has been pretty warm in Vienna lately.

With pretty warm I mean almost 20 ° C and sun. Cat Hammock. Sewing machine parts - Singer, White & Viking sewing machine parts. Sewing Machine Parts Sewing Parts Online specializes in genuine and replacement sewing machine parts from Singer to Viking sewing machine parts, plus serger parts, overlock parts, sewing machine accessories, manuals & more.
Special Offer from Sewing Machine Parts: Get Free Shipping on orders of $75 or more Your savings will be applied automatically at checkout on the Sewing Machine Parts website. Sewing Tutorial: Piggy Pillow. As promised, I have completed the tutorial and the pattern for the “Be My Valentine – Piggy Pillow”, which was published 3 weeks ago.
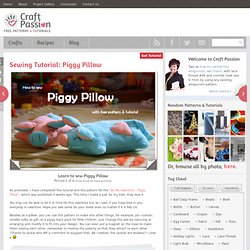
This time I made a pair for my kids, they love it. You may not be able to do it in time for this valentine but as I said, if you have love in you, everyday is valentine. Hope you sew some for your loved ones no matter if it is Feb 14. Besides as a pillow, you can use this pattern to make into other things, for example, pin cushion, smaller softy as gift, or a piggy back pack for little children. Just change the size by reducing or enlarging and modify it to fit into your design. Material you need:1. Print out the PDF pattern of the piggy pillow. Use a pencil and trace the pattern onto the cotton fabric. Sandwich the towels in between 2 fabrics. Sew it up on the sewing line, it can be from sewing machine or hand stitching. Turn body, ear and tail inside out. Tie a knot at the tip of the tail as shown, mark a length of 4″ from the tip. Sew the ears on. DIY.. Reversible Fabric Storage Bin. I’m addicted to making fabric storage bins.
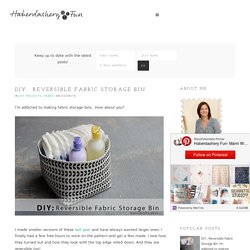
How about you? I made smaller versions of these last year and have always wanted larger ones. I finally had a few free hours to work on the pattern and get a few made. I love how they turned out and how they look with the top edge rolled down. And they are reversible too! Wouldn’t they make an awesome baby shower or house warming gift? The finished size is 8.5″L x 9″W x 7″H. Silk Brocade Corset... for $8! - CRAFTSTER CRAFT CHALLENGES. When this challenge was announced, I immediately started thinking about ideas.

What awesome things can I make for under $10? Then it hit me: A CORSET! I went to my dollar store with this end goal in mind, and after a week of blood, sweat, and tears (good thing I keep the band-aids in the craft room), I came up with this: The materials: 3 Silk-brocade pillow cases, 2 for $1.95, 1 for $1.50 (you'll find out later why one was cheaper)1 package of zip-ties, $1.651 pink kid's scarf, $1TOTAL: $8.05 I'd picked up a package of snaps and a grommet setter, but I decided not to use the snaps. First things first: the lacing. Farewell, pink scarf, I barely knew ye! Yarn tripled and chained with a G hook, then that chain was chained with a K hook.
Custom Corset Pattern Generator. 21+ Cute and Clever Things To Make From Old Jeans. You know that pair of favorite old jeans you just can’t get rid of?
The ones that have served you well for years, and now they are just too worn to wear as jeans much longer. They don’t need to just sit in your closet gathering dust! There are dozens of ways to recycle jeans into creative new objects, from corsets to notebook covers. Whether or not you want to re-purpose your favorite pair of jeans or simply want to get a little crafty with what you have on hand, here are awesome do-it-yourself projects using jeans. Chic Cocktail Napkins Patchwork Jean Bowl Recycled Denim Corset Pant Leg Jean Doll Skirt Crocheted Cutoffs. Recycled Denim Corset ∙ How To by Karlene C.
How To Re-Cover a Pillow. DIY: From Trash to High Fashion. Home > DIY > DIY: From Trash to High Fashion By Fashion Addict on August 26, 2013 Hey divas.

Polo Tee to Bow-Tie Blouse. By gabrielleblair | I love a good re-fashion don’t you?

The frugal minded part of me loves this kind of project, there’s something to be said for using what you have and turning it into something awesome. Men’s shirts seem to be an easy resource to get a hold of when it comes to re-purposing — they’re available in abundance at thrift stores. That cute skirt above was made using a men’s dress shirt. It's been one of those days...: T-shirt restyling - the Pinterest way. Again. It's no secret that I have a love-hate relationship with Pinterest.

I love how many ideas I gather, I hate that my home never reflects that I have seen these ideas. I love the inspirational, motivational quotes, I hate that I can never remember them at the right time. Elna - United States - Sewing ideas - Sewing - DENIM BAG. Sewing ideas Rate this project To vote, simply click on a star. The project 54 ratings. Button Down Peplum ... by madewithhugsandkisses.